
Minicraft PB4Y-1 Liberator in 1/72nd scale
by Charlie Scardon

The Minicraft PB4Y-1 kit has been around for some time now and is one of five versions they offer. It was the best B-24 available until the advent of the Hasegawa kit. Minicraft tooled up 5 different nose sections to give the modeler the many options. Other than that, the remaining parts are the same.
What is a PB4Y-1? It is any type of Liberator the navy used regardless of US Army designation. Except for one aircraft (42-78271) all were built by Consolidated at their San Diego plant.


The kit is molded in light grey and clear plastic. The moldings are crisp with only one exception. One propeller hub lacks the detail of the others. I think they failed to finish that one. The other downfalls of the kit are the slightly undersized and tapered engine cowlings, an extra panel line running the entire length of the aft fuselage halves, and the rear turret has a seam running through the glass. At some point, the thrust line was interpreted as a panel line. It is an easy fix to fill it with .010 rod and MEK. Sand it smooth and rescribe the vertical lines. The cowlings are tougher. Short of replacing them I do not have a repair for them. A company called Ron’s Resin used to make cowls for the kit. I purchased a set, and discovered the size problem everyone was having a cow about is not really all that much. But that is modelers. On a built up kit, it is not really that noticeable. Like the 1/48 Monogram B-24 the rear turret has a seam through the Plexiglas. Squadron makes replacement canopy sets for this. The rear turret is a A6A, Squadron B-24D canopy set has the required part.
I decided to make a post-war reserve plane from San Diego in the Arctic markings. The post-war planes had enclosed waist guns. I cut the opening so it was a rectangle. The gun mounts were made out of round rod and the glass was plastic from a Dannon yogurt container.
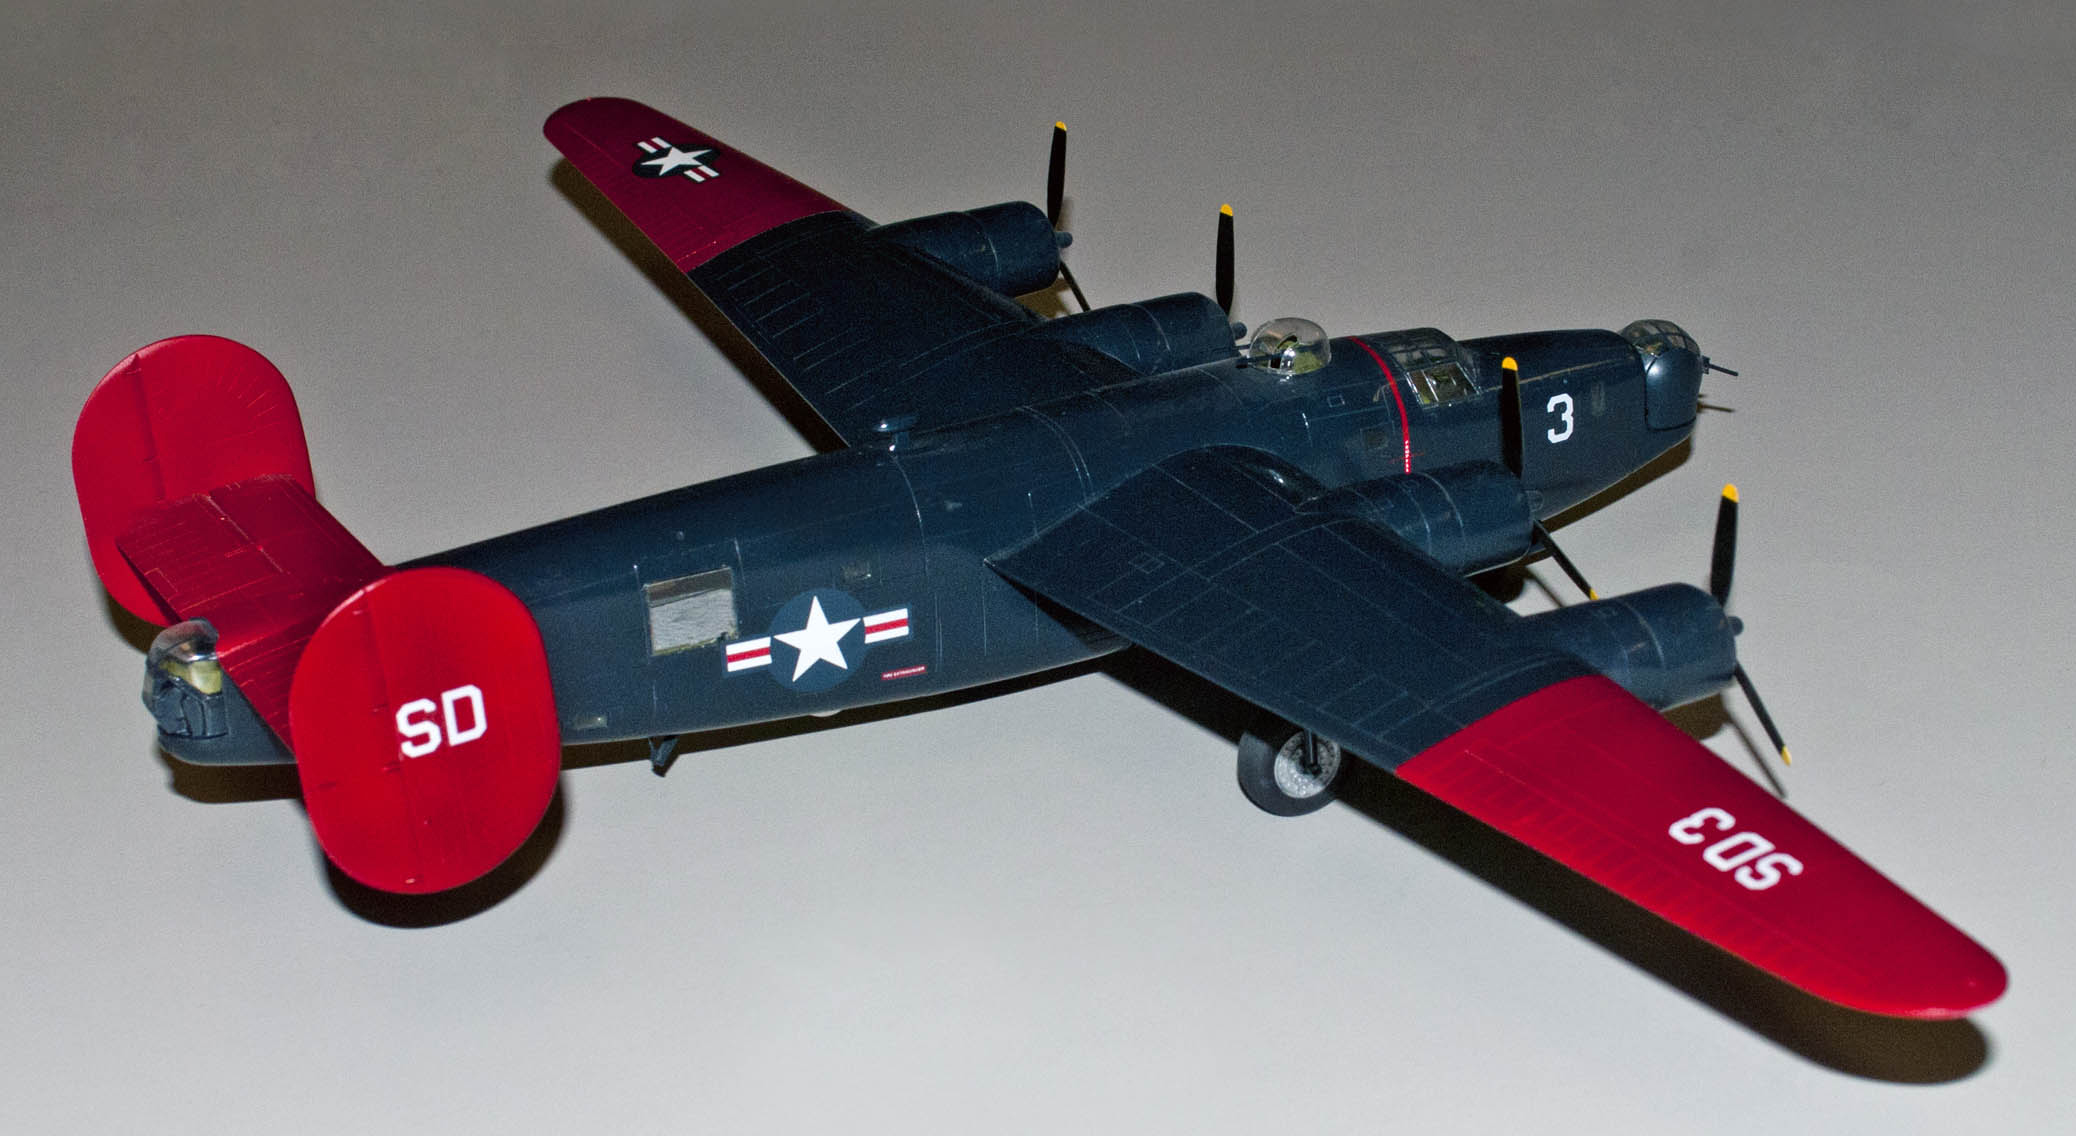
I used the Squadron canopies. I used my tried and true method of pouring hydrocal into the cavity to reinforce the plastic while I cut them out. The parts were painted before they were cut out. I used Model Master Gloss Sea Blue, for the main coat. The red areas were first painted white and then given a coat of Insignia Red. I had to cobble together decals from a variety of old Super Scale sheets. Good luck with that now, they are very hard to find.
Overall it is a good kit. It has a lot of potential. I have found at least ten different ways to paint them for just operational aircraft. There are a number ways to paint up hacks also.


I appreciate the detailed information about this model and its modifications.