
Invasion Stripes
How to paint D-Day markings on your Thunderbolt
by Ed Mate

The first step is to determine where the stripes go. There is an “official” placement, but if you can check photos, you may find your subject has some differences from the official guide.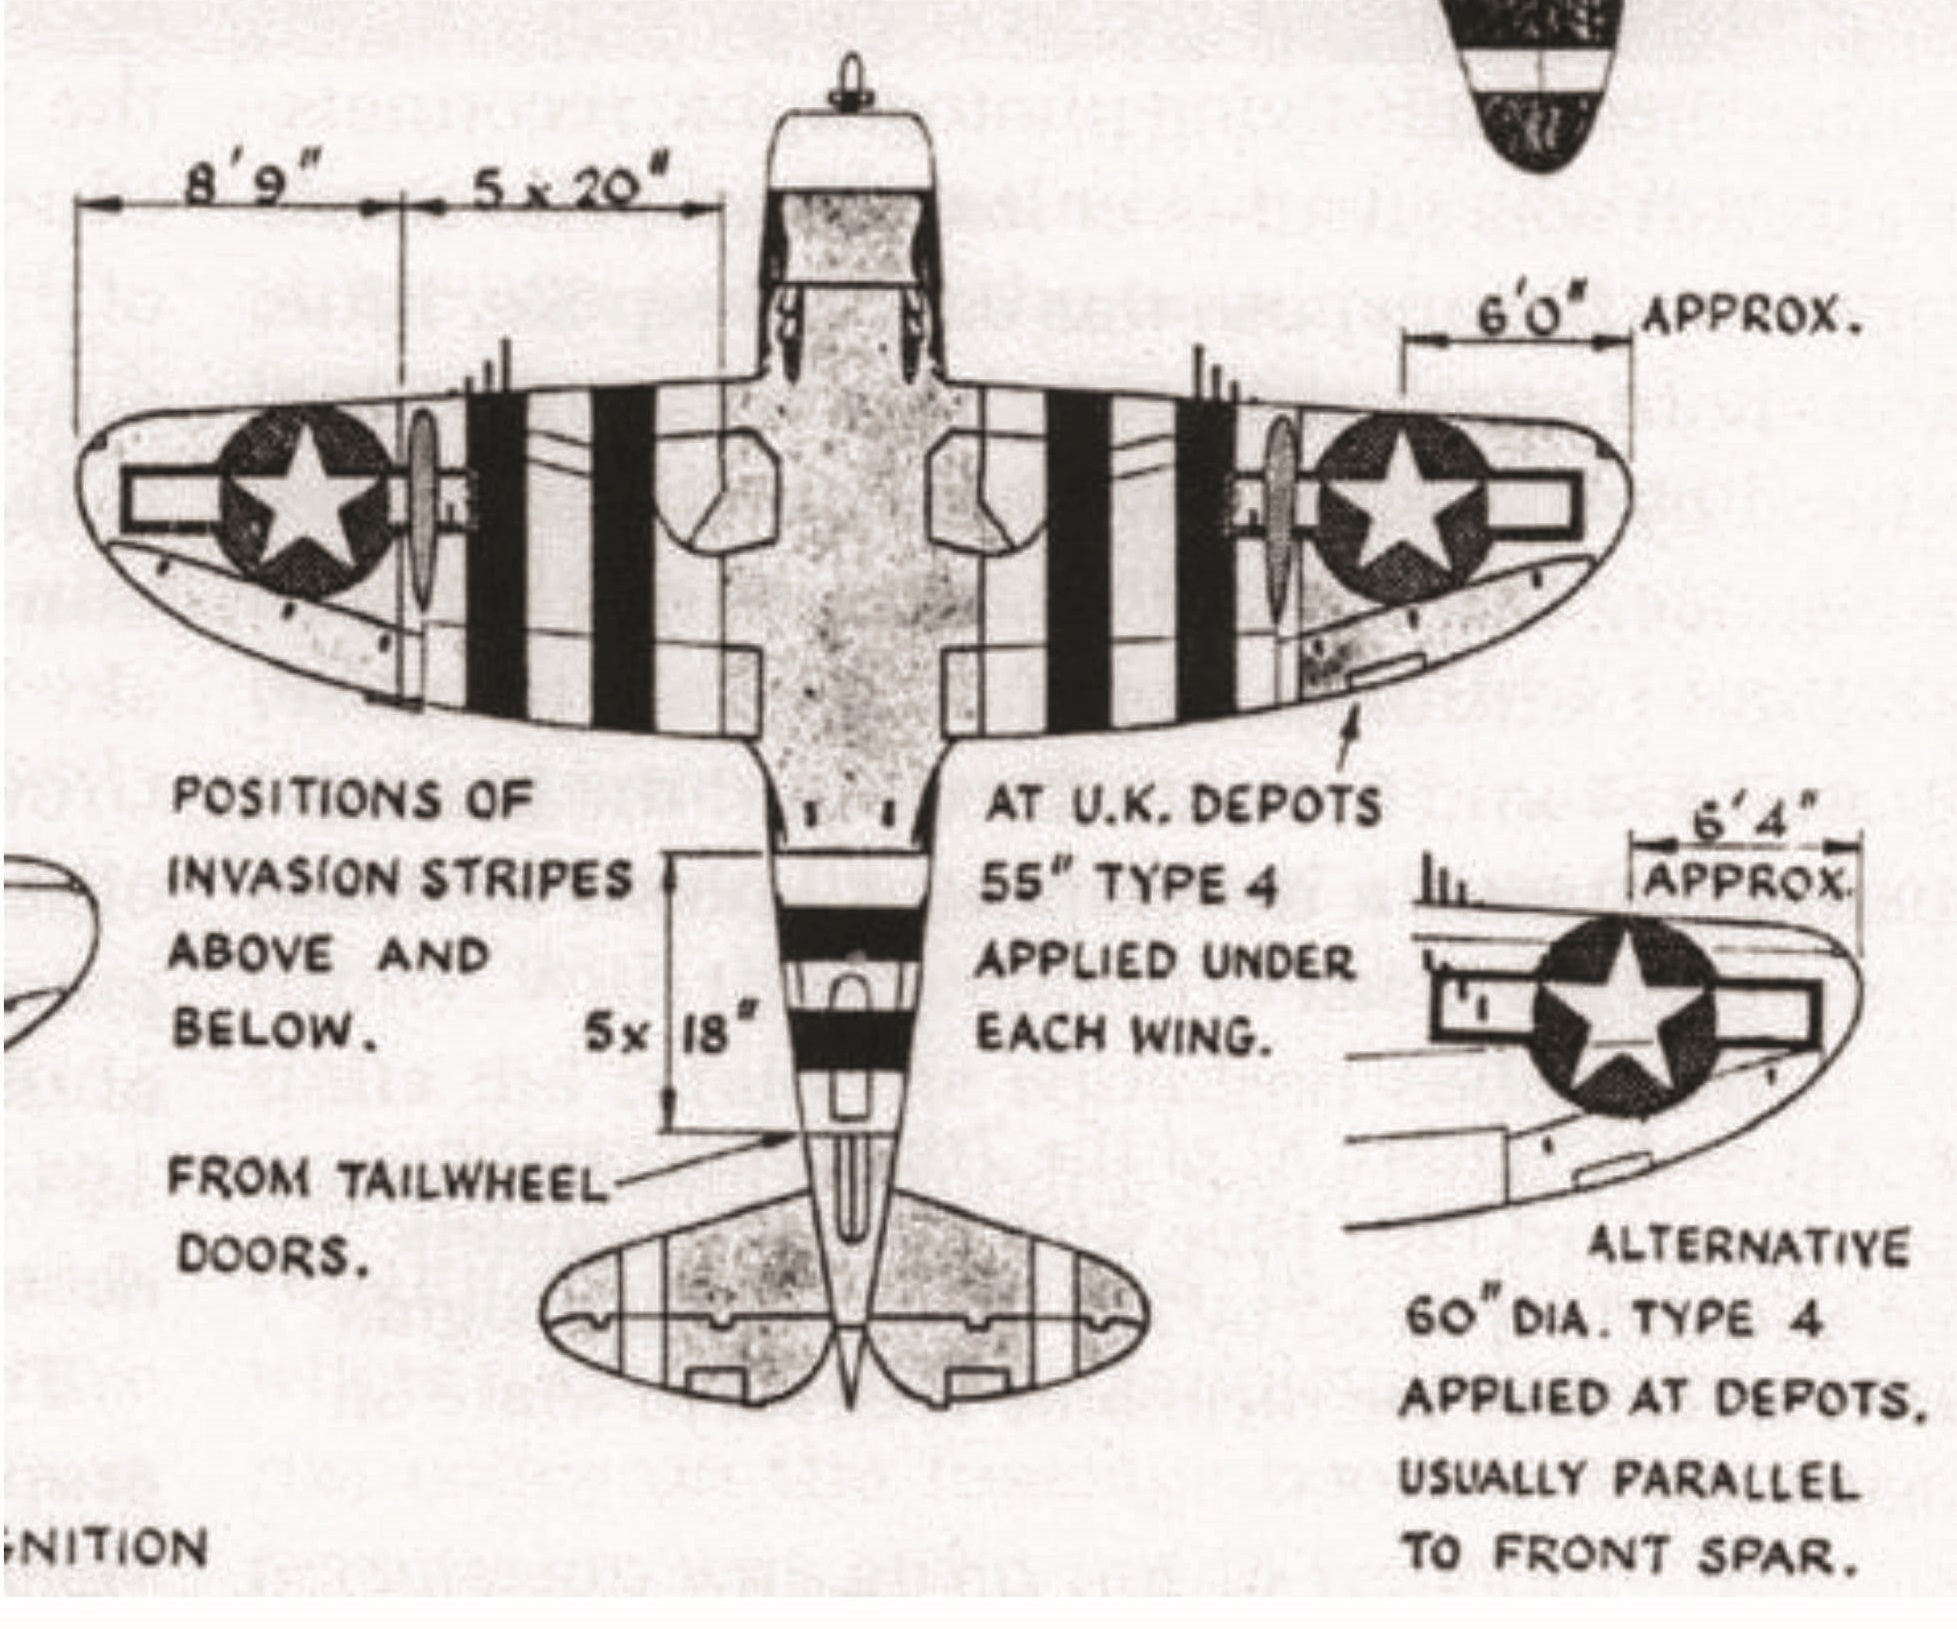
The photo of Silver Lady shows standard fuselage stripes and the wing stripes appear to be 20 inches wide, but the wing stripes are outboard of the official placement. Moving the inboard stripe to the outside and adjusting the black & white pattern to maintain two black stripes in the middle appears about correct. Note the black stripe spanning across the aileron and flap just like the outboard white stripe should.
I started with some tape strips cut to a scale 20″ wide and placed the first piece where the black stripe straddles the aileron & flap. More strips of tape placed side by side lays out the stripes on the top of the wing. Scrap tape is placed outside the five 20″ tape strips and then the 20″ tape strips are removed. Repeat on each wing on top and bottom.
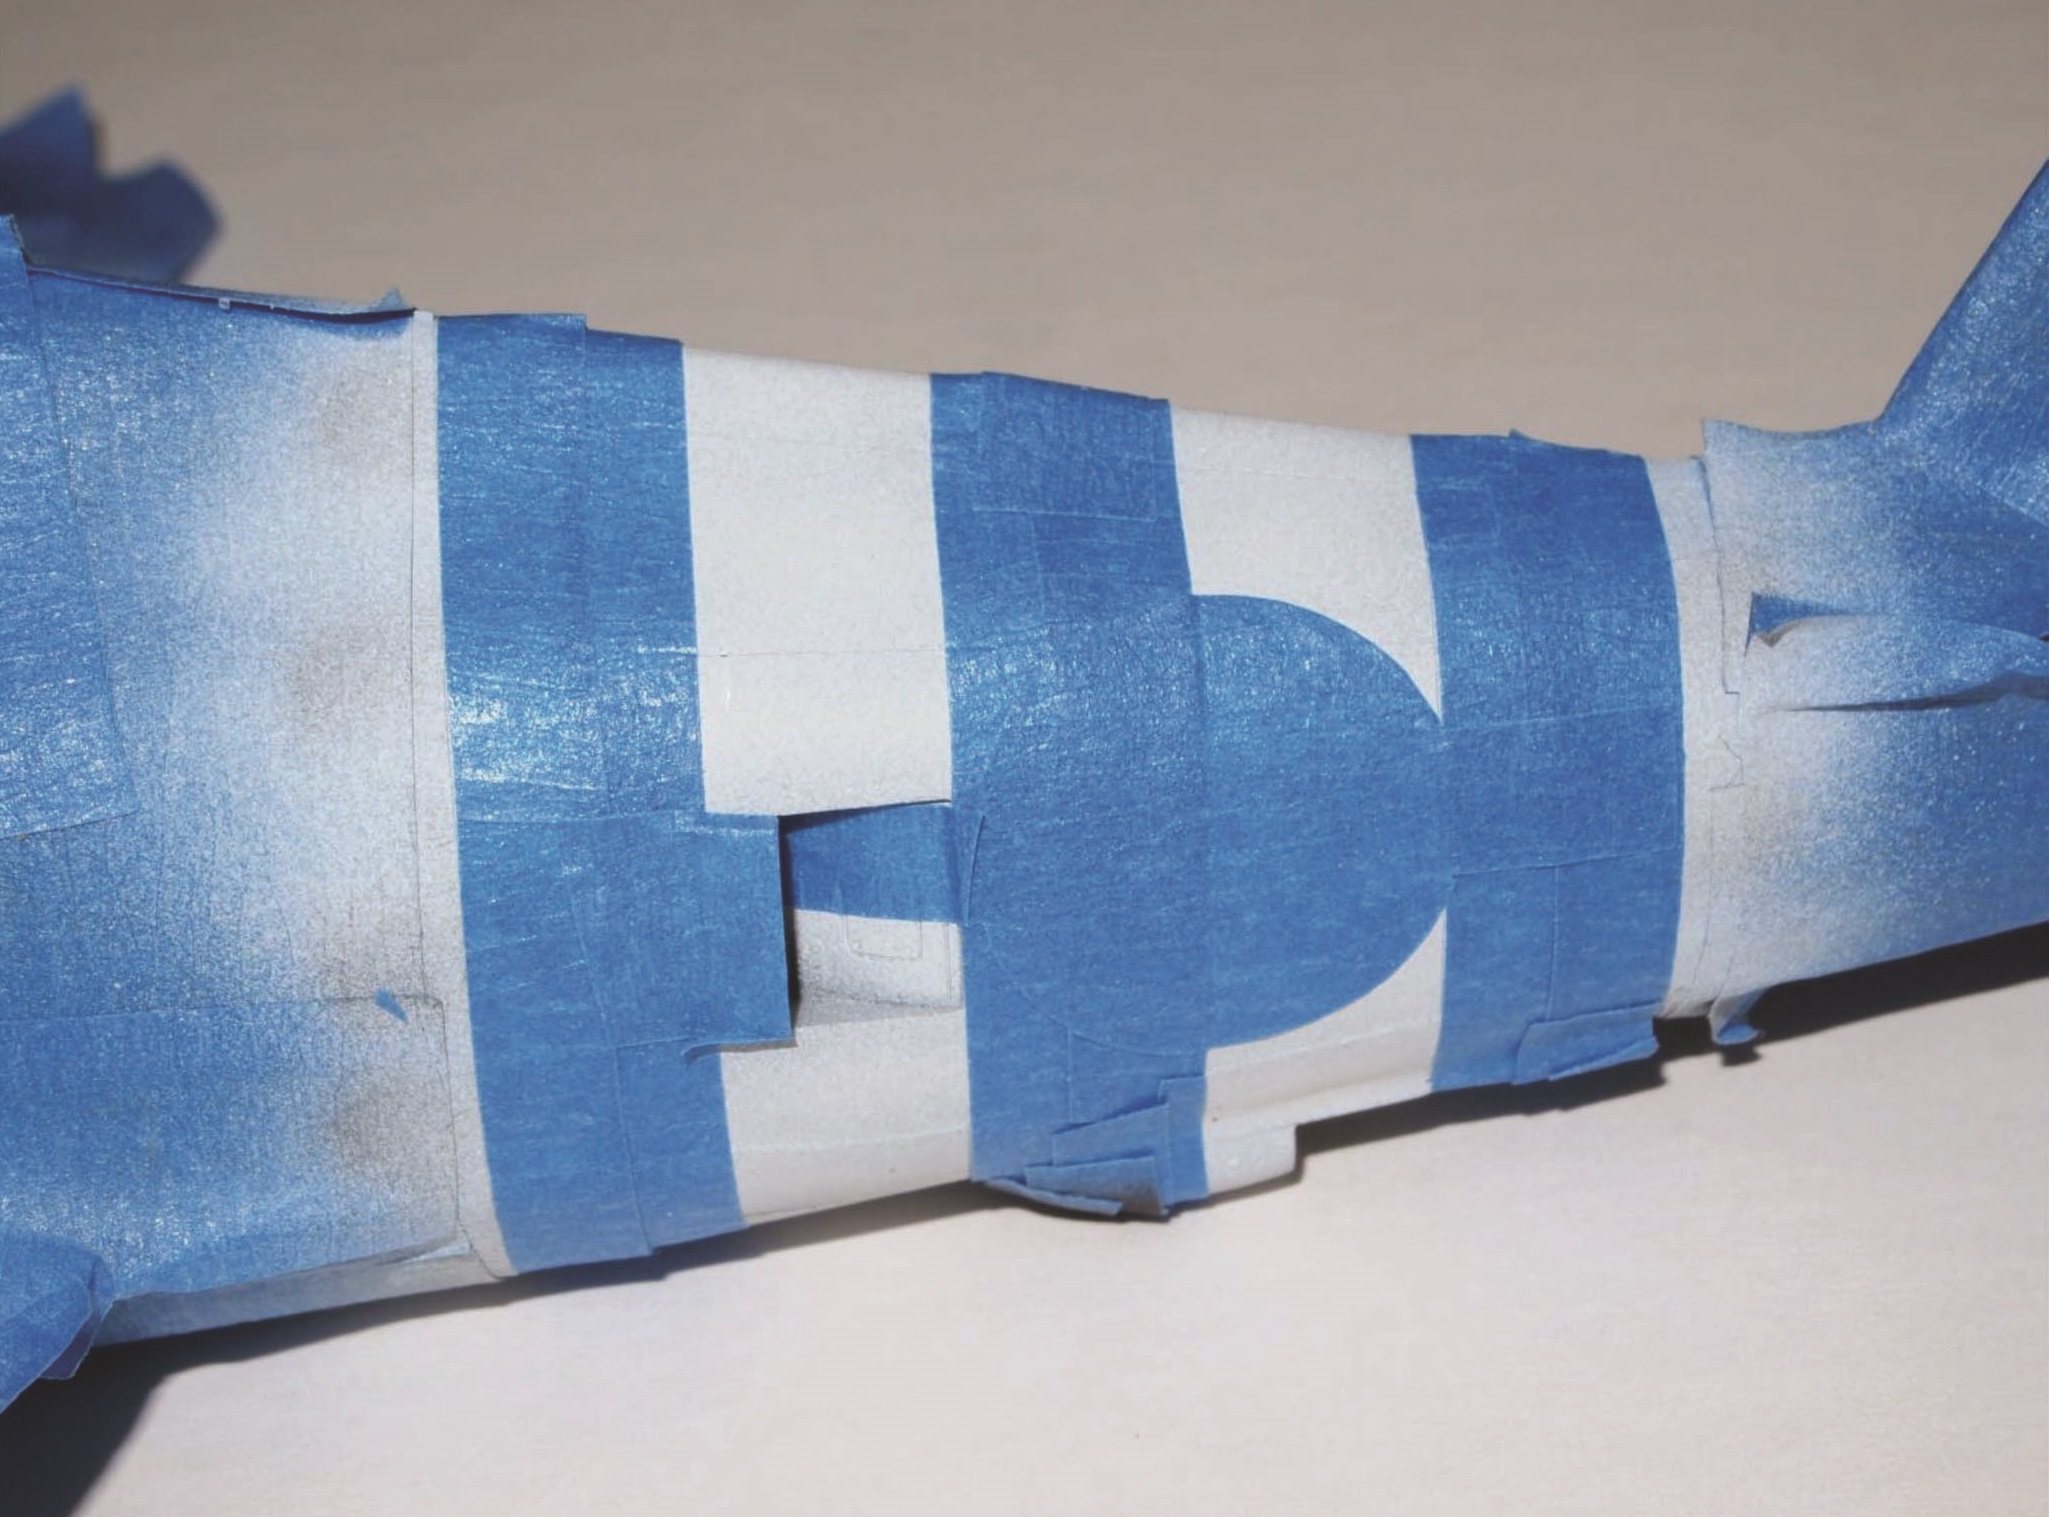
The fuselage is a little trickier. It turns out that starting the rear stripe just ahead of the tail wheel well has the forward edge of the white stripe on a vertical panel line. (Thank you for little miracles.) I used some short pieces of tape cut to a scale 18″ wide to help locate the rearmost vertical line. Place the front edge of the 18″ tape pieces on the panel line in several places around the fuselage. A narrow piece of tape cut on a curve (about 200 mm radius) is placed abutting the rear edges of the 18″ strips of tape. The curvature of the narrow tape will appear vertical on the fuselage due to the tapering of the shape towards the rear. By keeping the tape narrow, some flexibility is available so the curvature doesn’t have to be perfect. With the rear most vertical edge established, I measured a scale 90″ inches (5 x 18″) forward and marked several spots with short pieces of tape. Another narrow curved piece of tape is wrapped around the fuselage abutting the short pieces to establish the forward vertical edge of the stripes. Add wider pieces of tape to prevent overspray on to the other parts of the model. Also, determine if the landing gear doors were painted and prepare them to be painted if needed. Also take a close look at the intercooler doors on the fuselage to see how they were painted – they often do not match the stripes well. Notice Silver Lady’s intercooler bay is painted black, but the bottom of the door is not completely painted black.

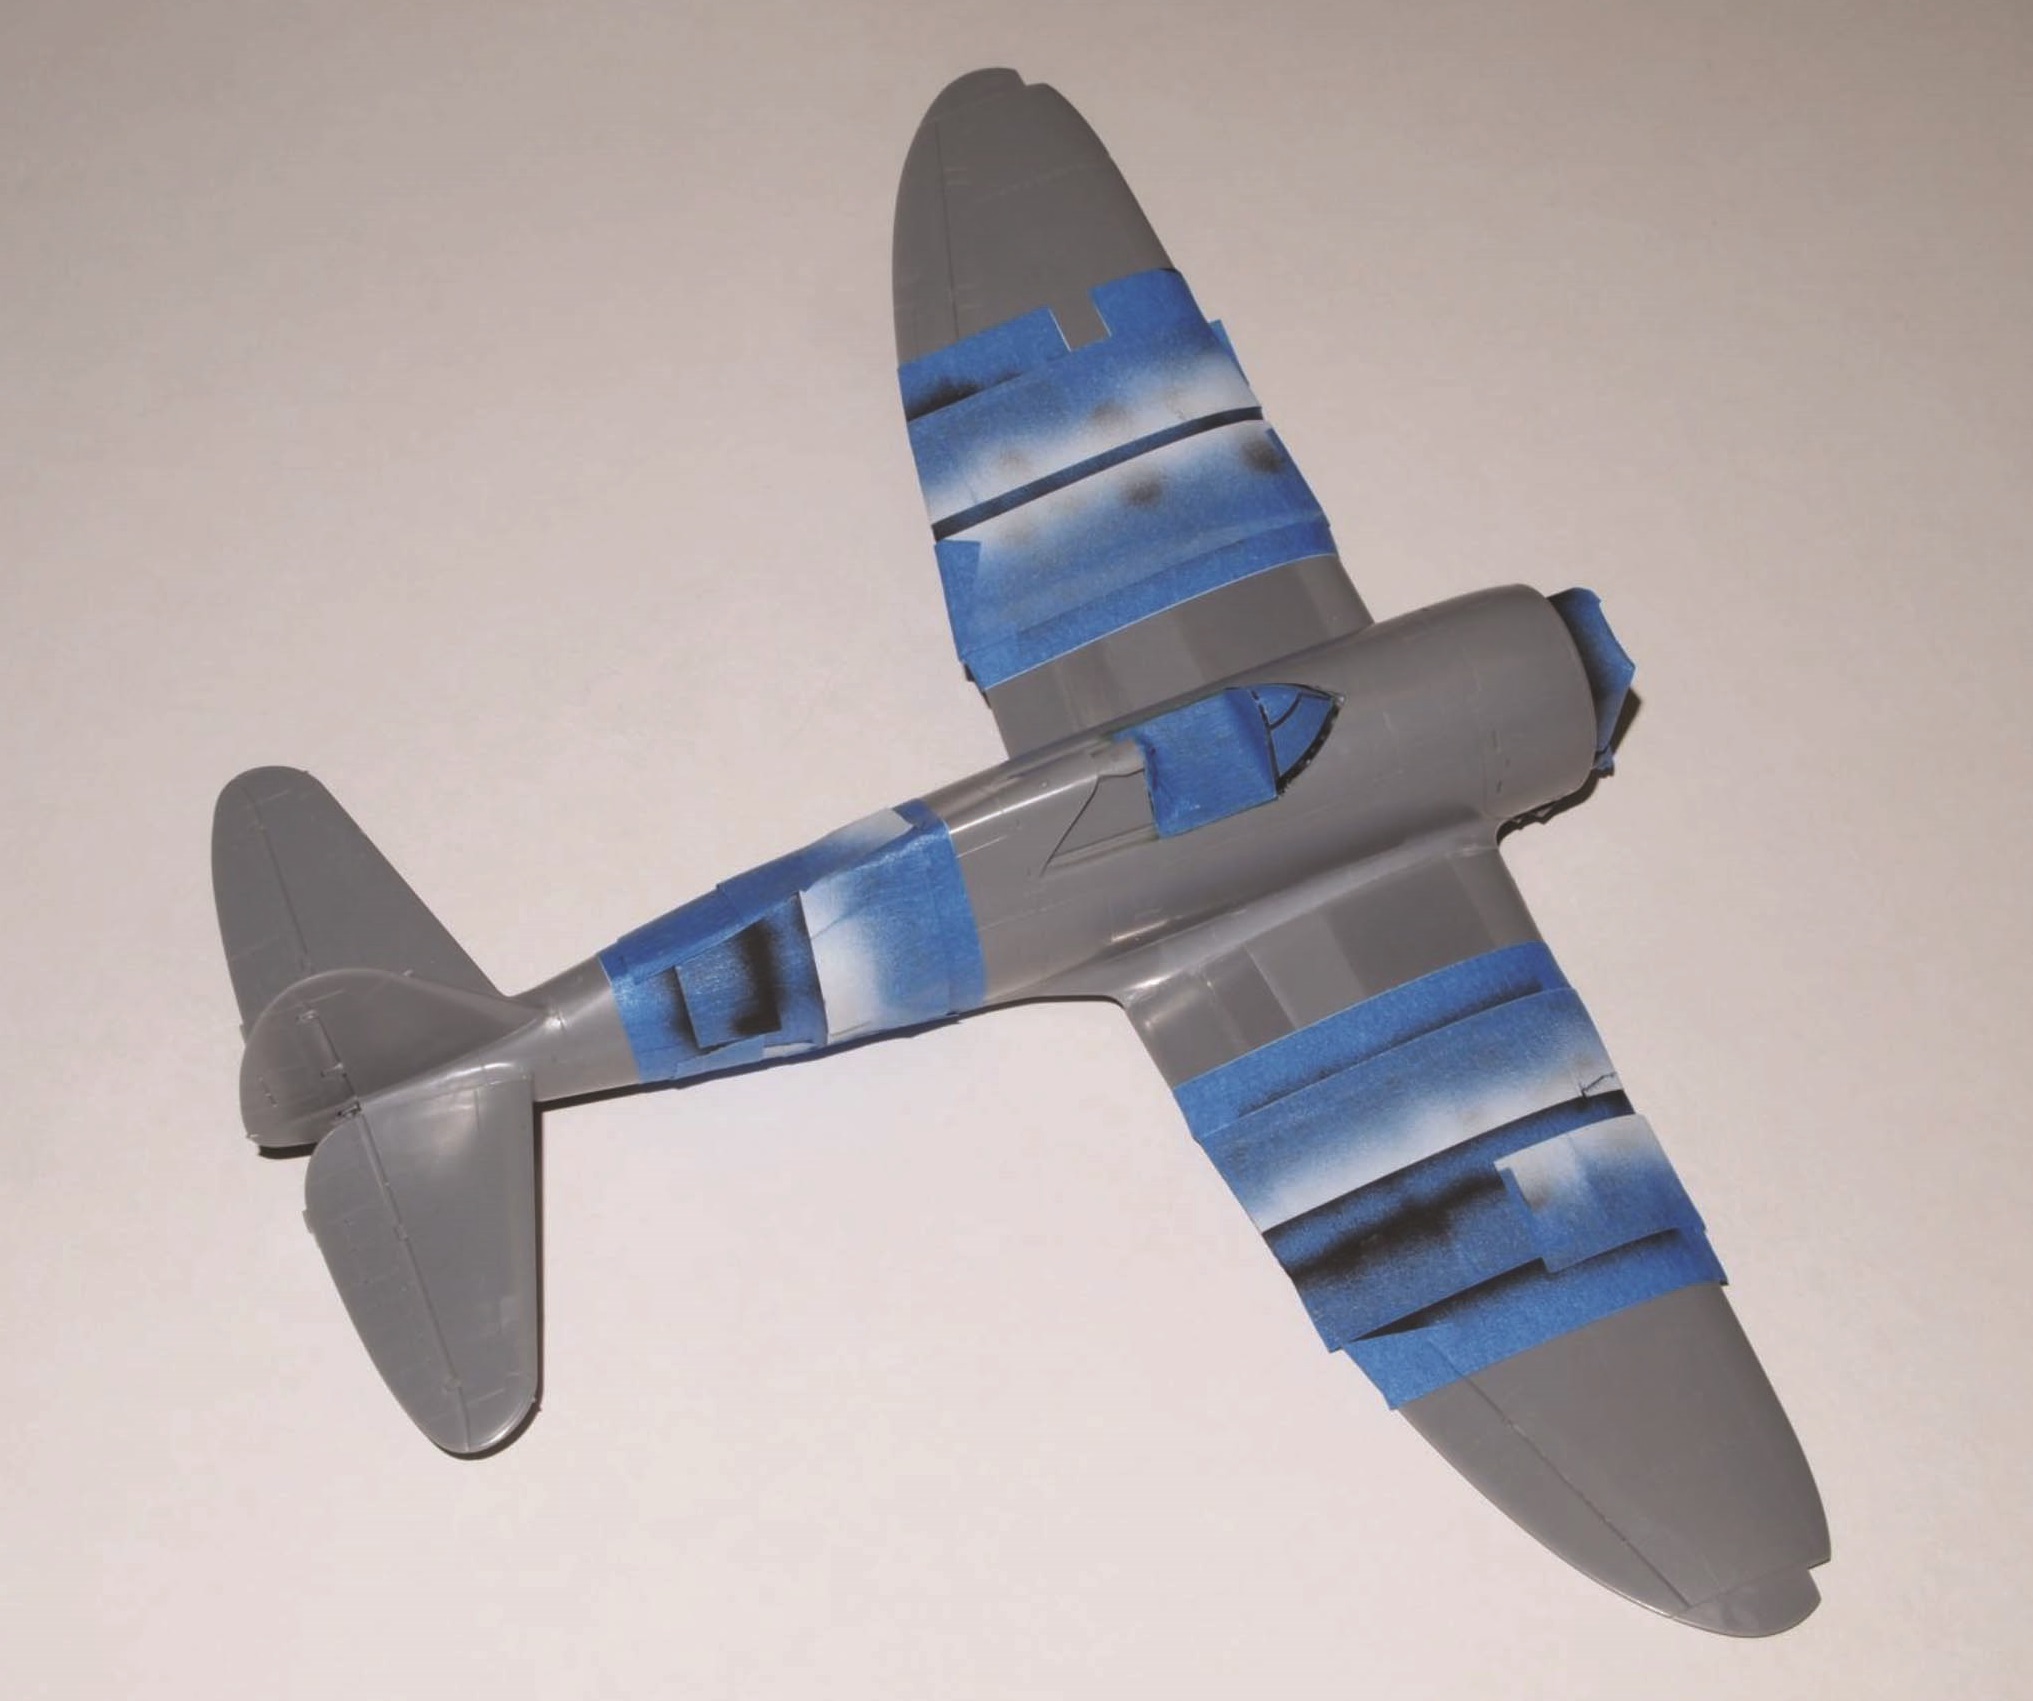
Here is my model (Tamiya kit) with the fields for the invasion stripes exposed and the edges masked to prevent overspray on the areas outside of the fields. You might also notice the small piece of tape covering the spot inside the field on the left wing. That is where the bar for the national insignia ends up. There is a similar piece on the bottom of the right wing. Be sure to mask for the insignias so that there will only be one color under the decal – otherwise it is likely the line of color change will be seen.

Paint the exposed fields white. I used some dark grey preshading on the panel lines to help break up the stark solid white. You might also note that I painted the stripes before painting the rest of the model. That is a modeler’s choice – the technique works either way. I prefer to limit the amount of masking I do over natural metal silver finishes so I painted the stripes first.

Mask the white stripes. Relocate the strips of tape that were cut 20″ wide and place them back on the model. The outboard and inboard white stripes are masked by placing the strips against the edges of the tape that determines the field. Another 20″ strip placed against the edges of those stripes should generate an open spot in the middle that is filled with the last 20″ strip of tape. Lift the two strips of tape where the black will be painted. Repeat for other wing and the bottoms. Again, the fuselage is a little trickier. The 18″ short bits of tape are used to find the edges of the stripes just like the rear edge of the field was found. Narrow curved pieces of tape are placed on the model along the edges of the pieces. Once the edges of the white stripes are masked, the centers are filled in with scraps of tape.
Don’t forget to mask for the national insignia! I create the tape mask for the insignia by photo copying the decals to be used on the model. I place the photo copy over a piece of tape and cut through both just inside the outside edges of the insignia.
When you layout the fuselage stripes, you’re going to find out that Tamiya placed the right fuselage side intercooler bay about 0.015″ forward of the one on the left side. The good news is that the insignia breaks up the edge of the black stripe passing by so it will be hard to notice unless you’re looking for it.

Paint the black stripes. I used black ever so slightly lightened with grey and then post shaded the panel lines with pure black to help break up the stark black much like the  preshade was used for the white.
Don’t forget to paint the gear doors at the same time.
Now mask the black stripes and remove the tape outside of the edges of the field so that the rest of the model can be painted using your usual techniques.
I find painting basic shapes like stripes much easier than applying very large decals that can wrinkle, silver, blister, etc. Invasion stripes are not really that difficult, but some patience is needed – it might take two hours to get the tape in the correct location, then just 10 minutes to spray the paint.
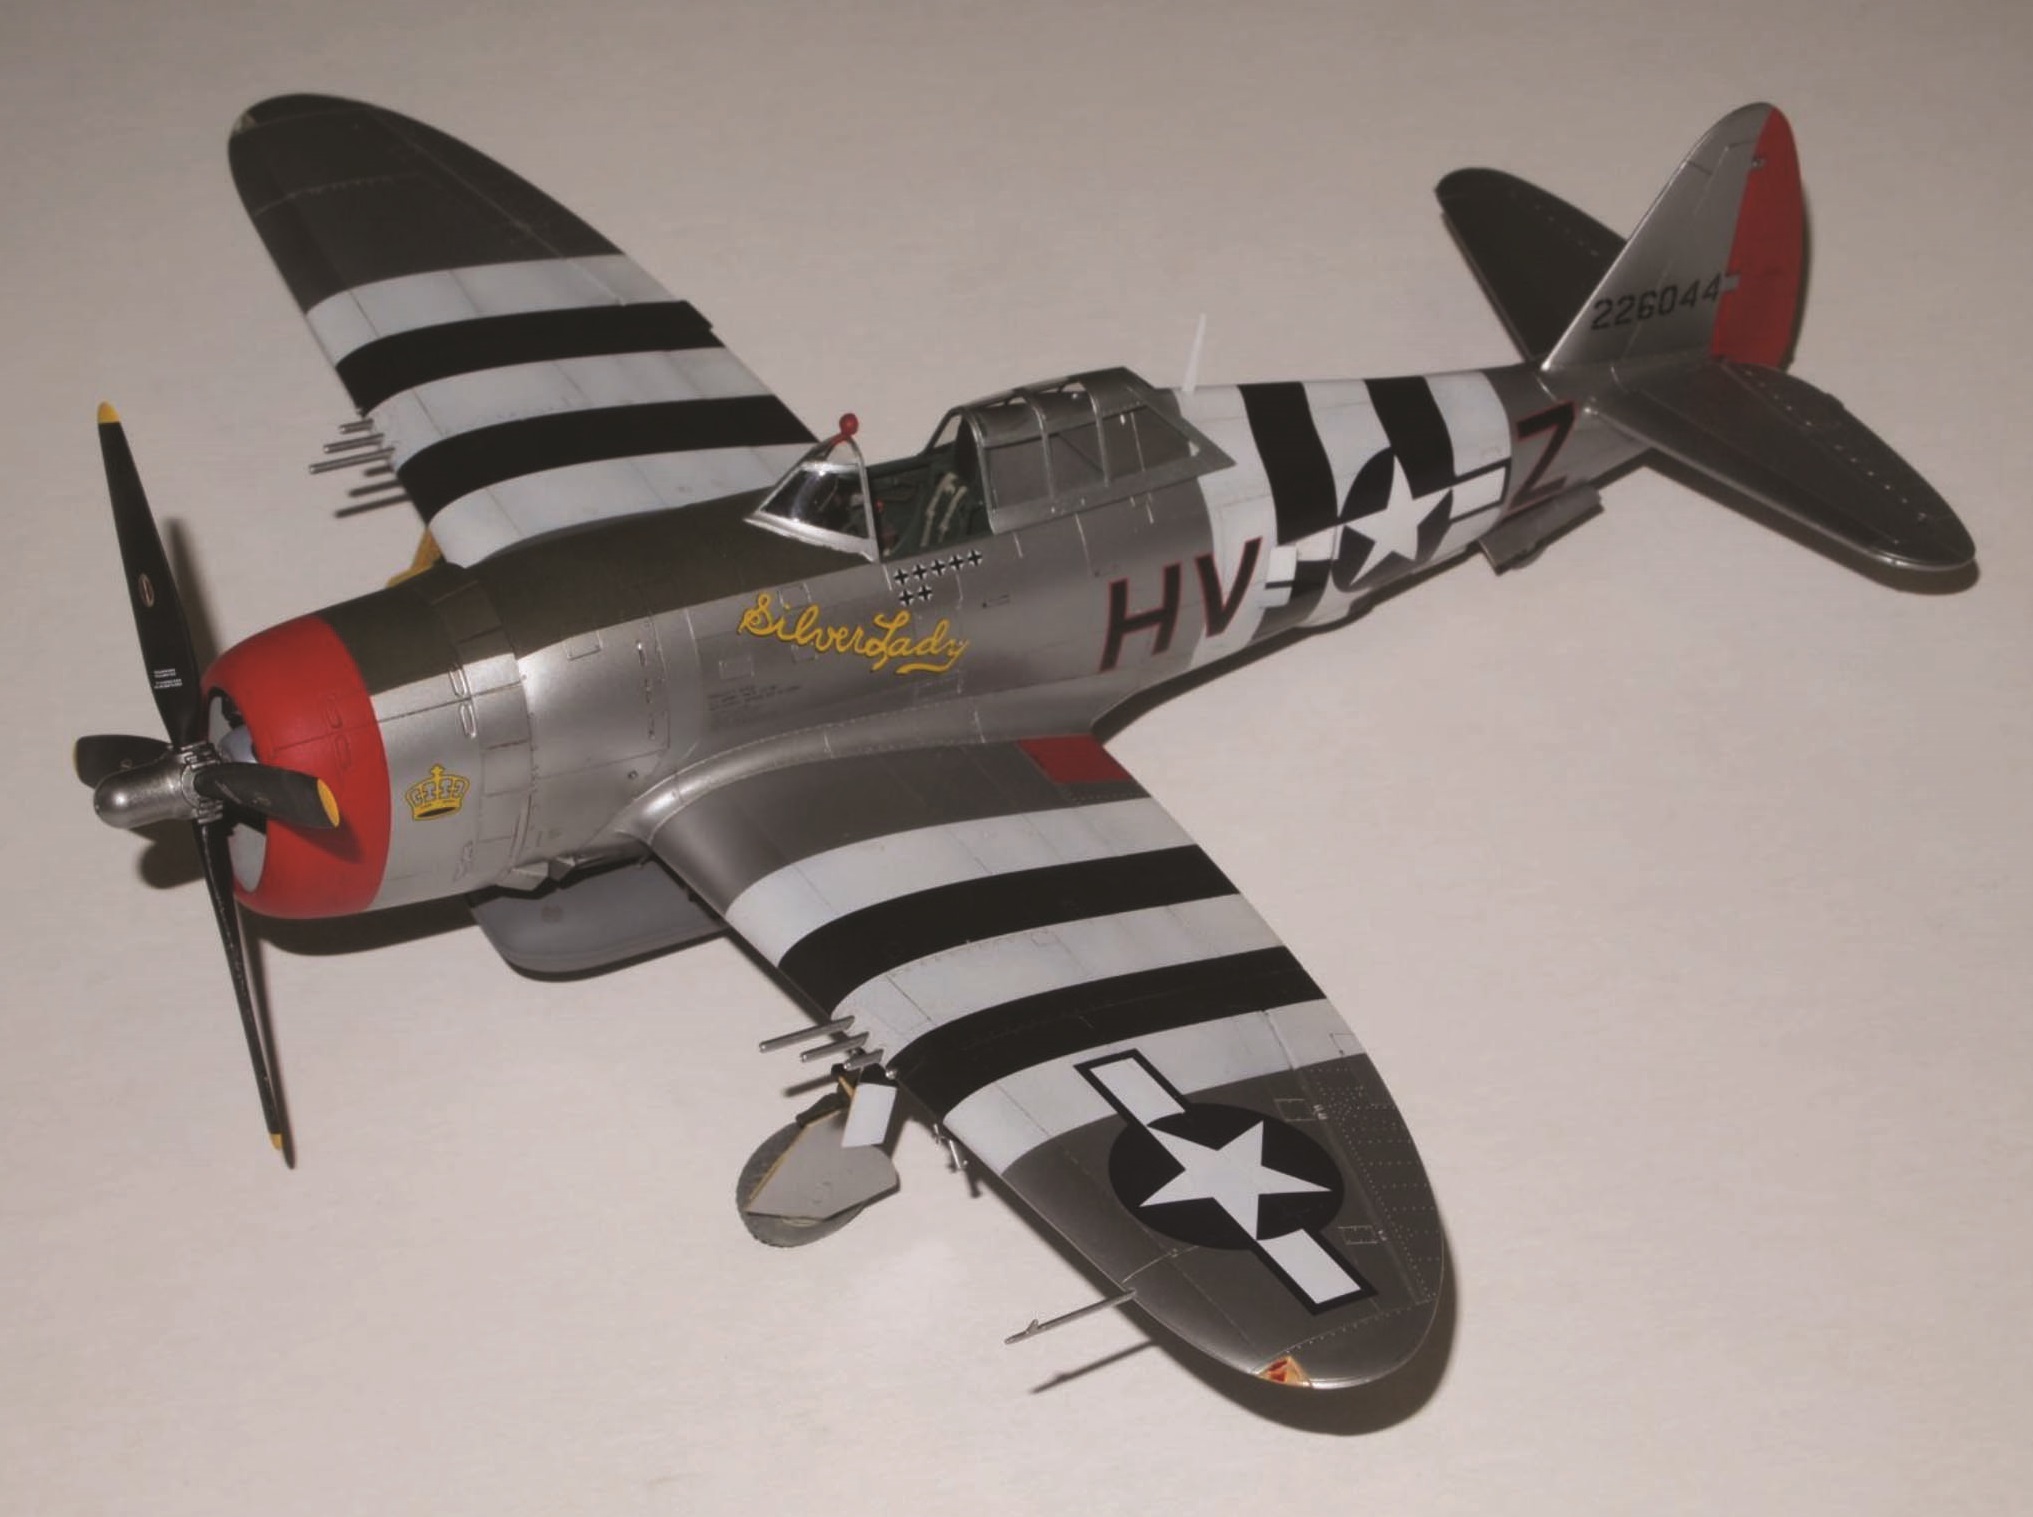
Final results on the completed model.
