April 10, 2015 McKinstry Meeting
Theme: Nuke Nite
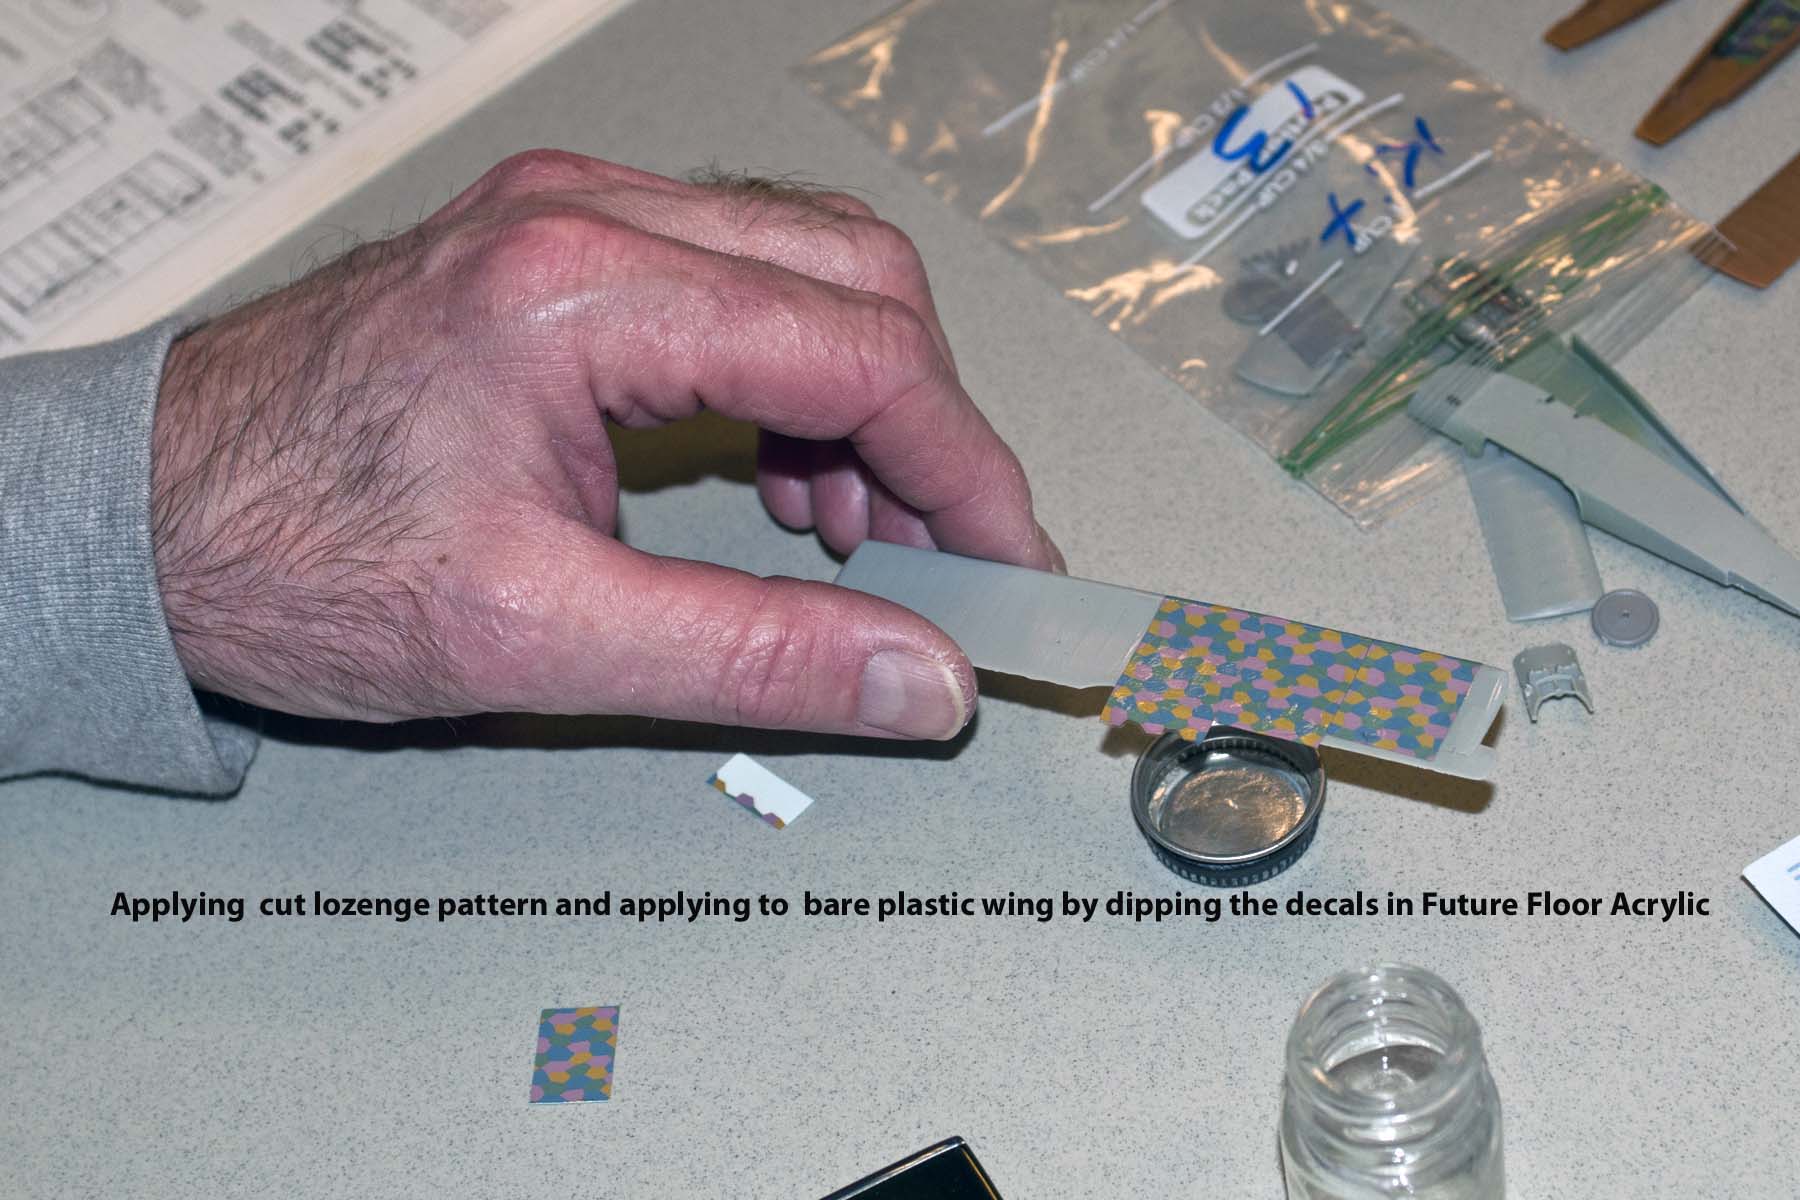
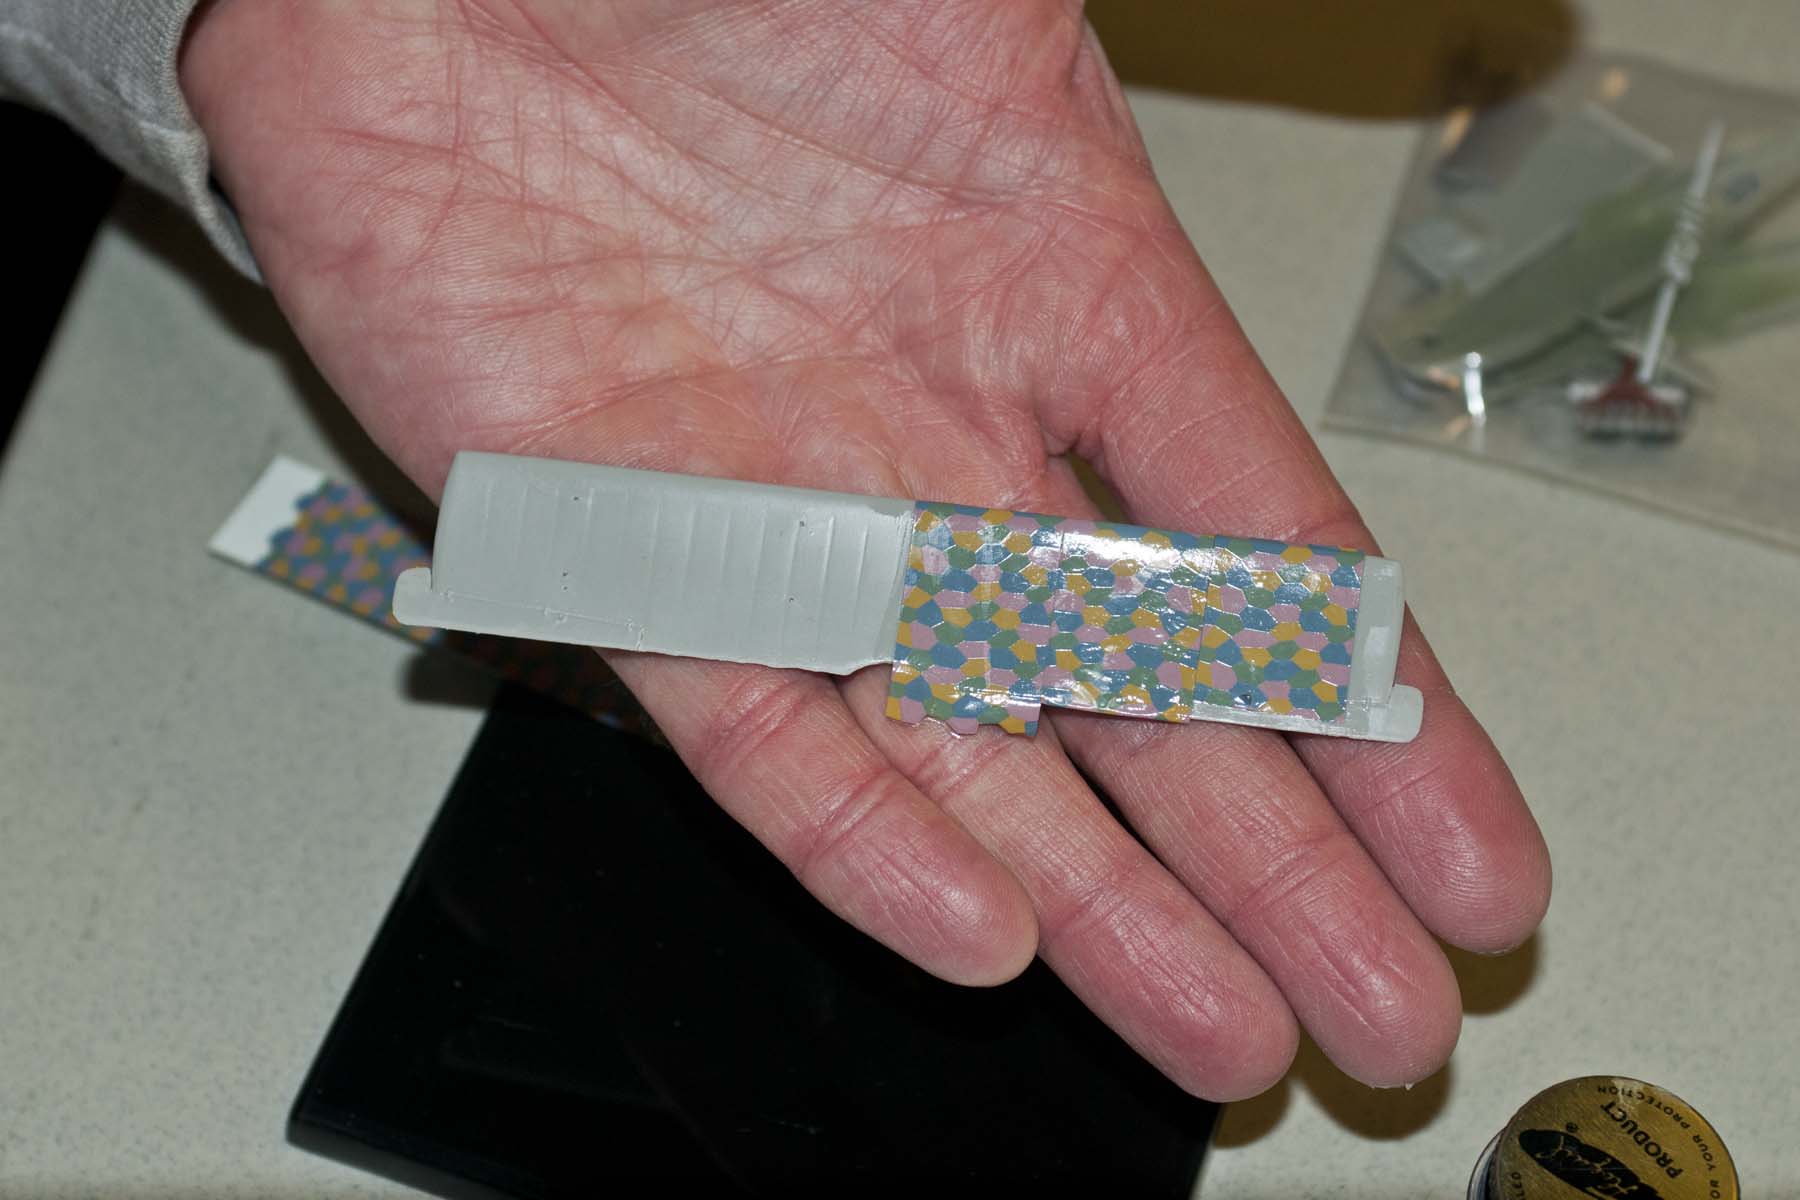
Program: Charlie Scardon – Applying Lozenge Decals
While show n tell was fine, the theme only produced four models for NUKE NITE. They were: B-52 stratofortress, 1/72nd scale Monogram built by John Koziol; A-4E Skyhawk, 1/48th Scale, Hasegawa built by Ed Mate; F-89J Scorpion, 1/72nd scale, Academy by Dan Paulien; F2H-1 (although I believe it was the F2H-2 that was the 1st Banshee capable of carrying a nuke) model by Carl Geiger
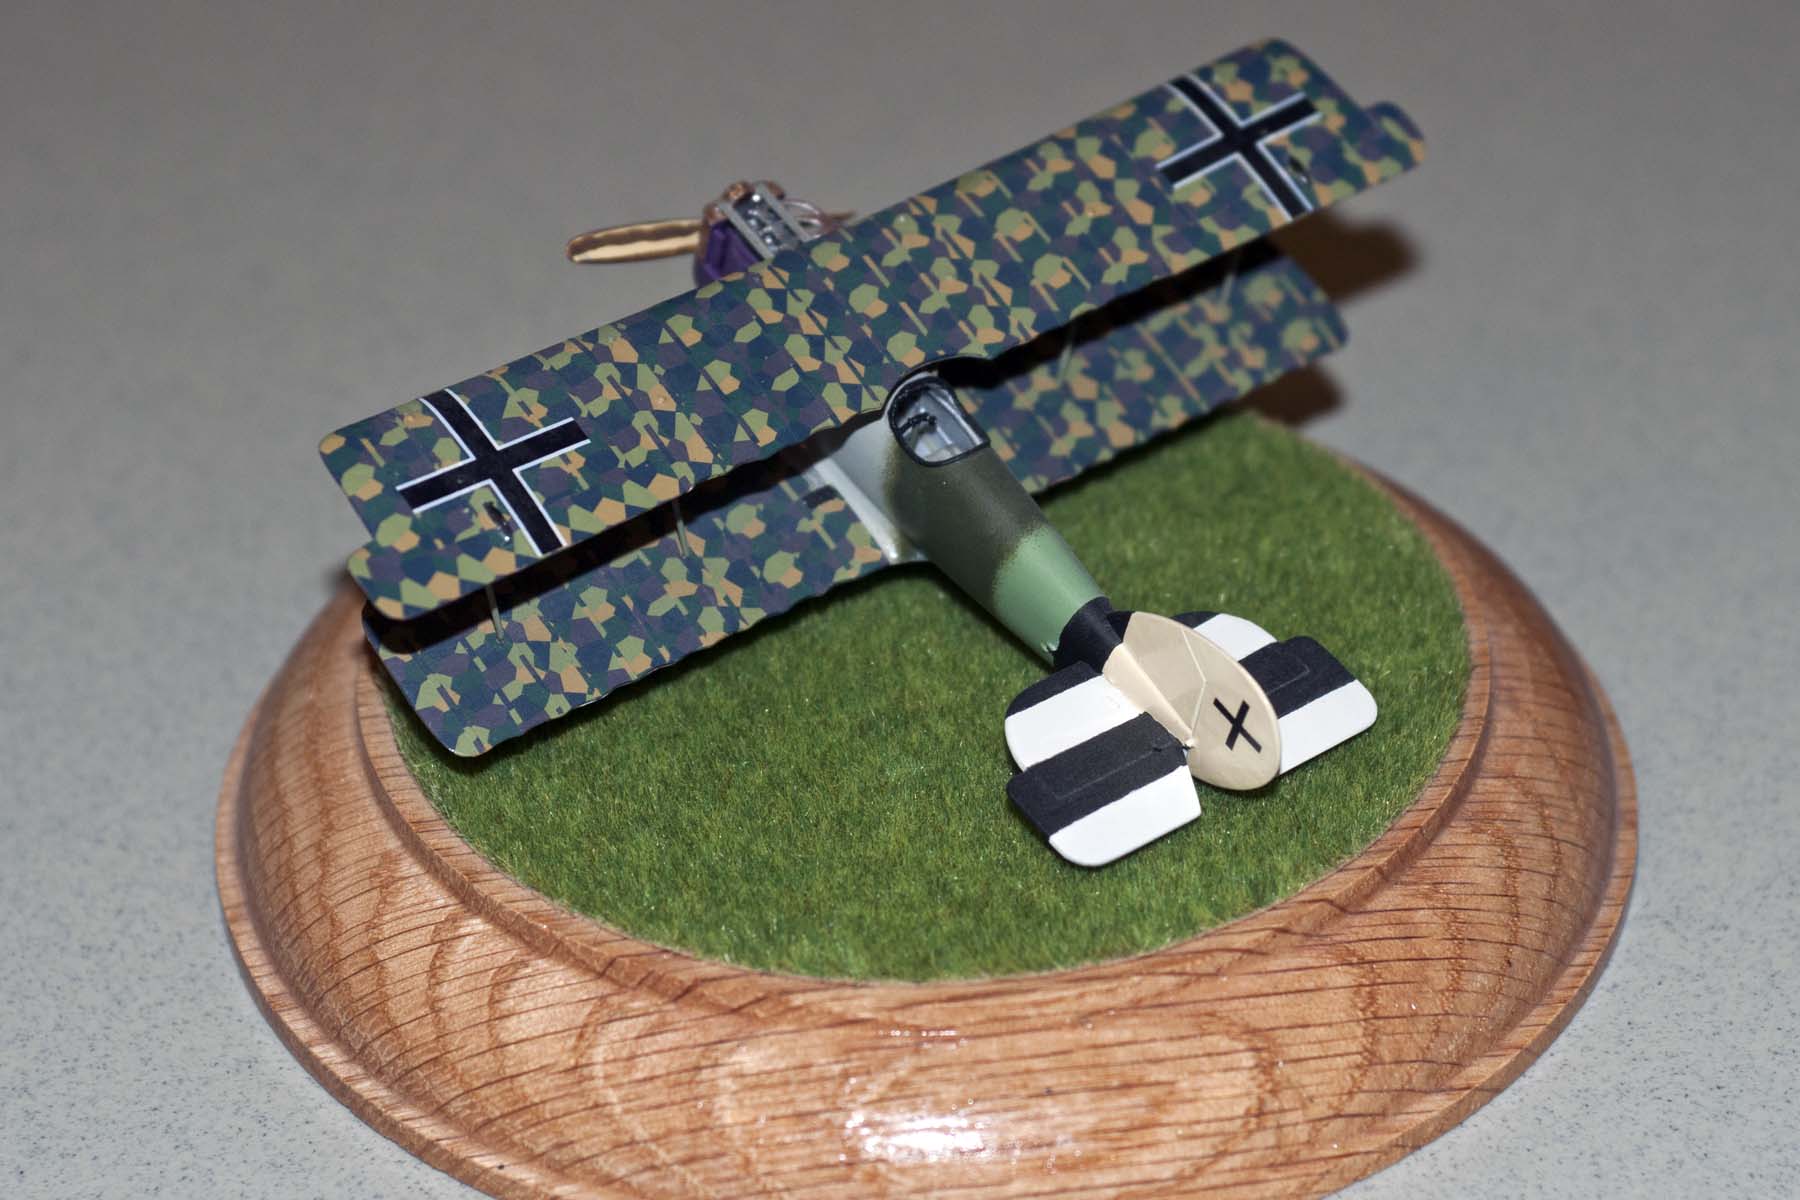
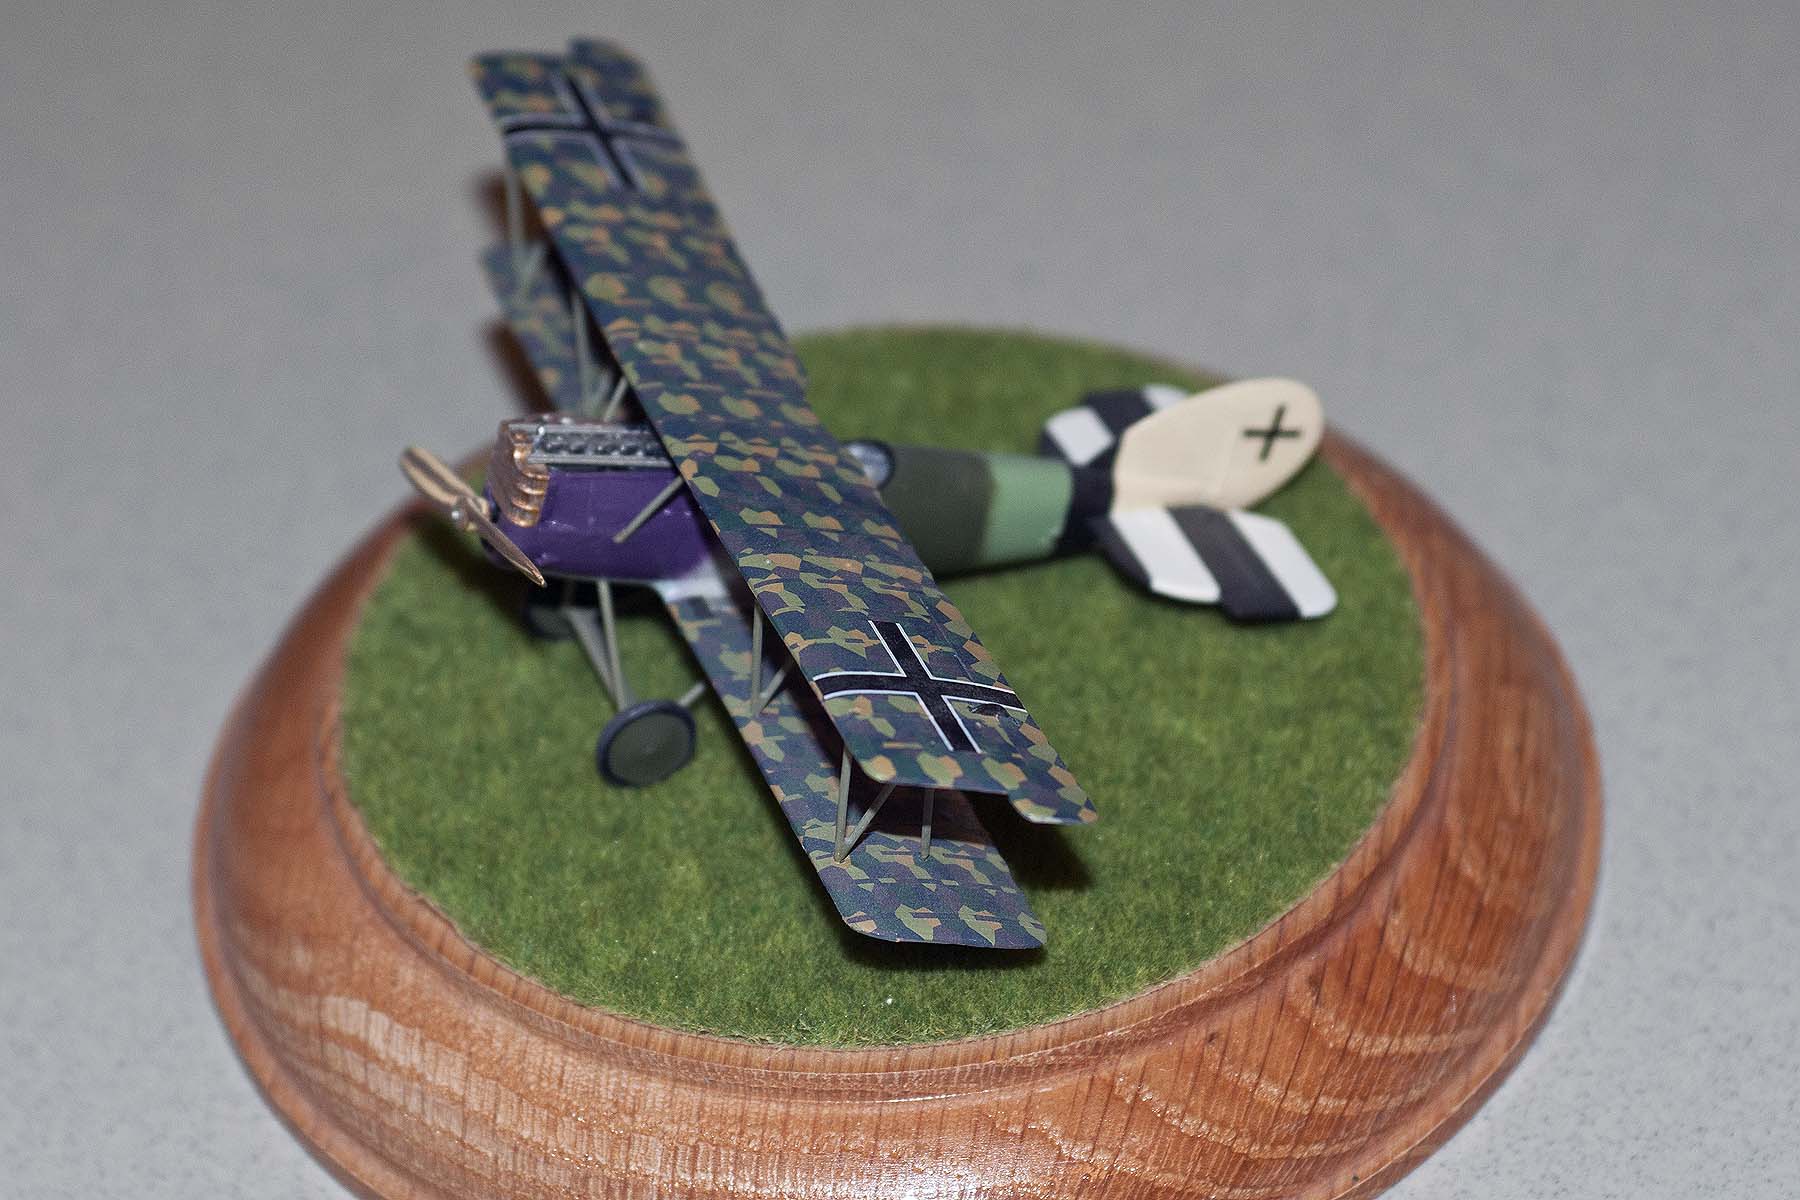
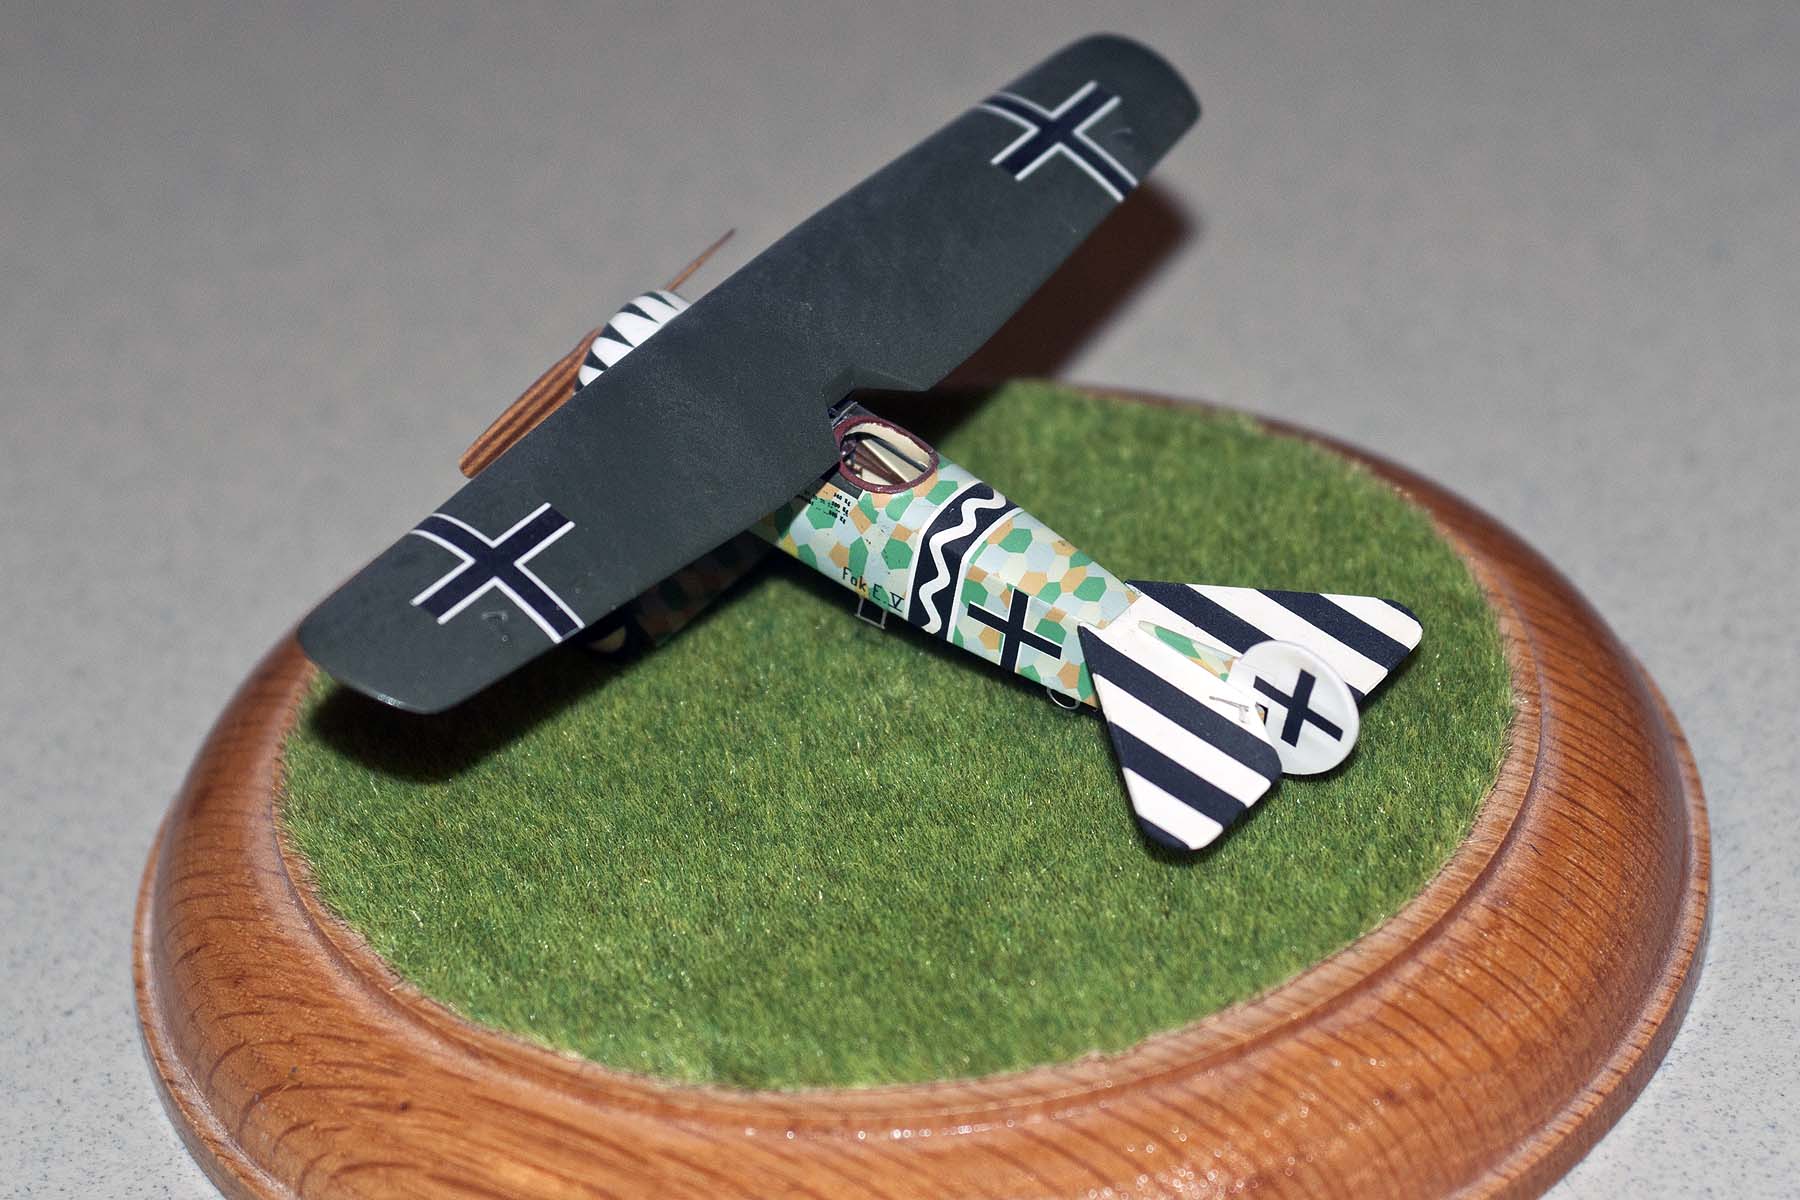
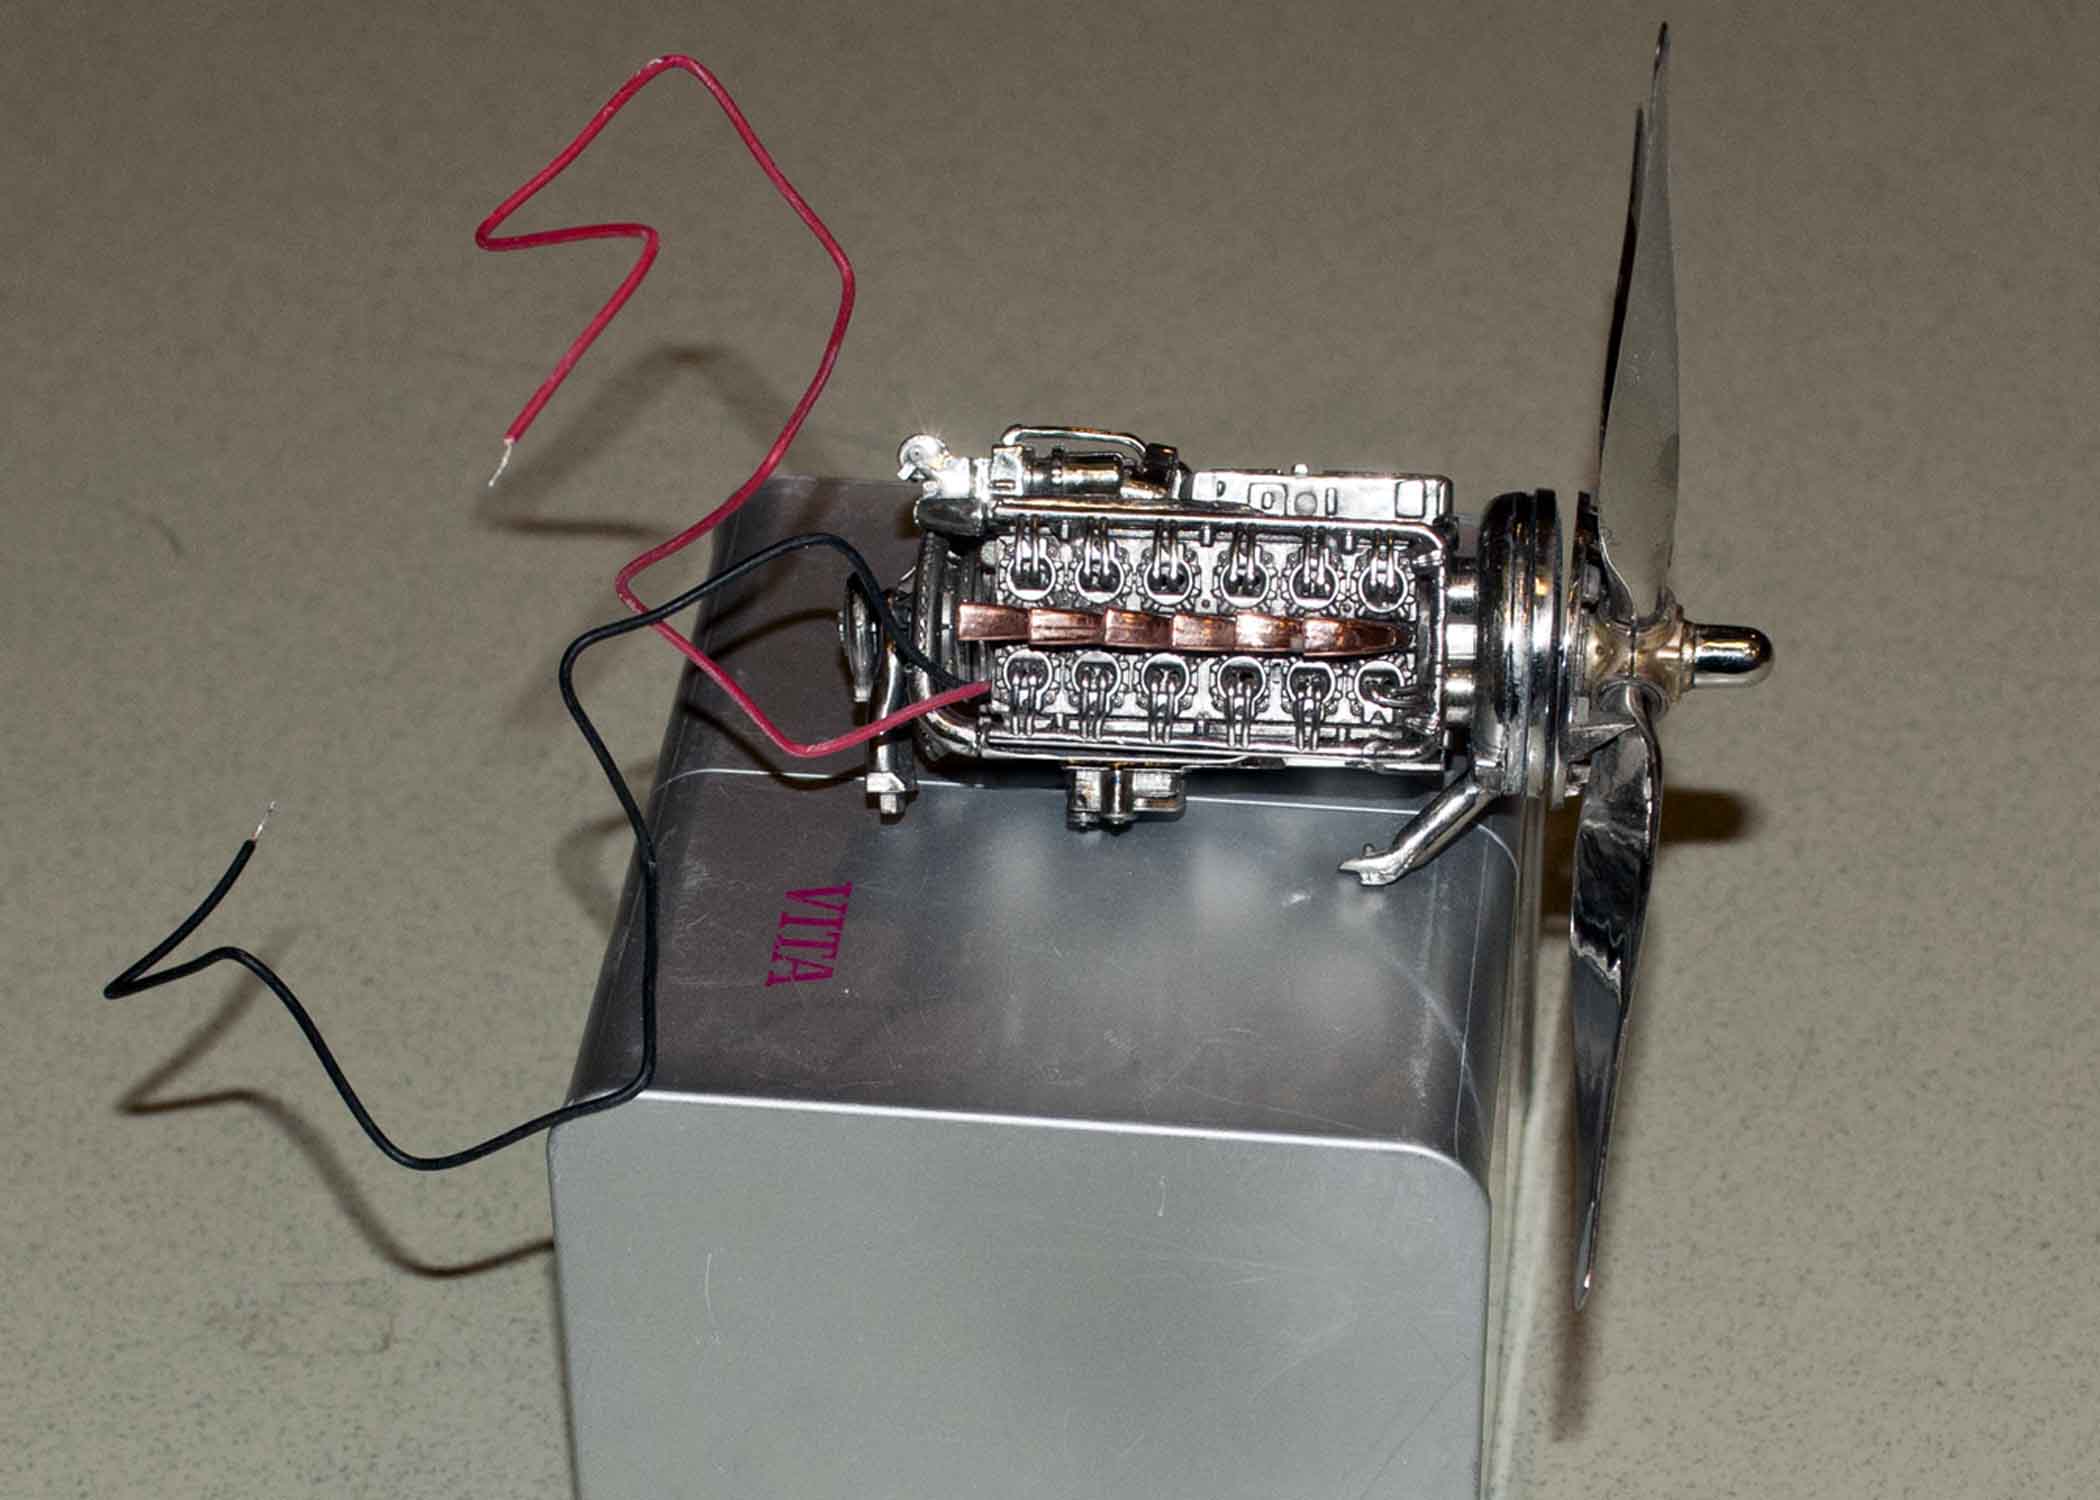
Continuing WW I aircraft programs, in anticipation of the May WW I theme night, Charlie Scardon presented a demo on applying lozenge decals. He had everyone’s attention – especially concerning his unusual way of using Future Acrylic when applying decals.
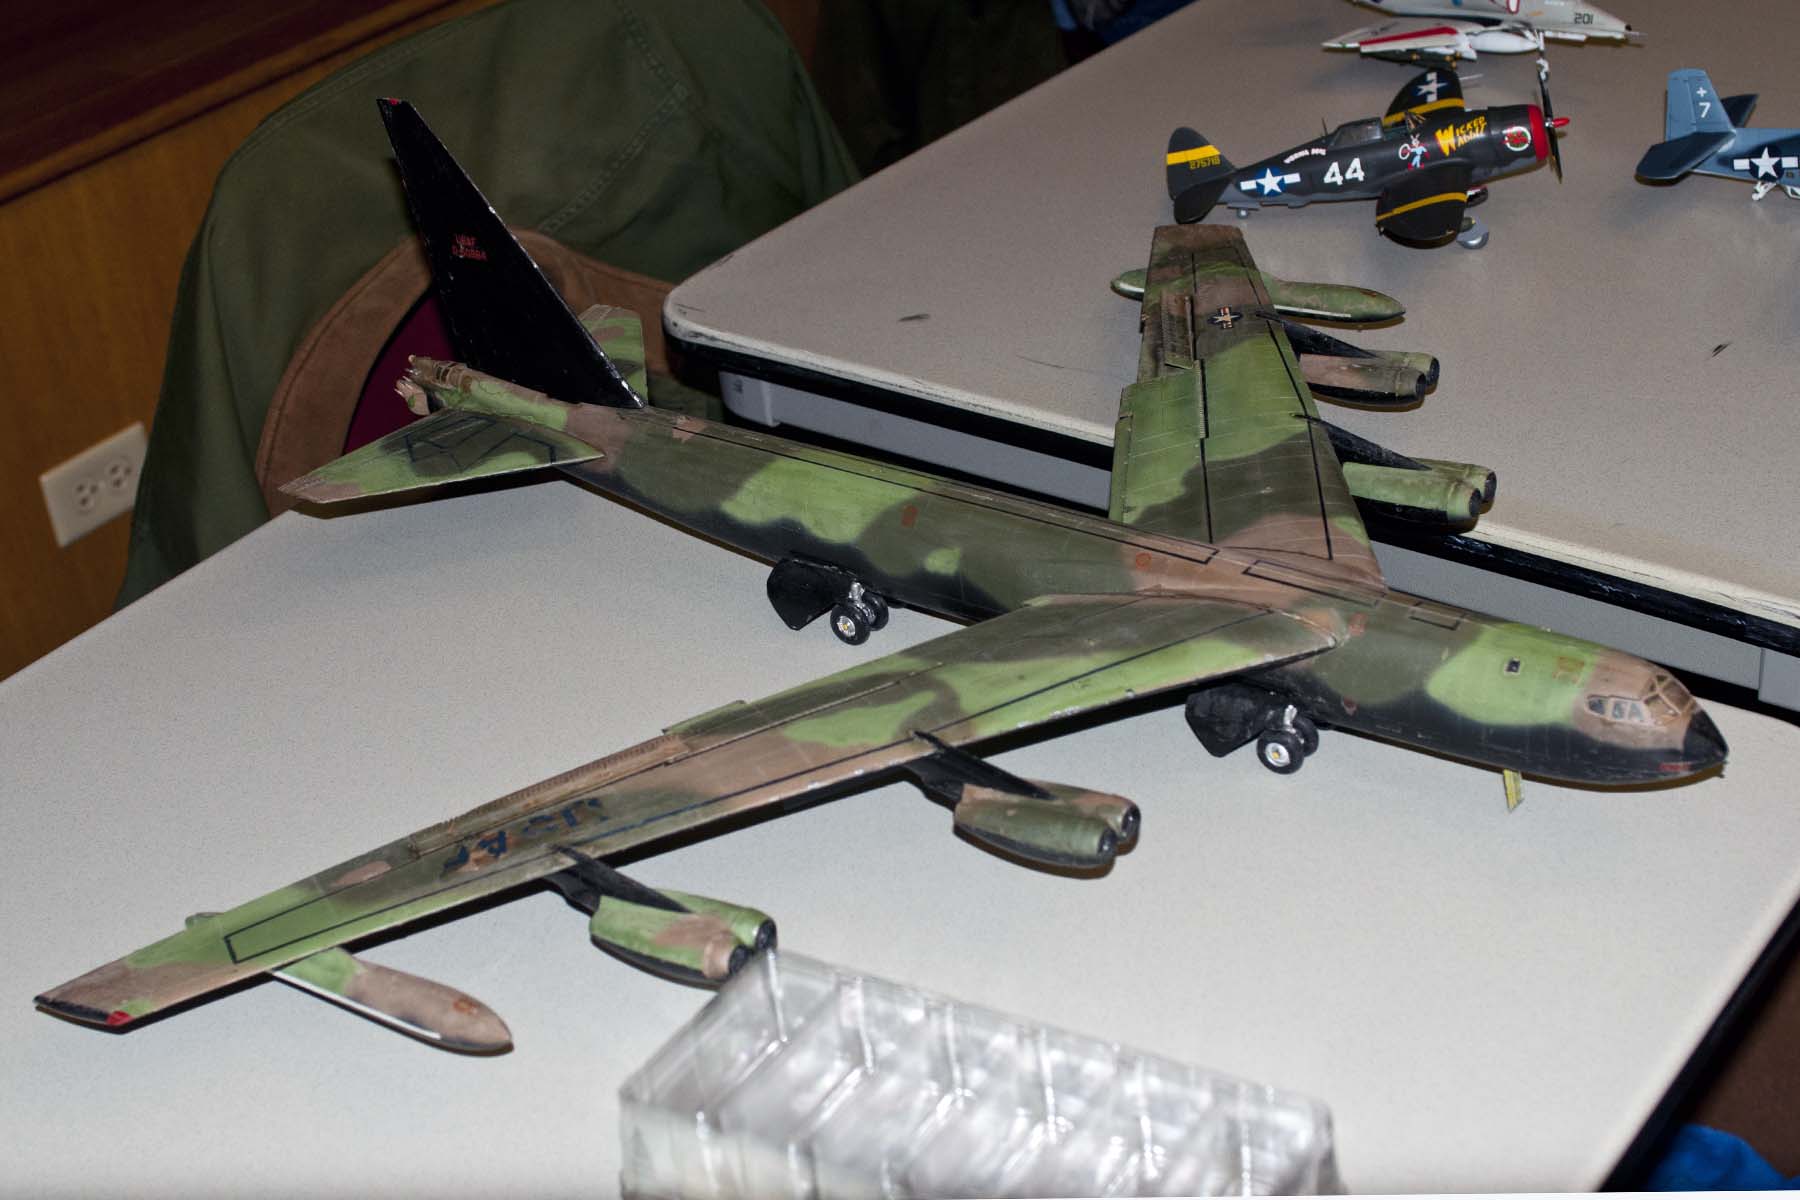
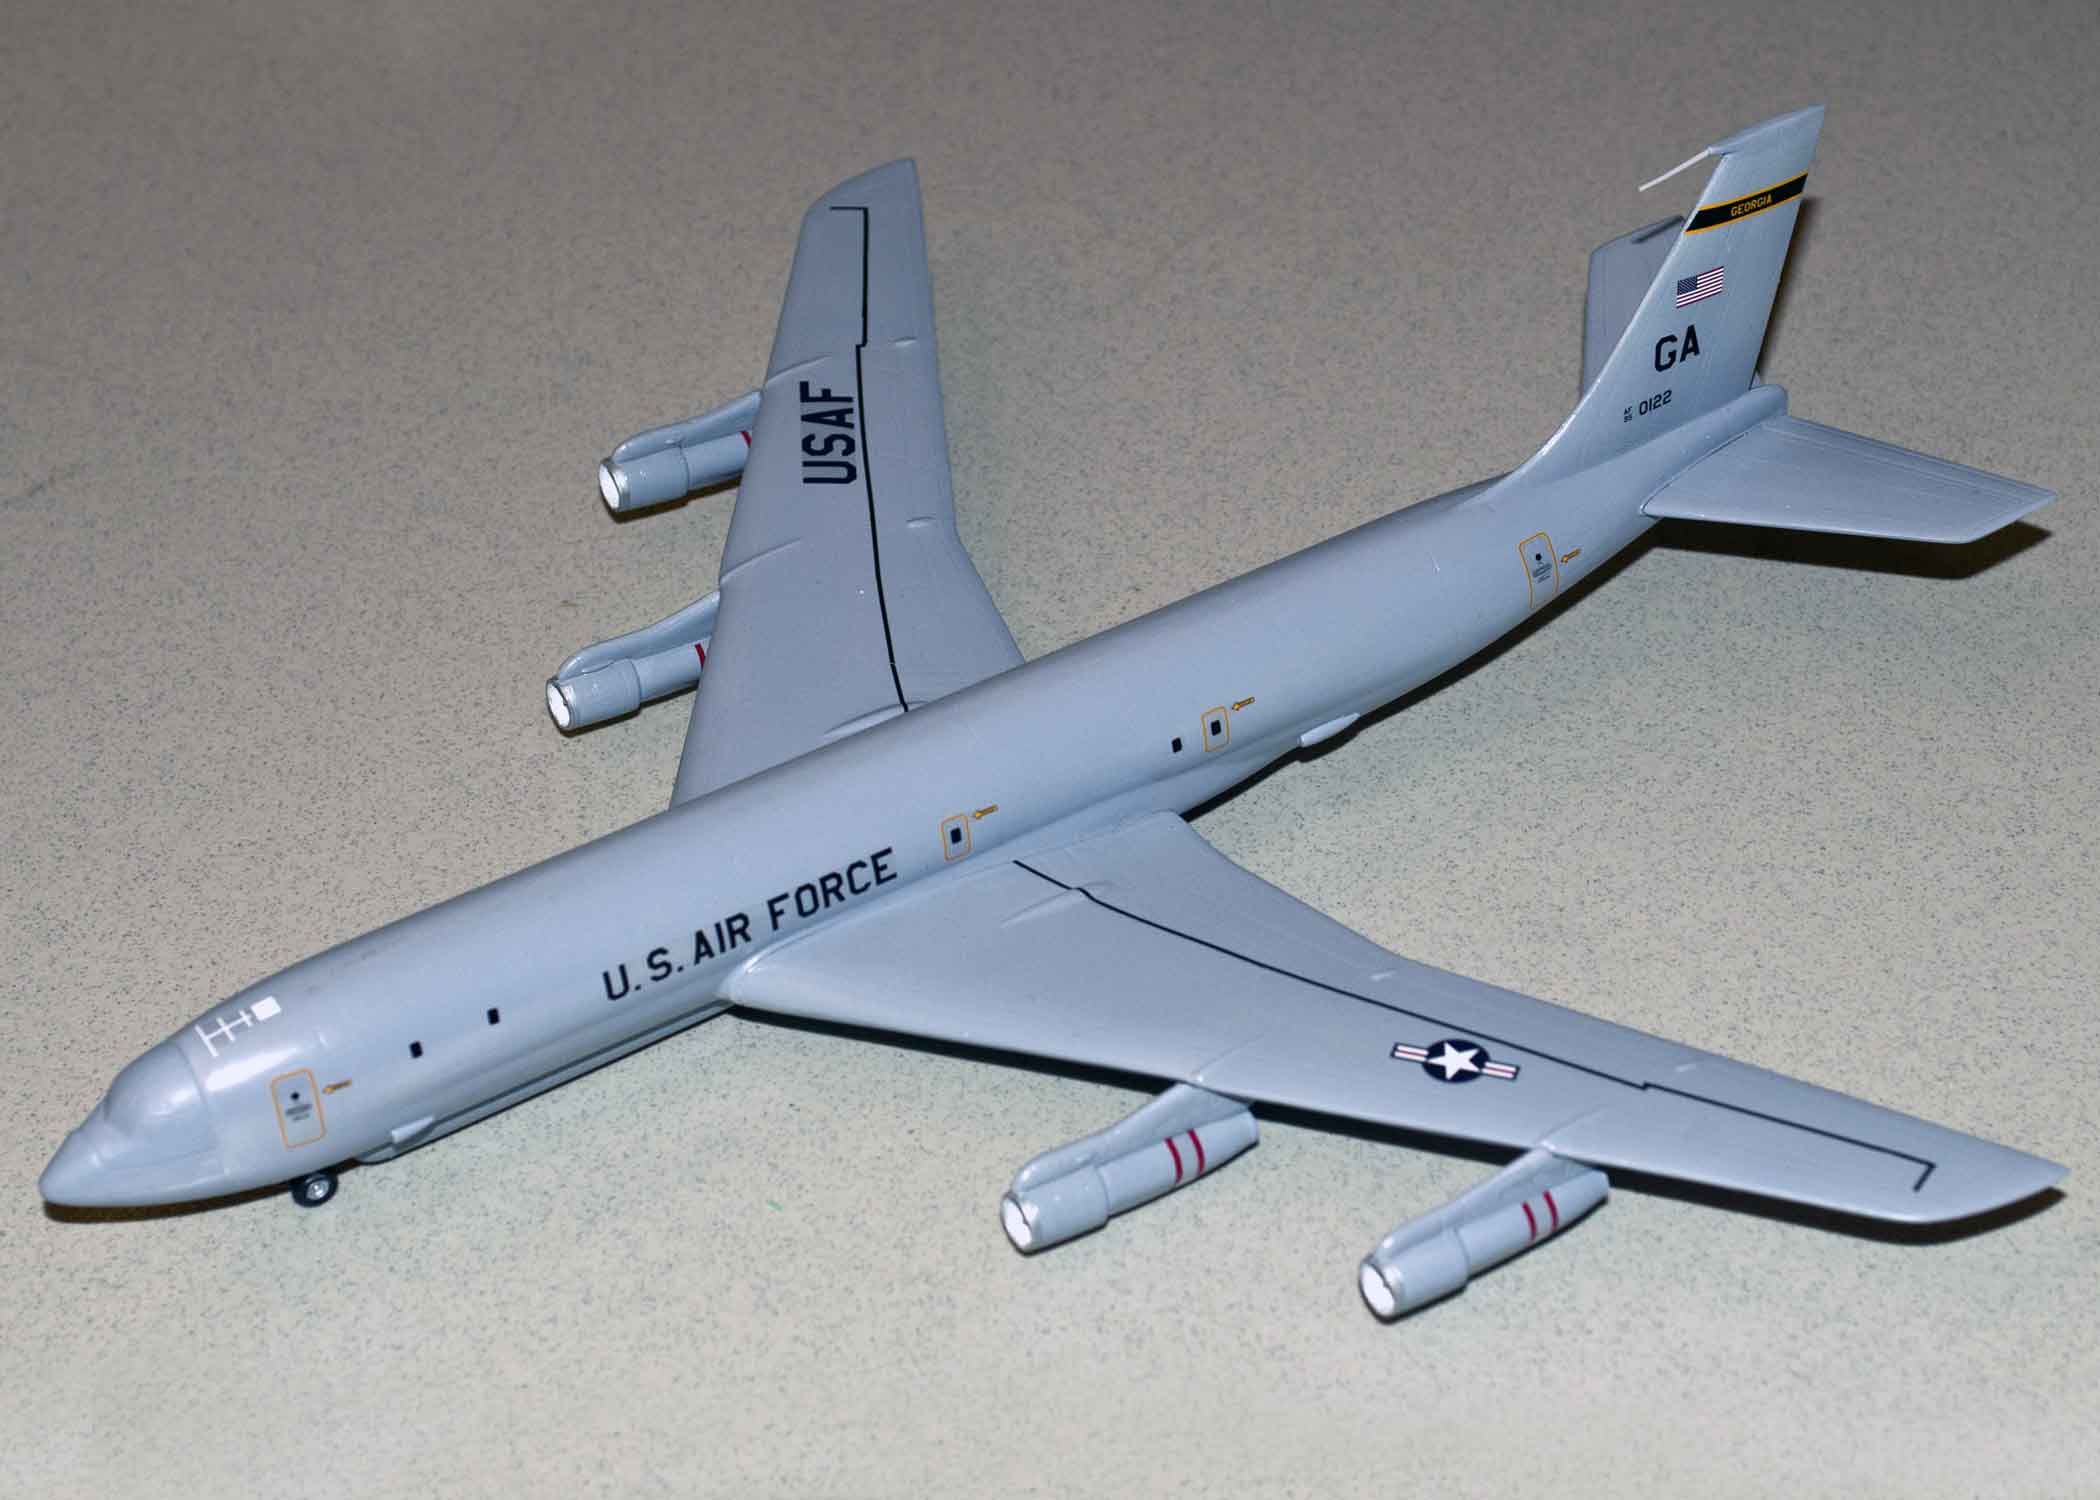
B-52D 1/72nd scale Monogram by John Koziol

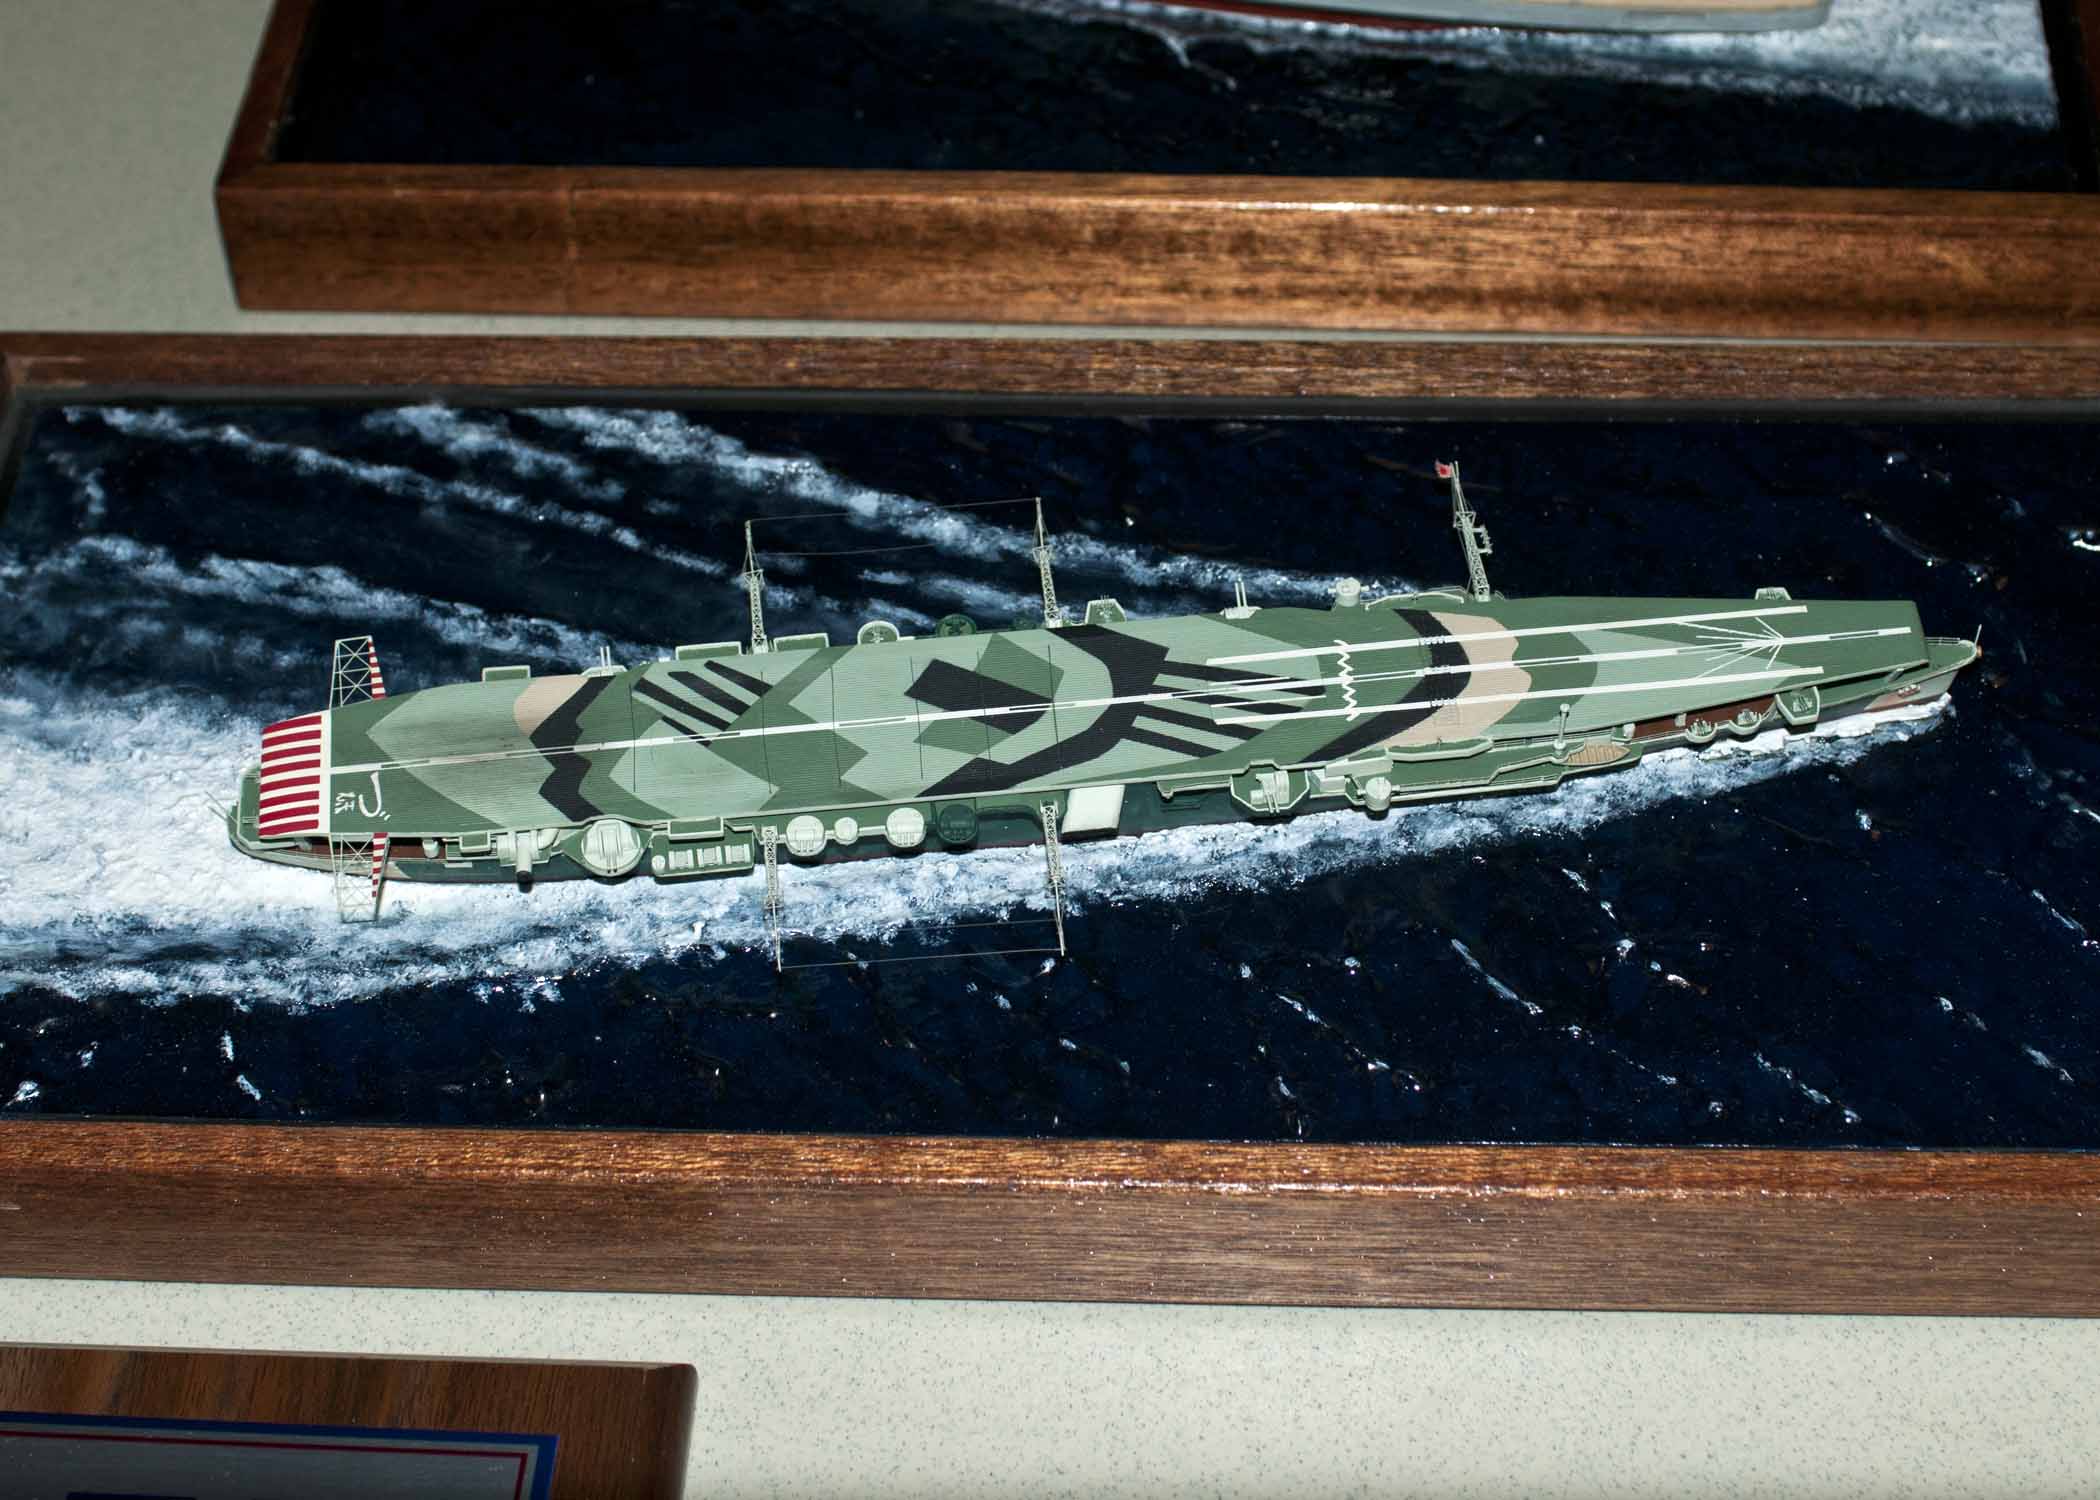
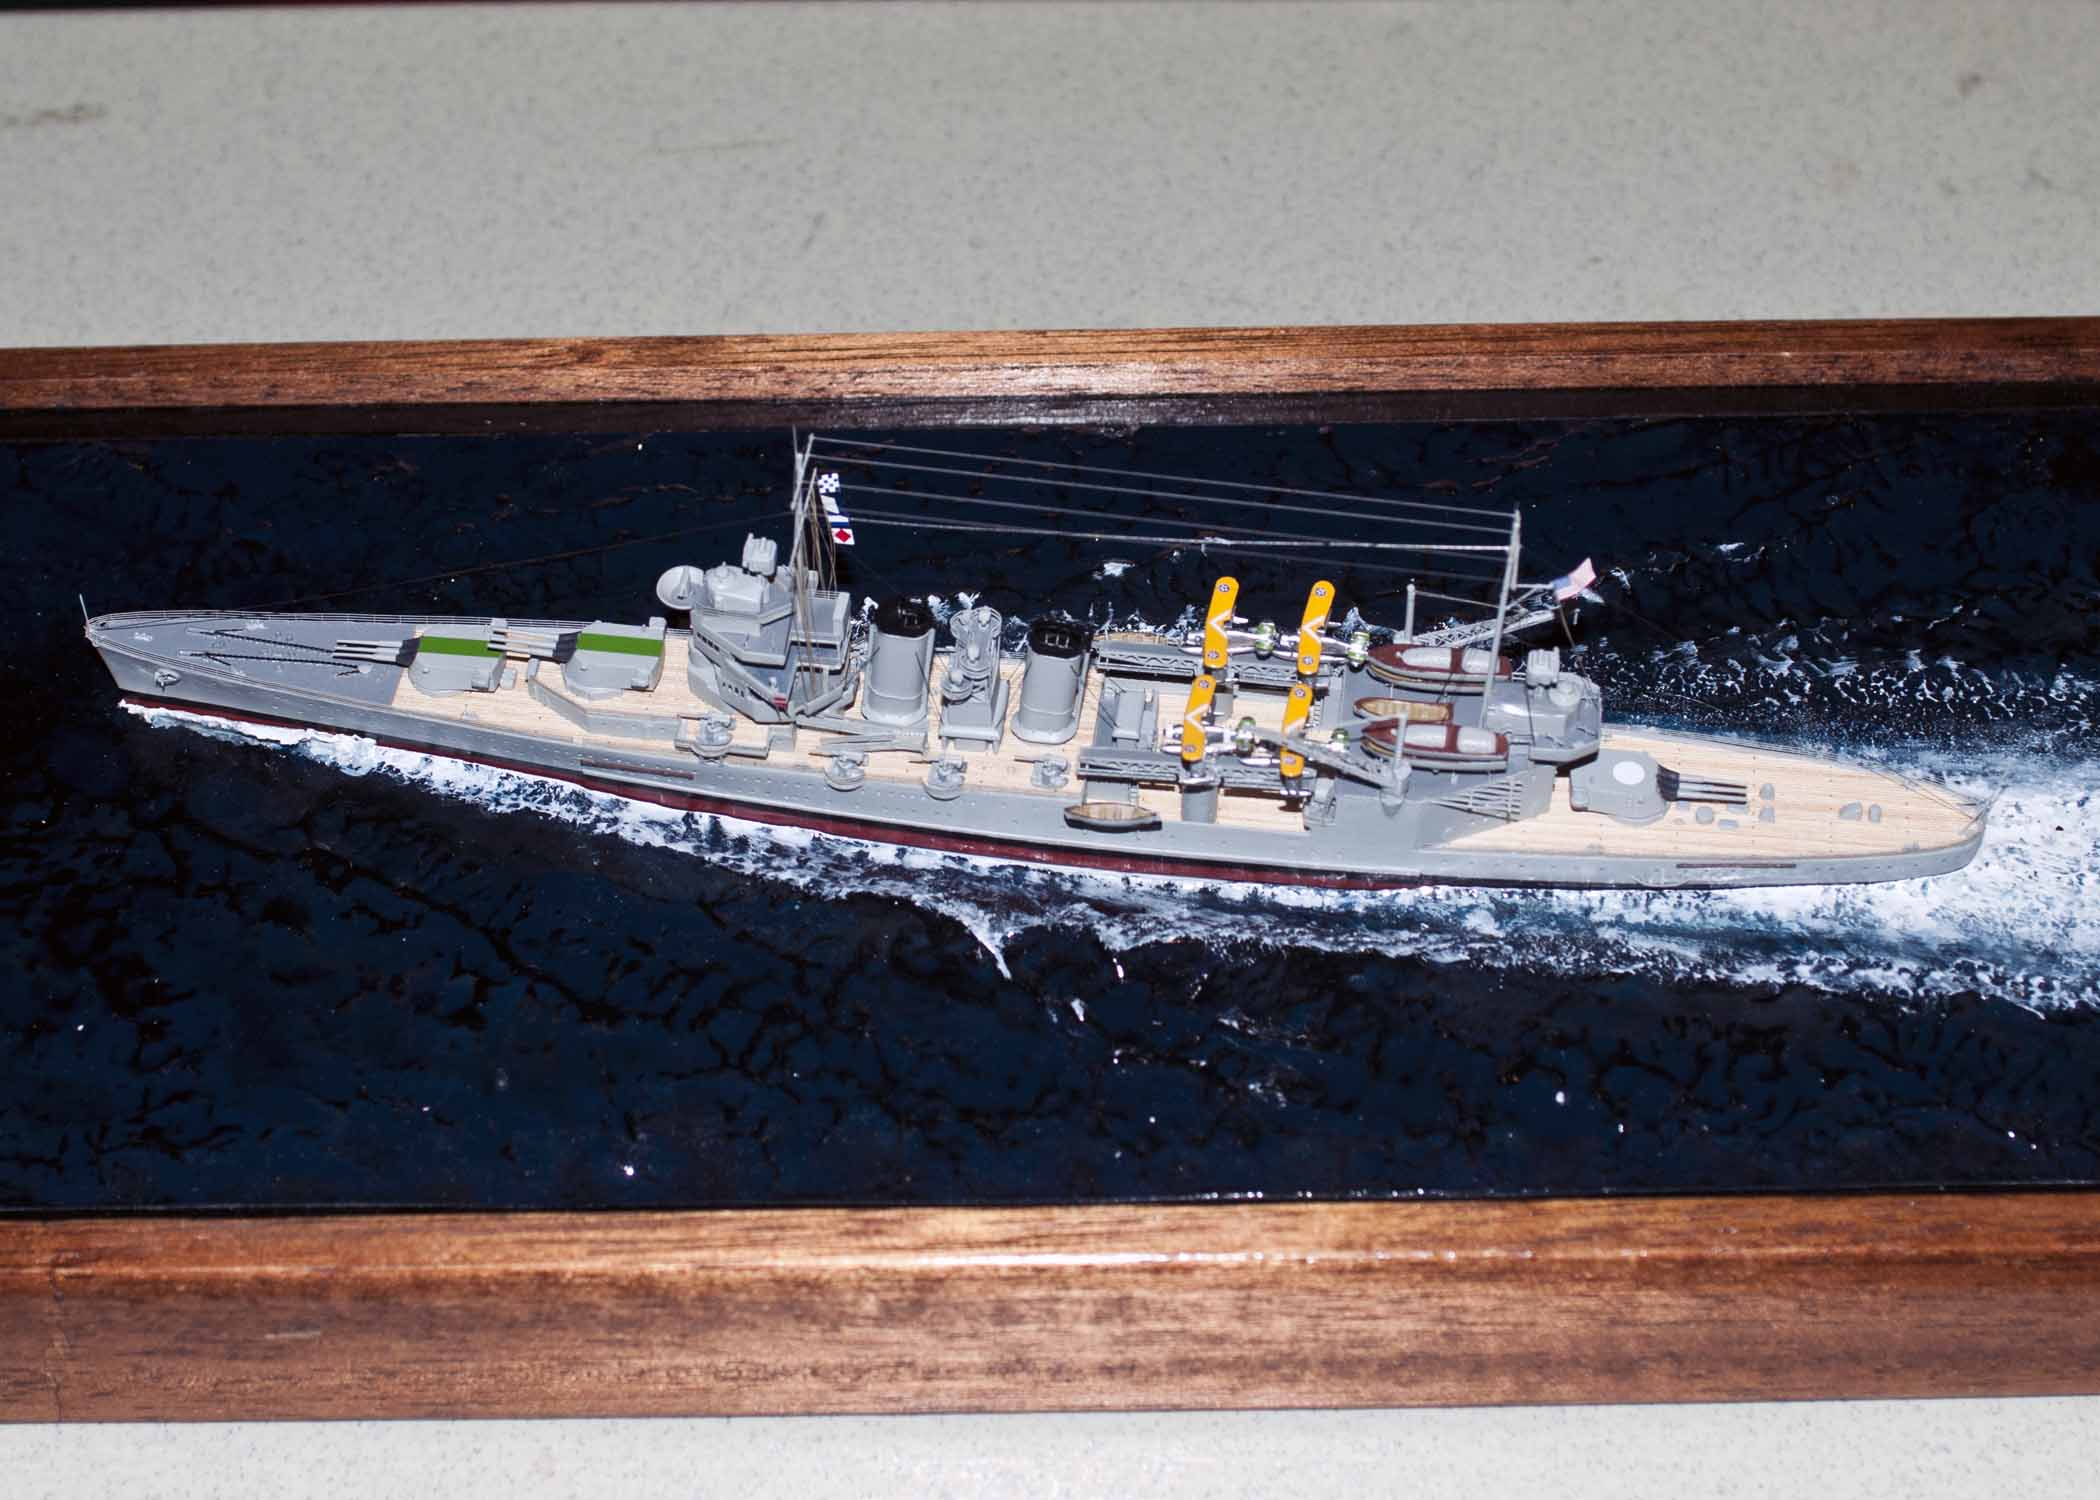
USS Greenville, 1/700th scale Hobby Boss. Model master Acryl paint by Paul Gasiorowski
Paul Gasiorowski, under construction
Paul Gasiorowski, under construction
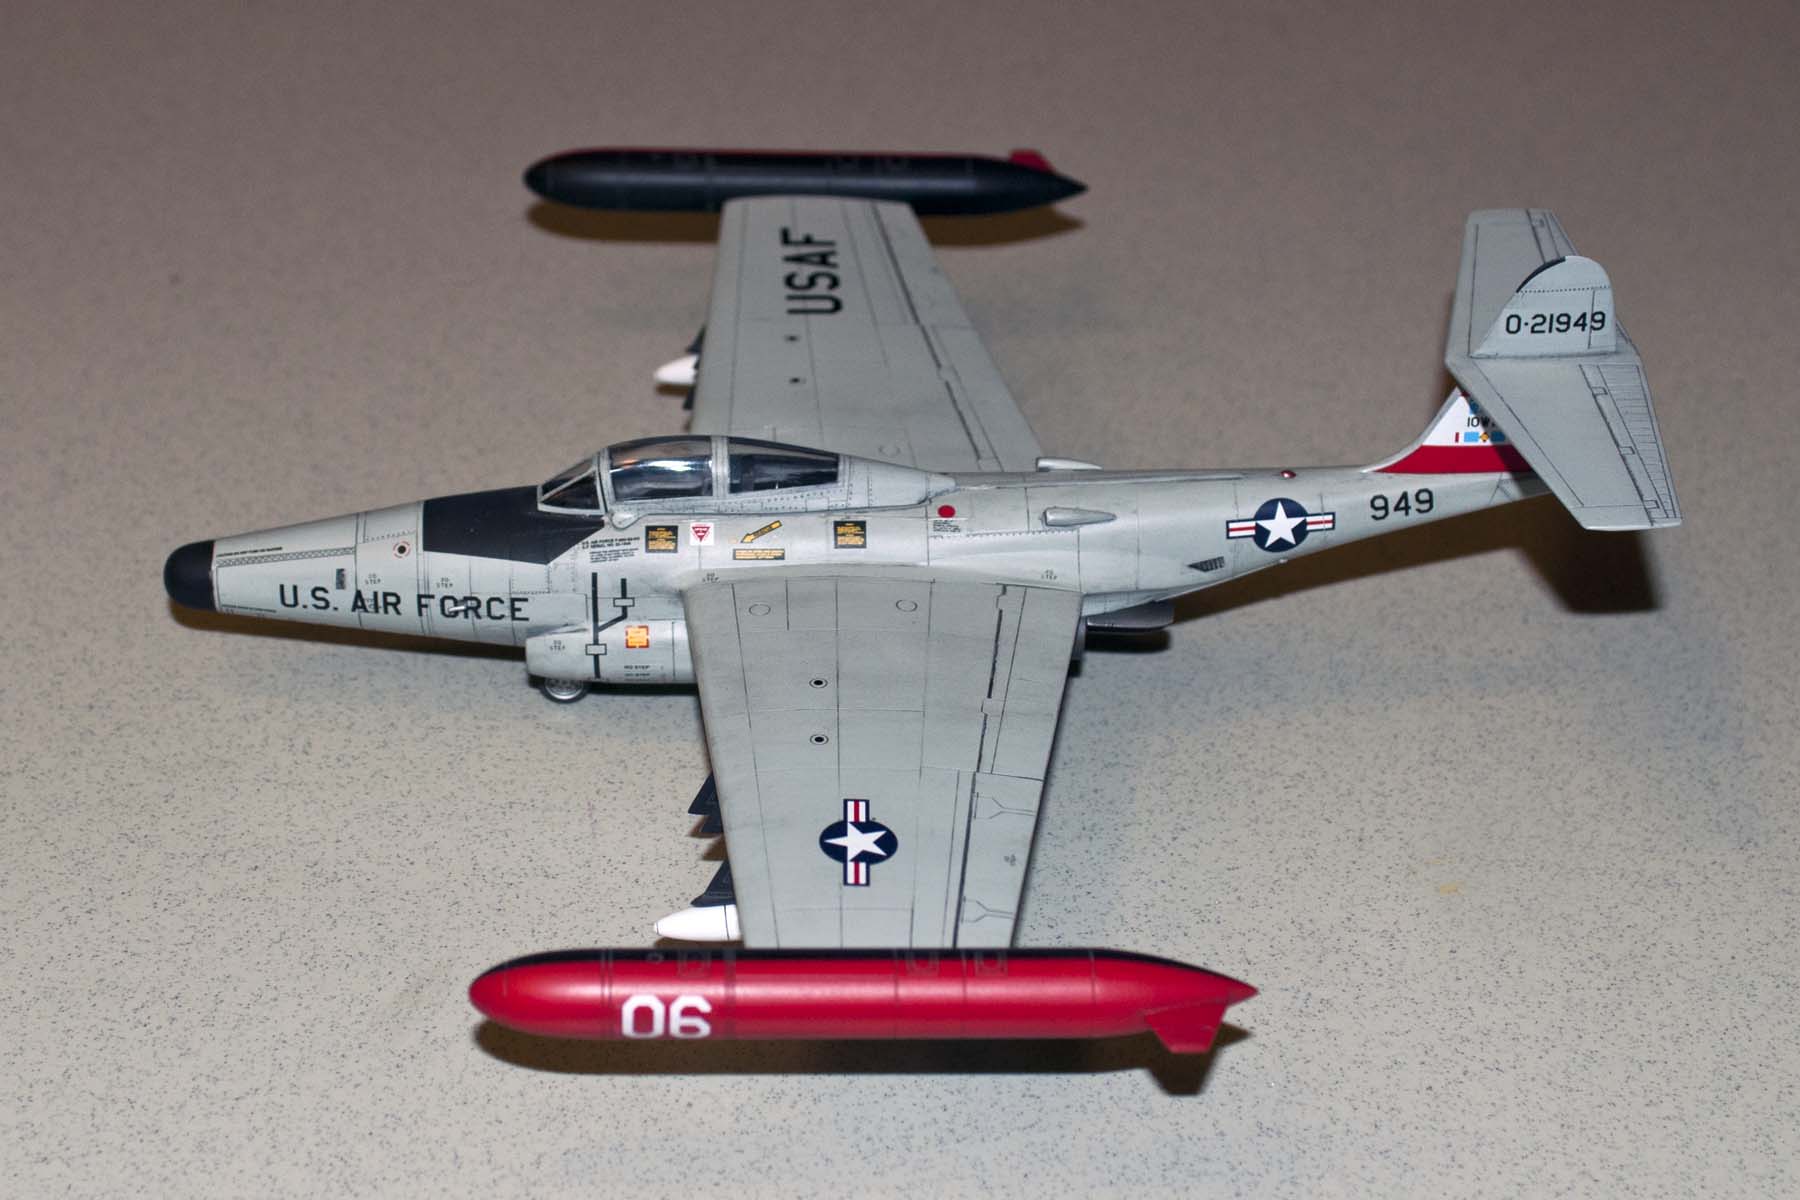
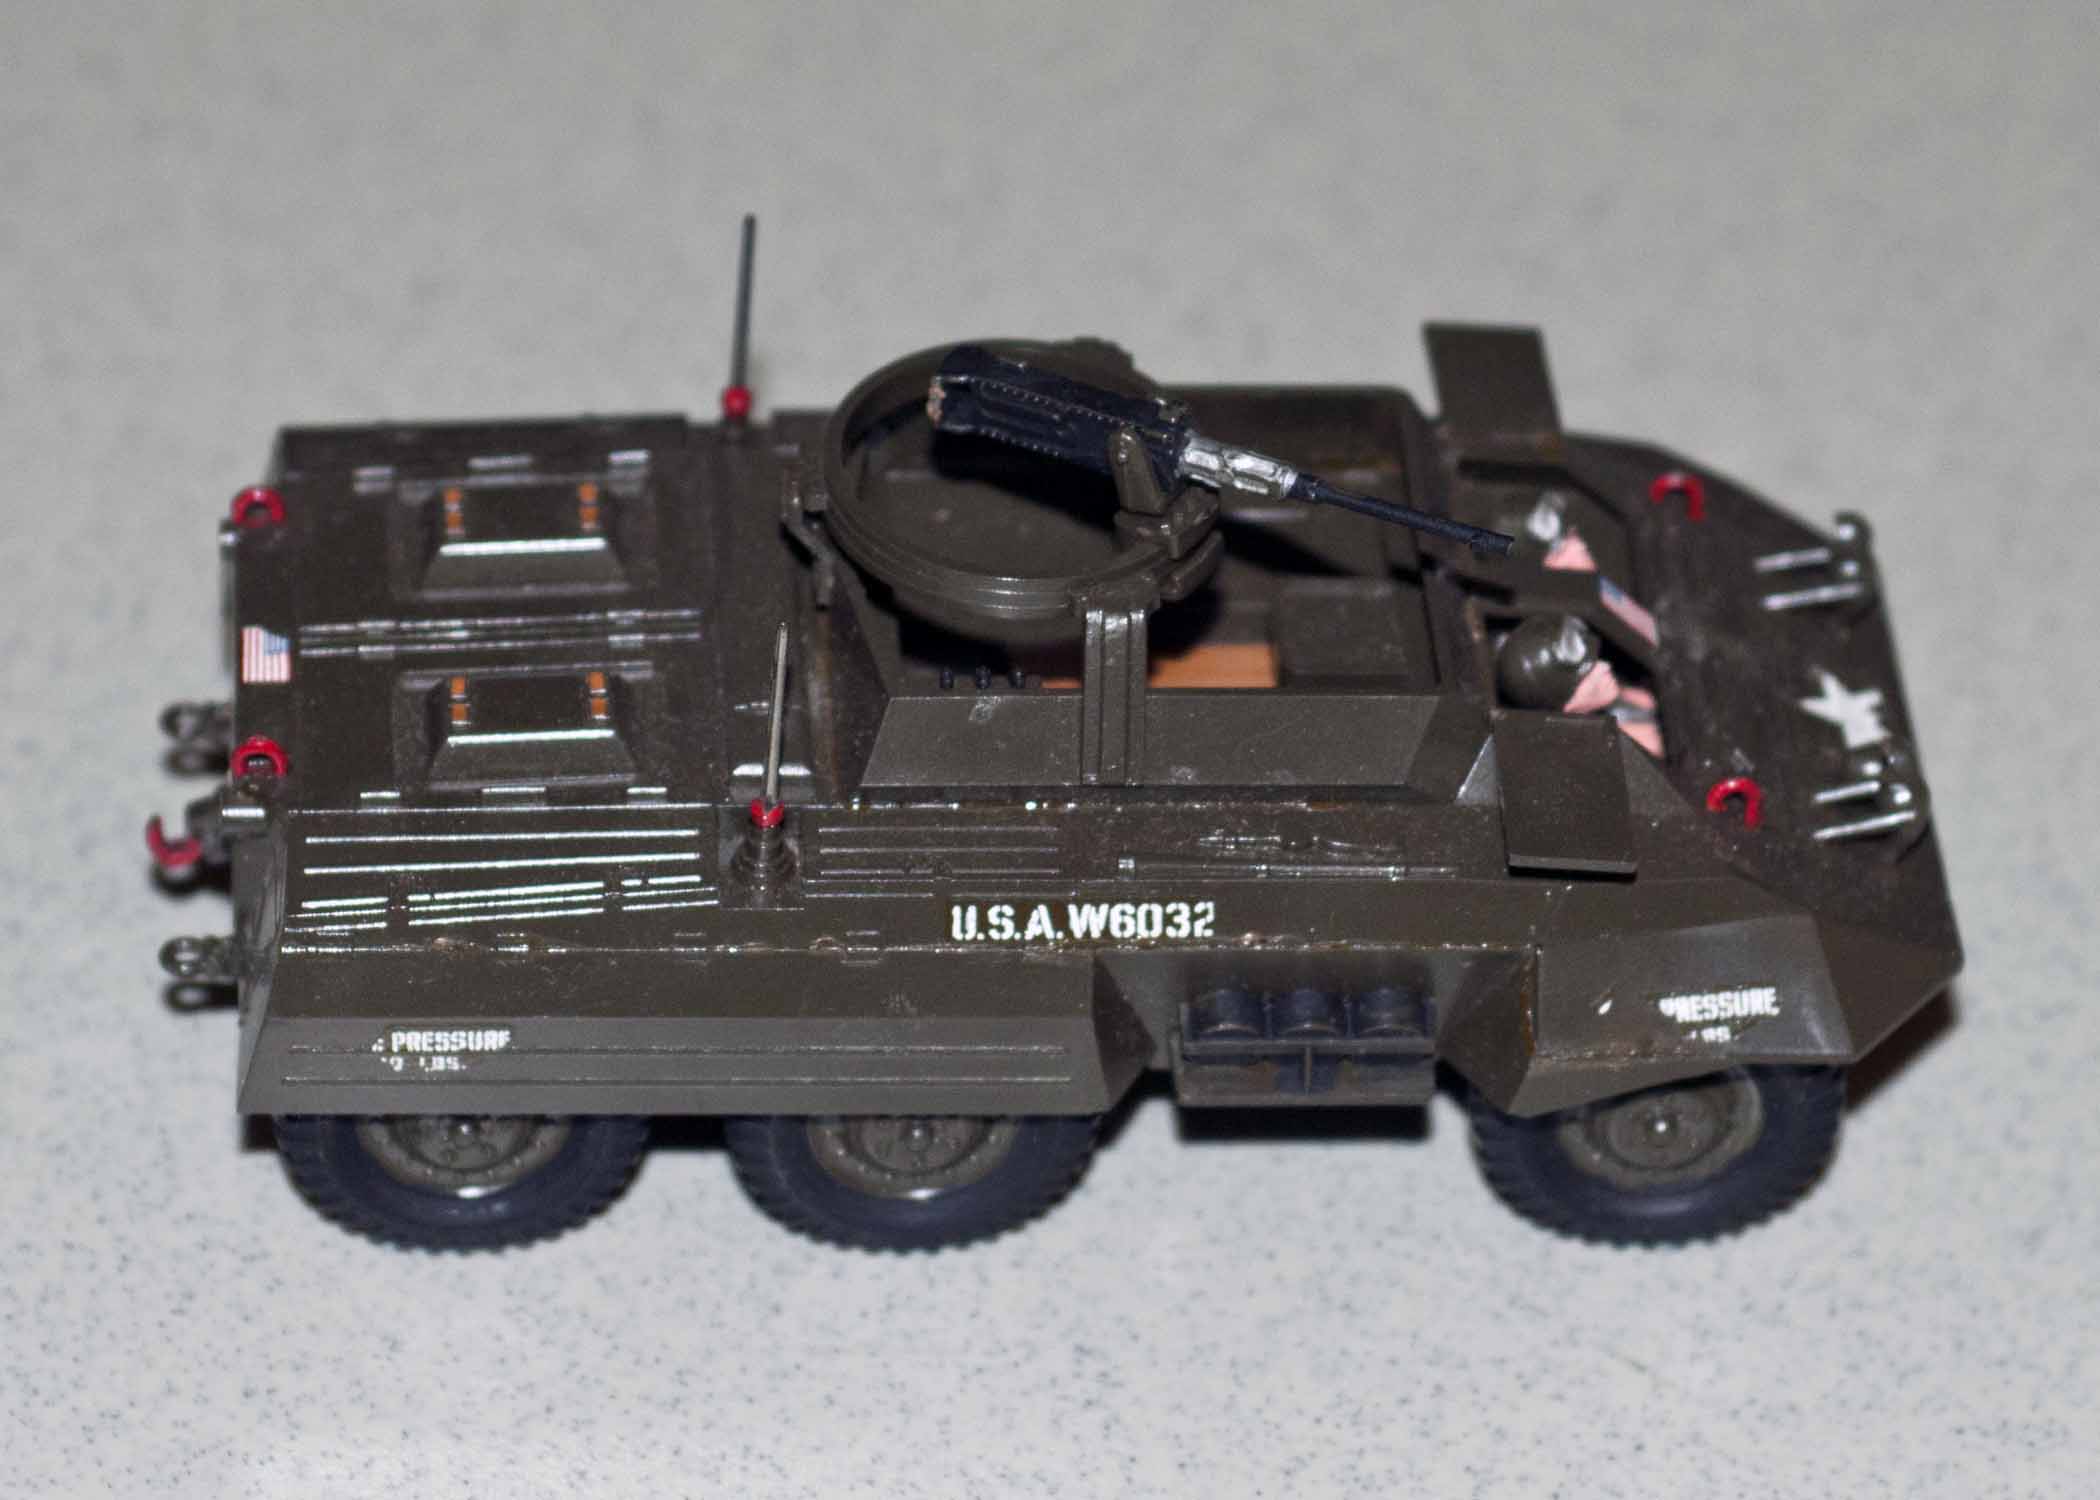
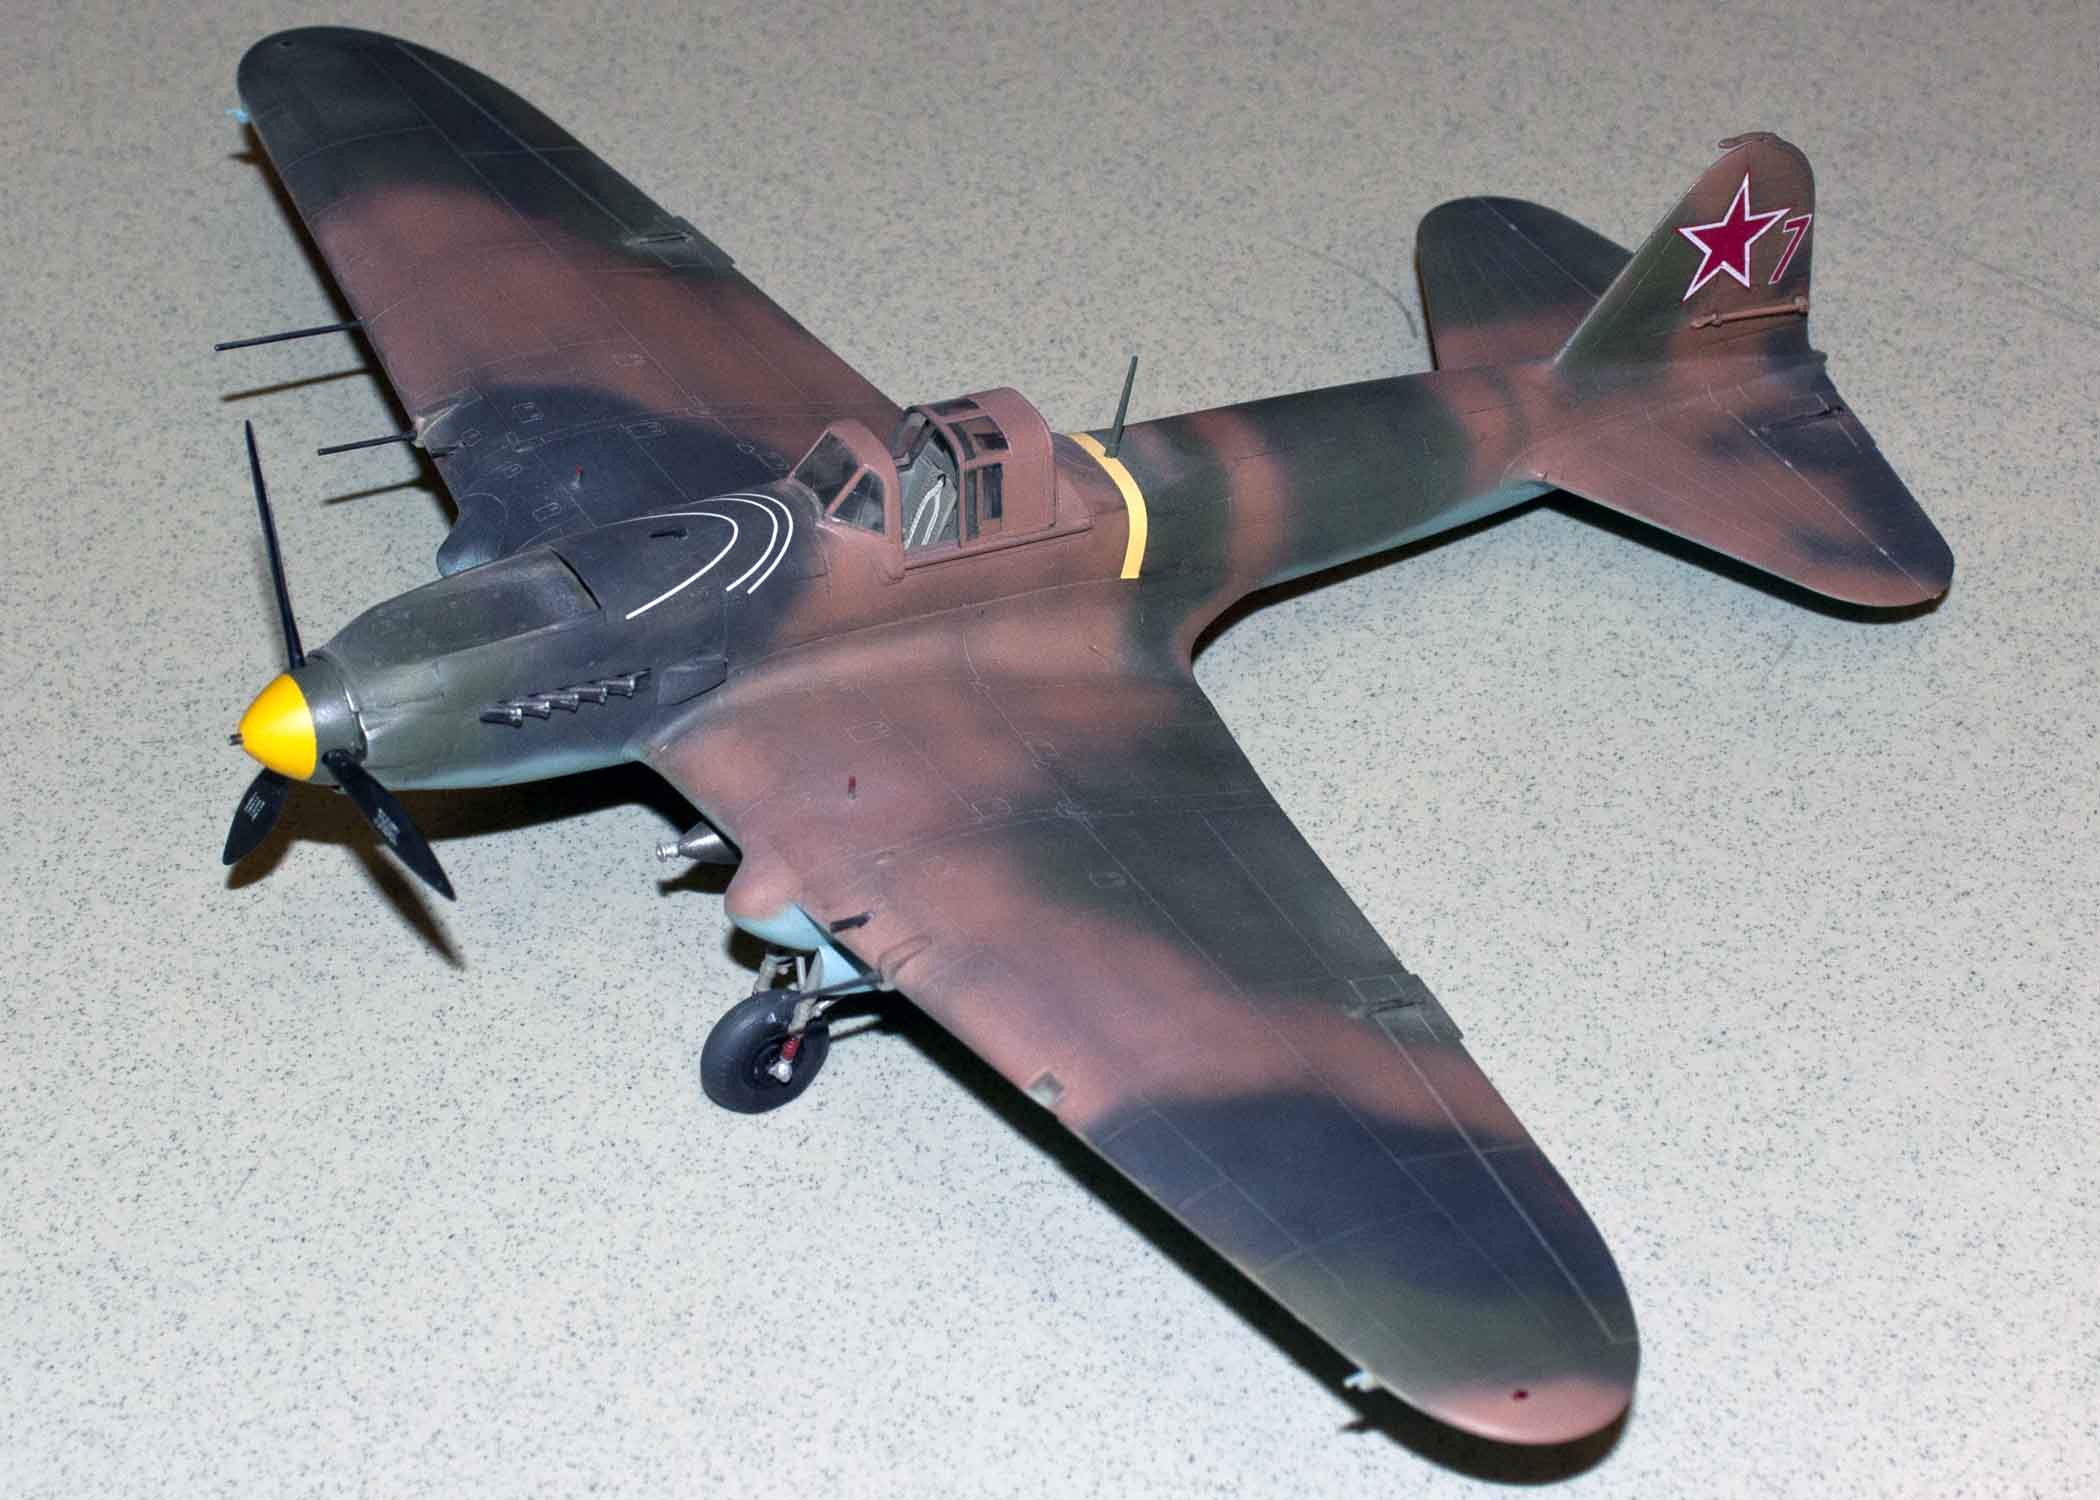
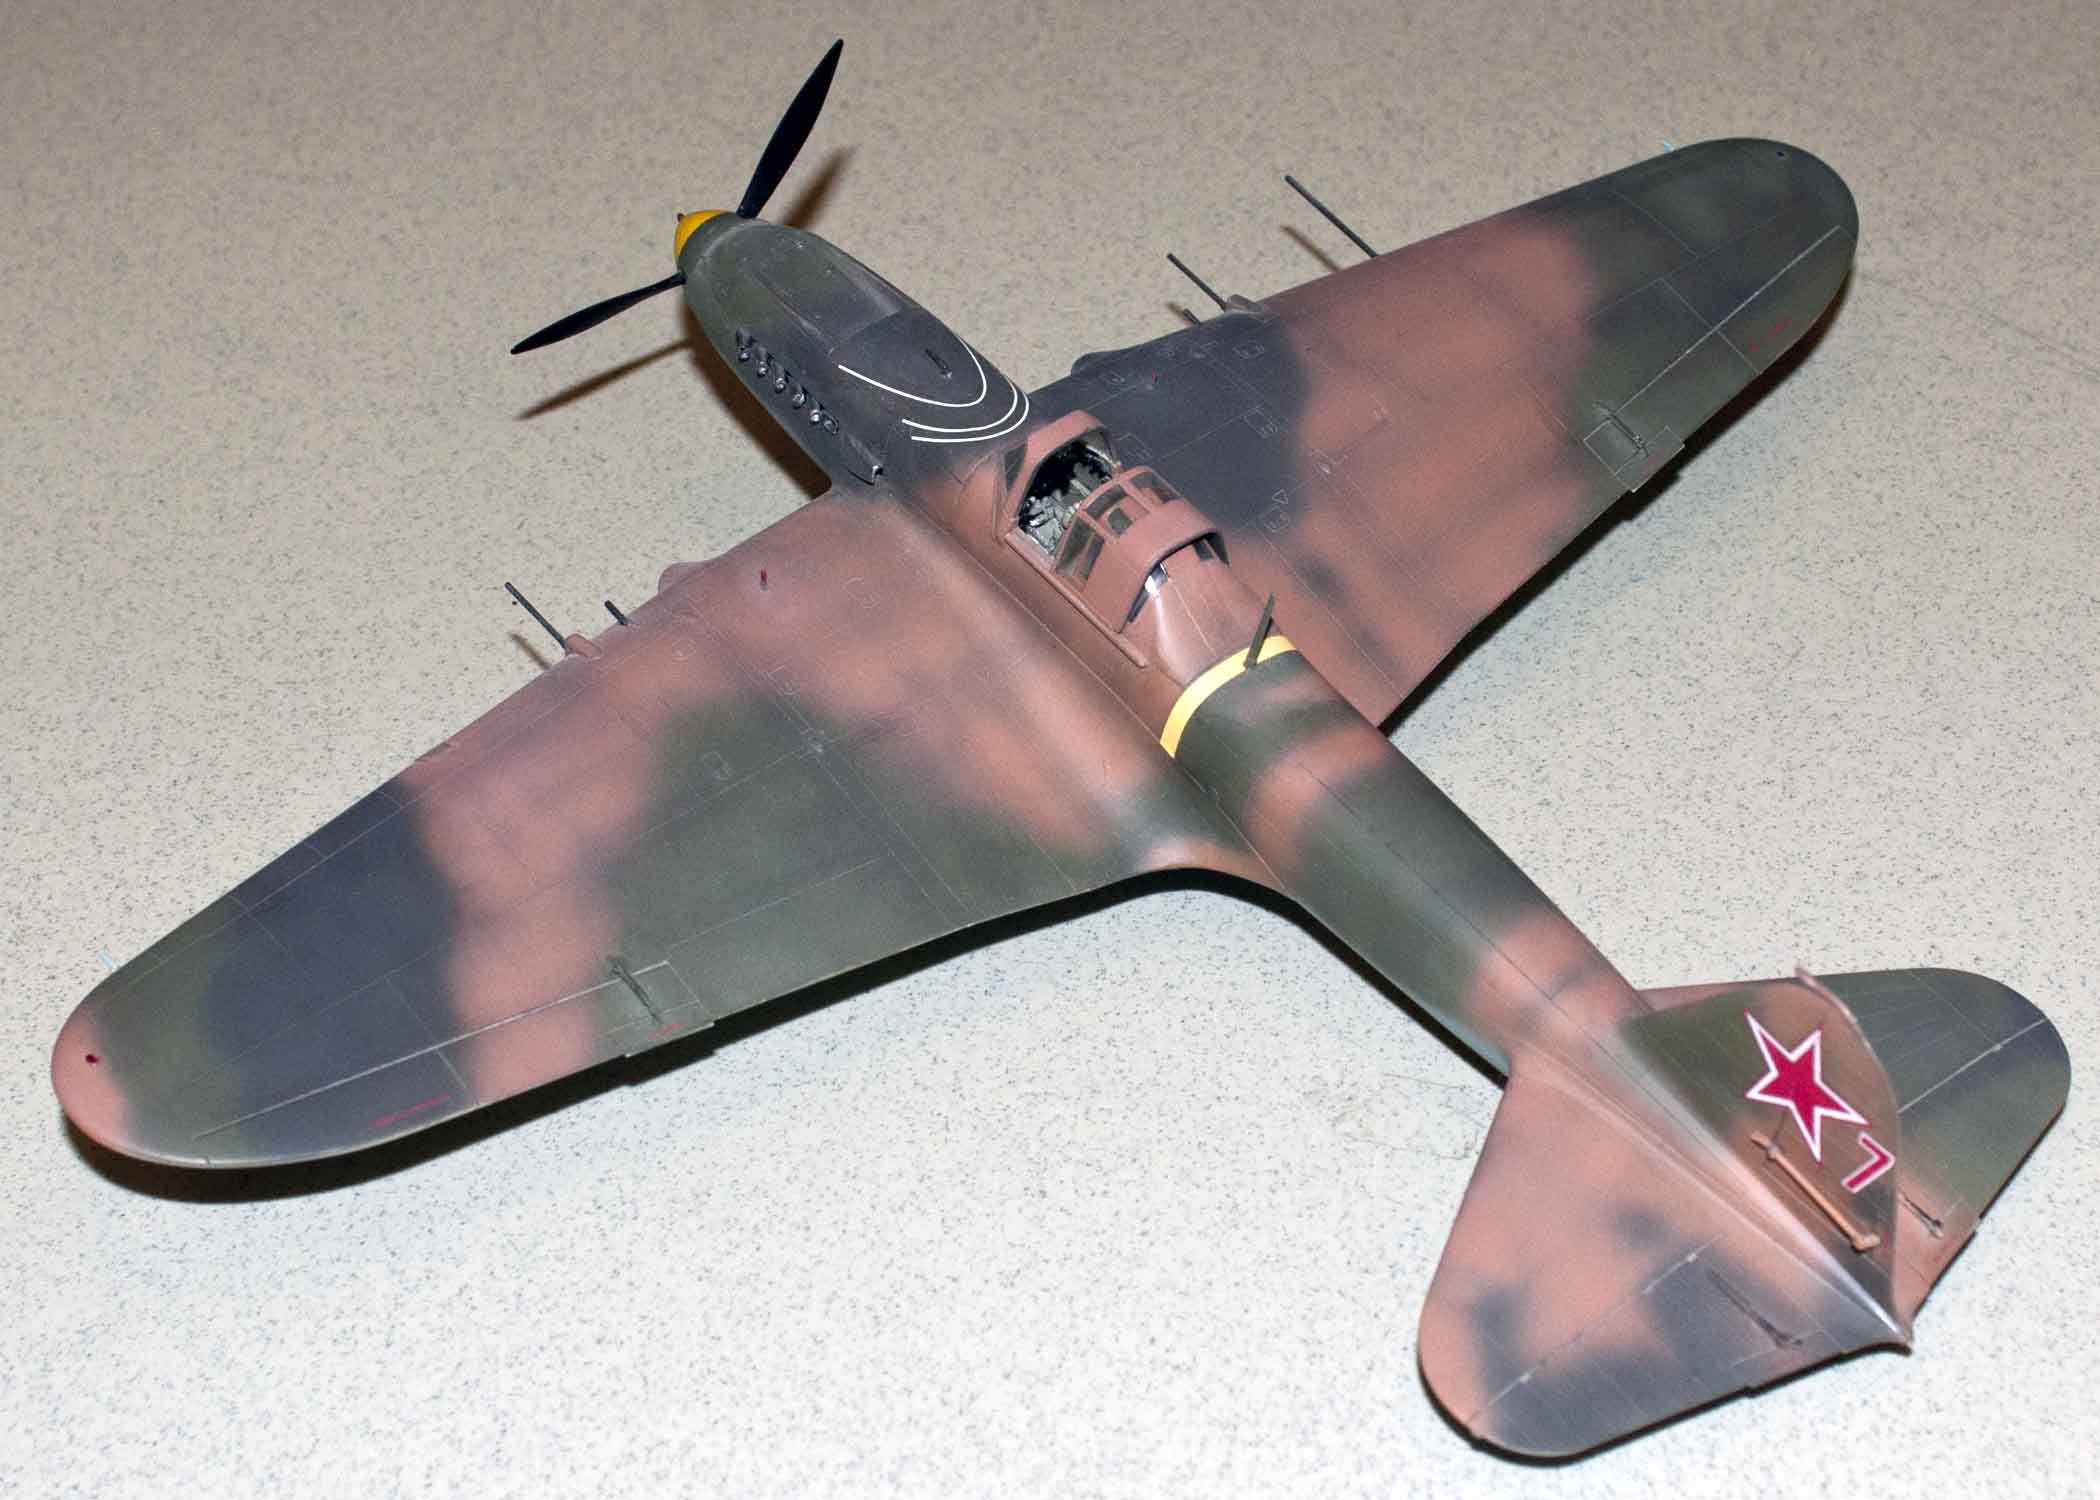
F-89J Scorpion all weather interceptor. Weapons included air to air Genie missile.
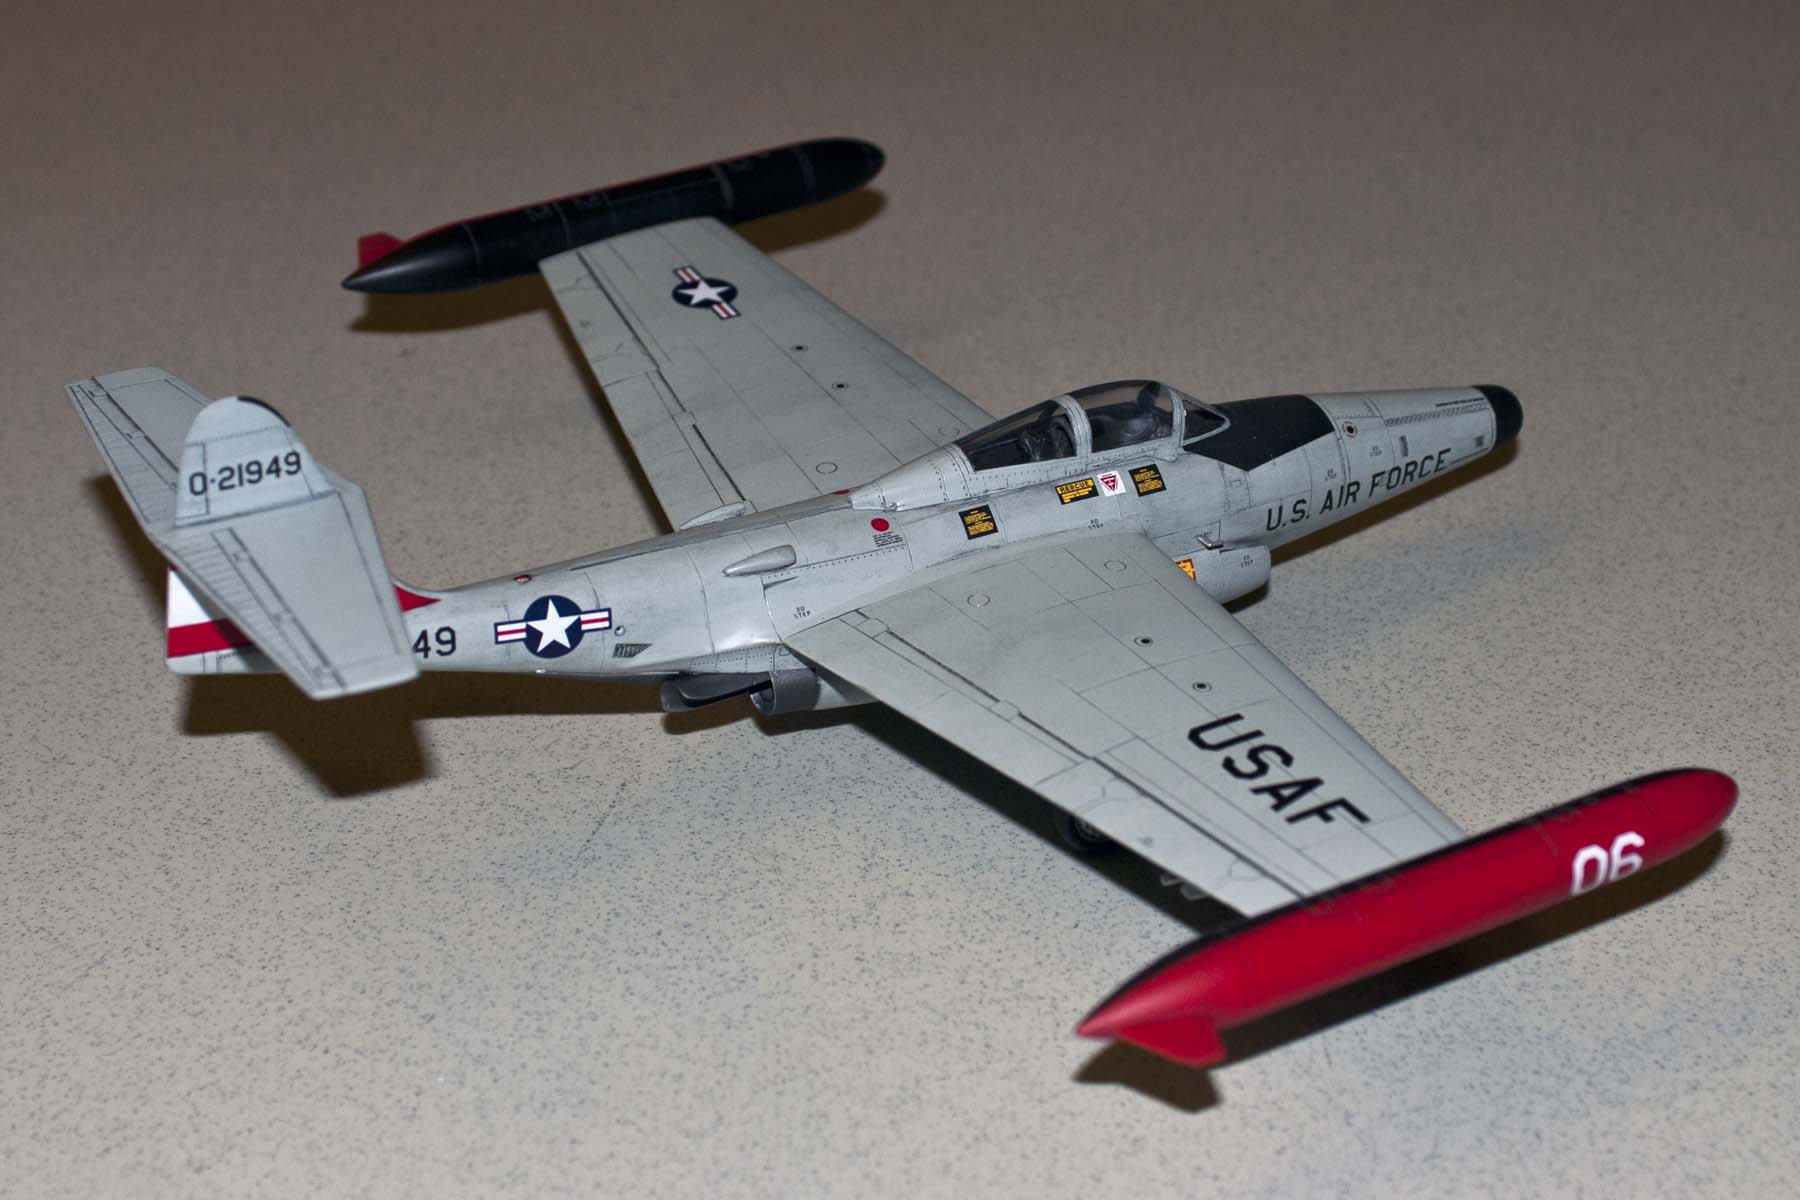
F-89J by Dan Paulien 1/72, Academy built OOB, Gloss Aircraft Gray finish. Iowa ANG markings.
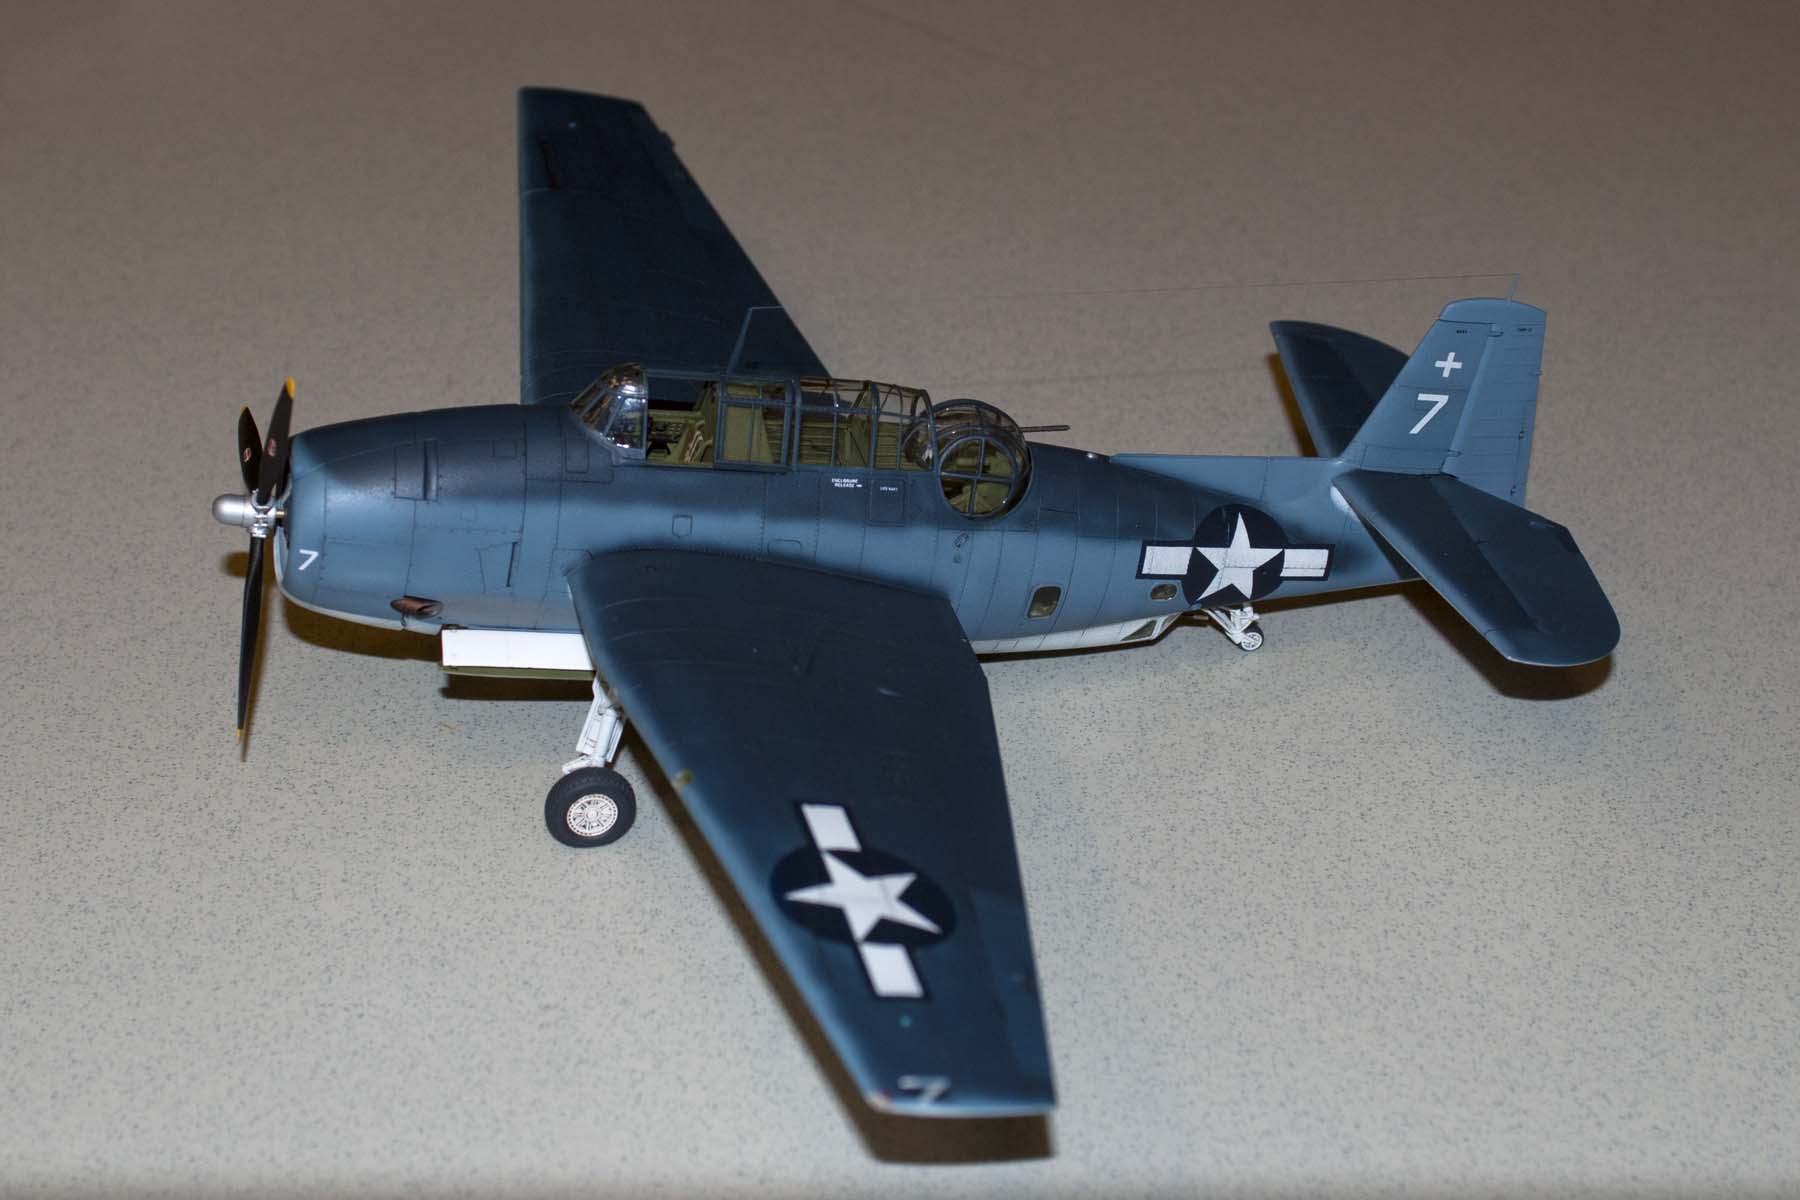
TBM-1C Avenger, 1/48th scale Accurate Miniatures. Model by Ed Mate.

VT-18 USS Intrepid Philippine Sea Oct 1944.
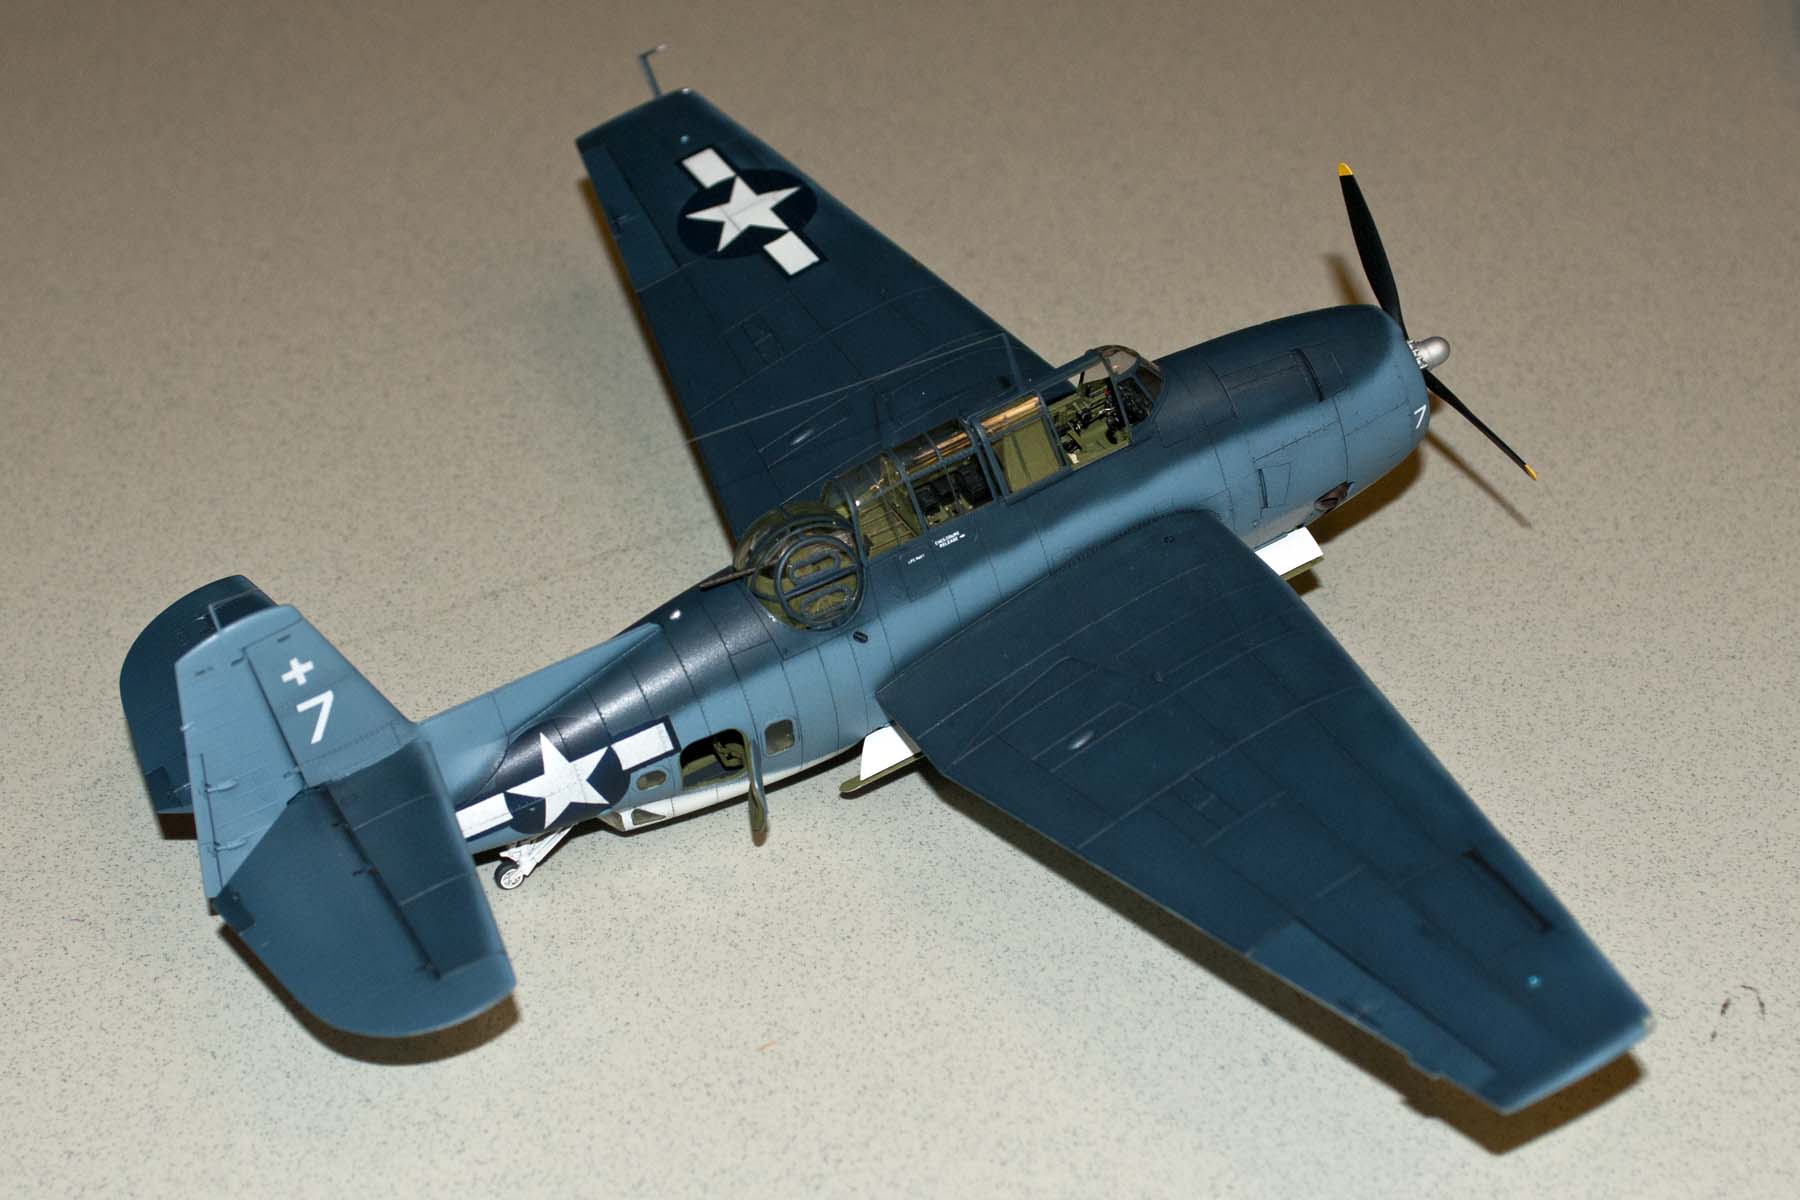
Eduard Photo Etch, Master Model gun barrels, MMaster/Aeromaster paint SuperScale Decals
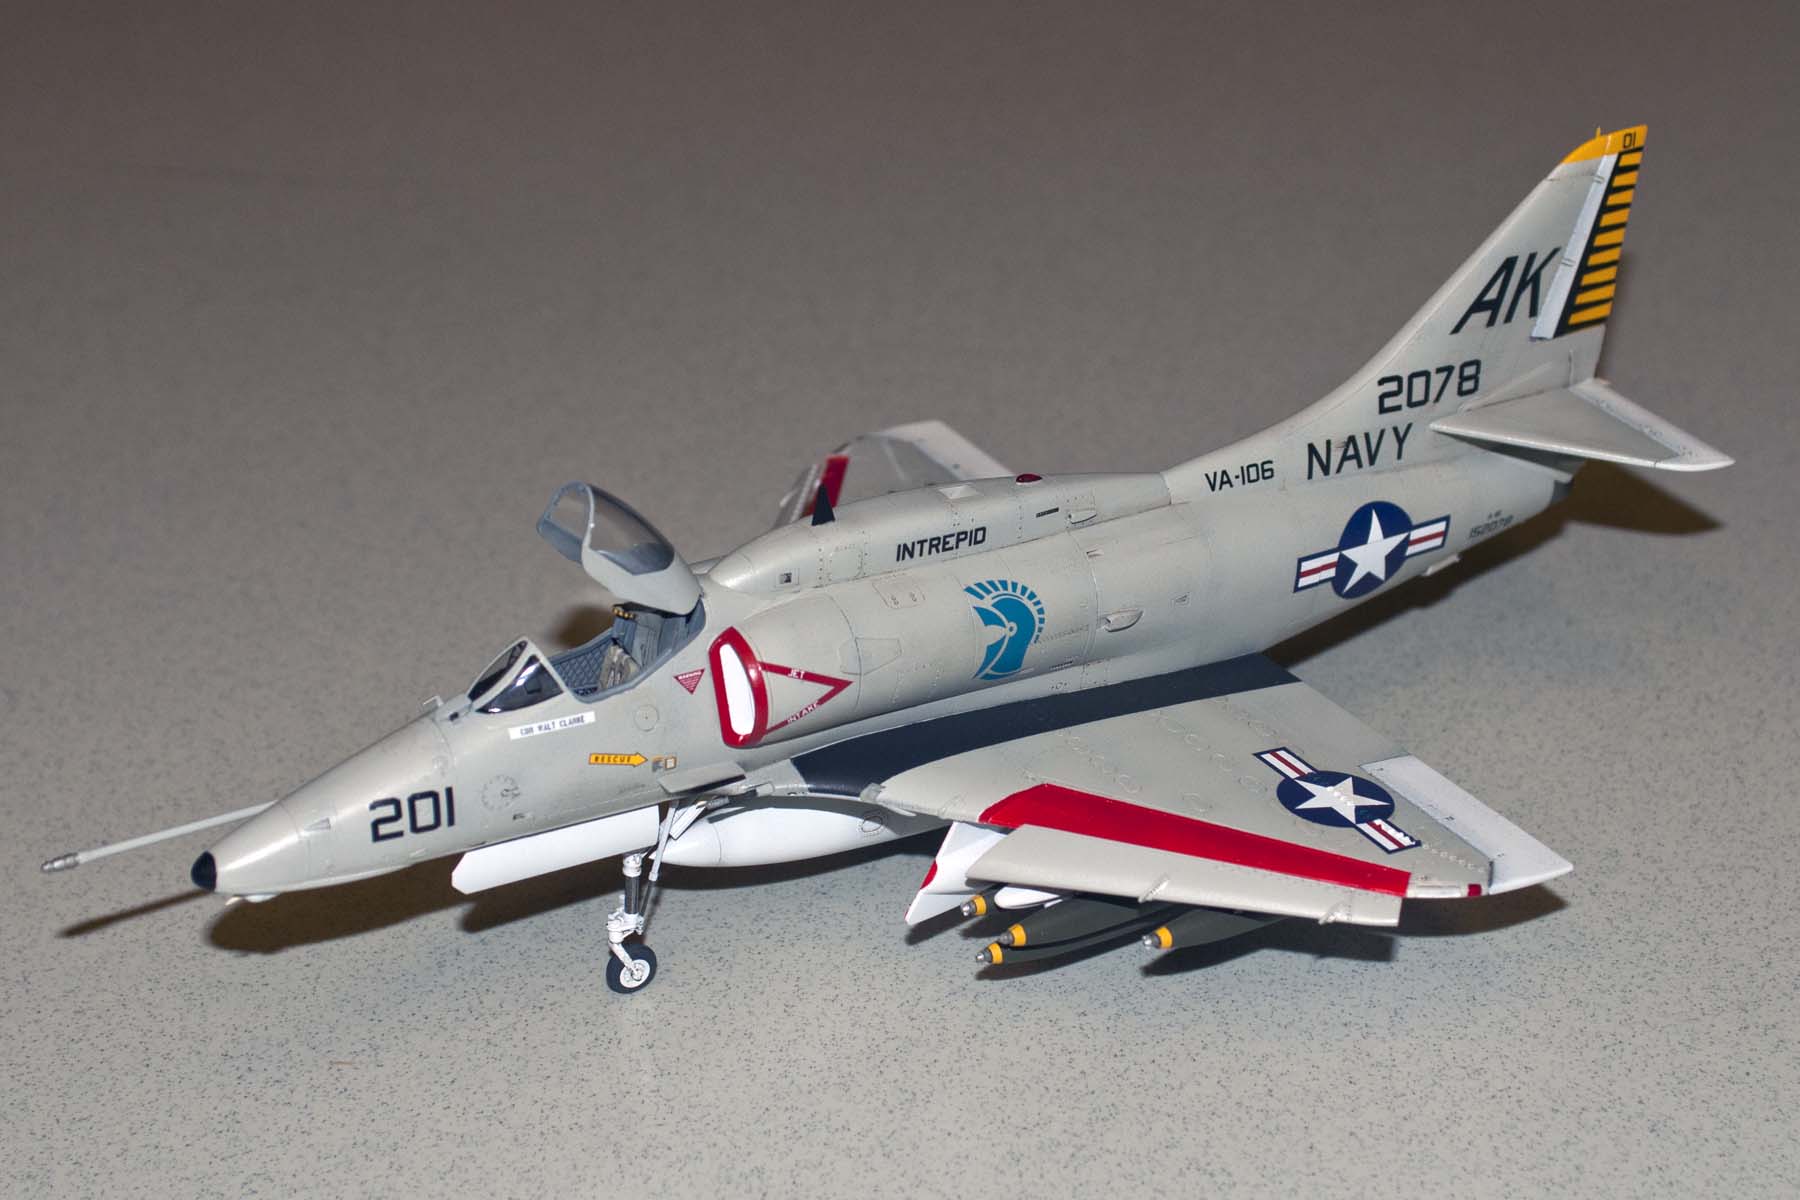
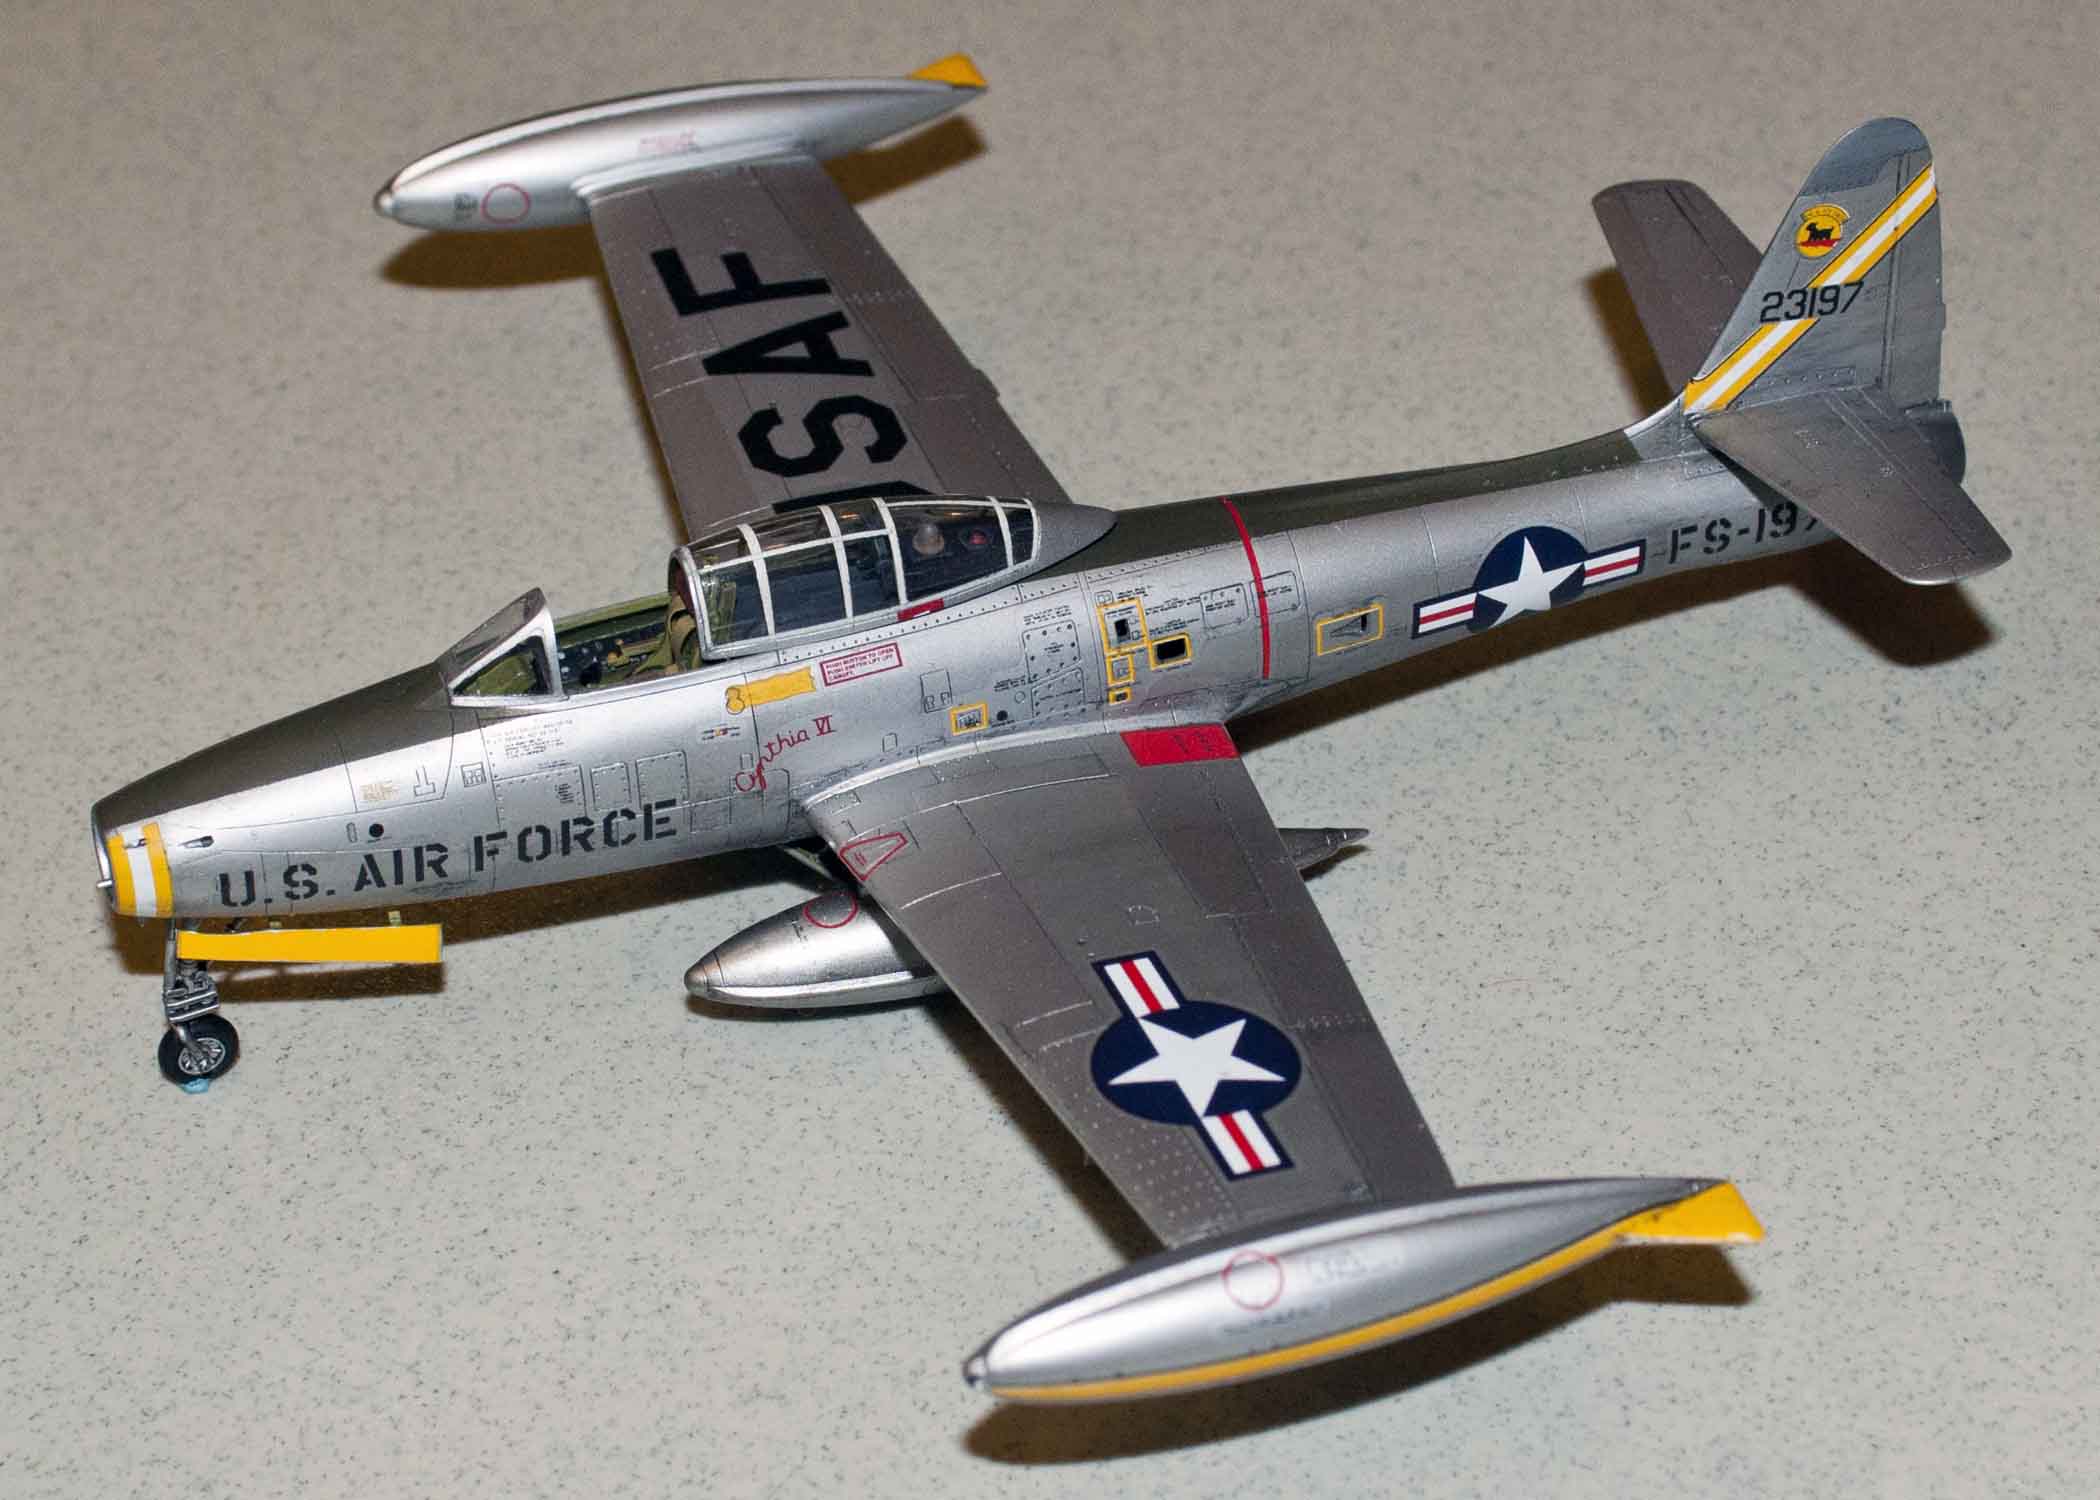
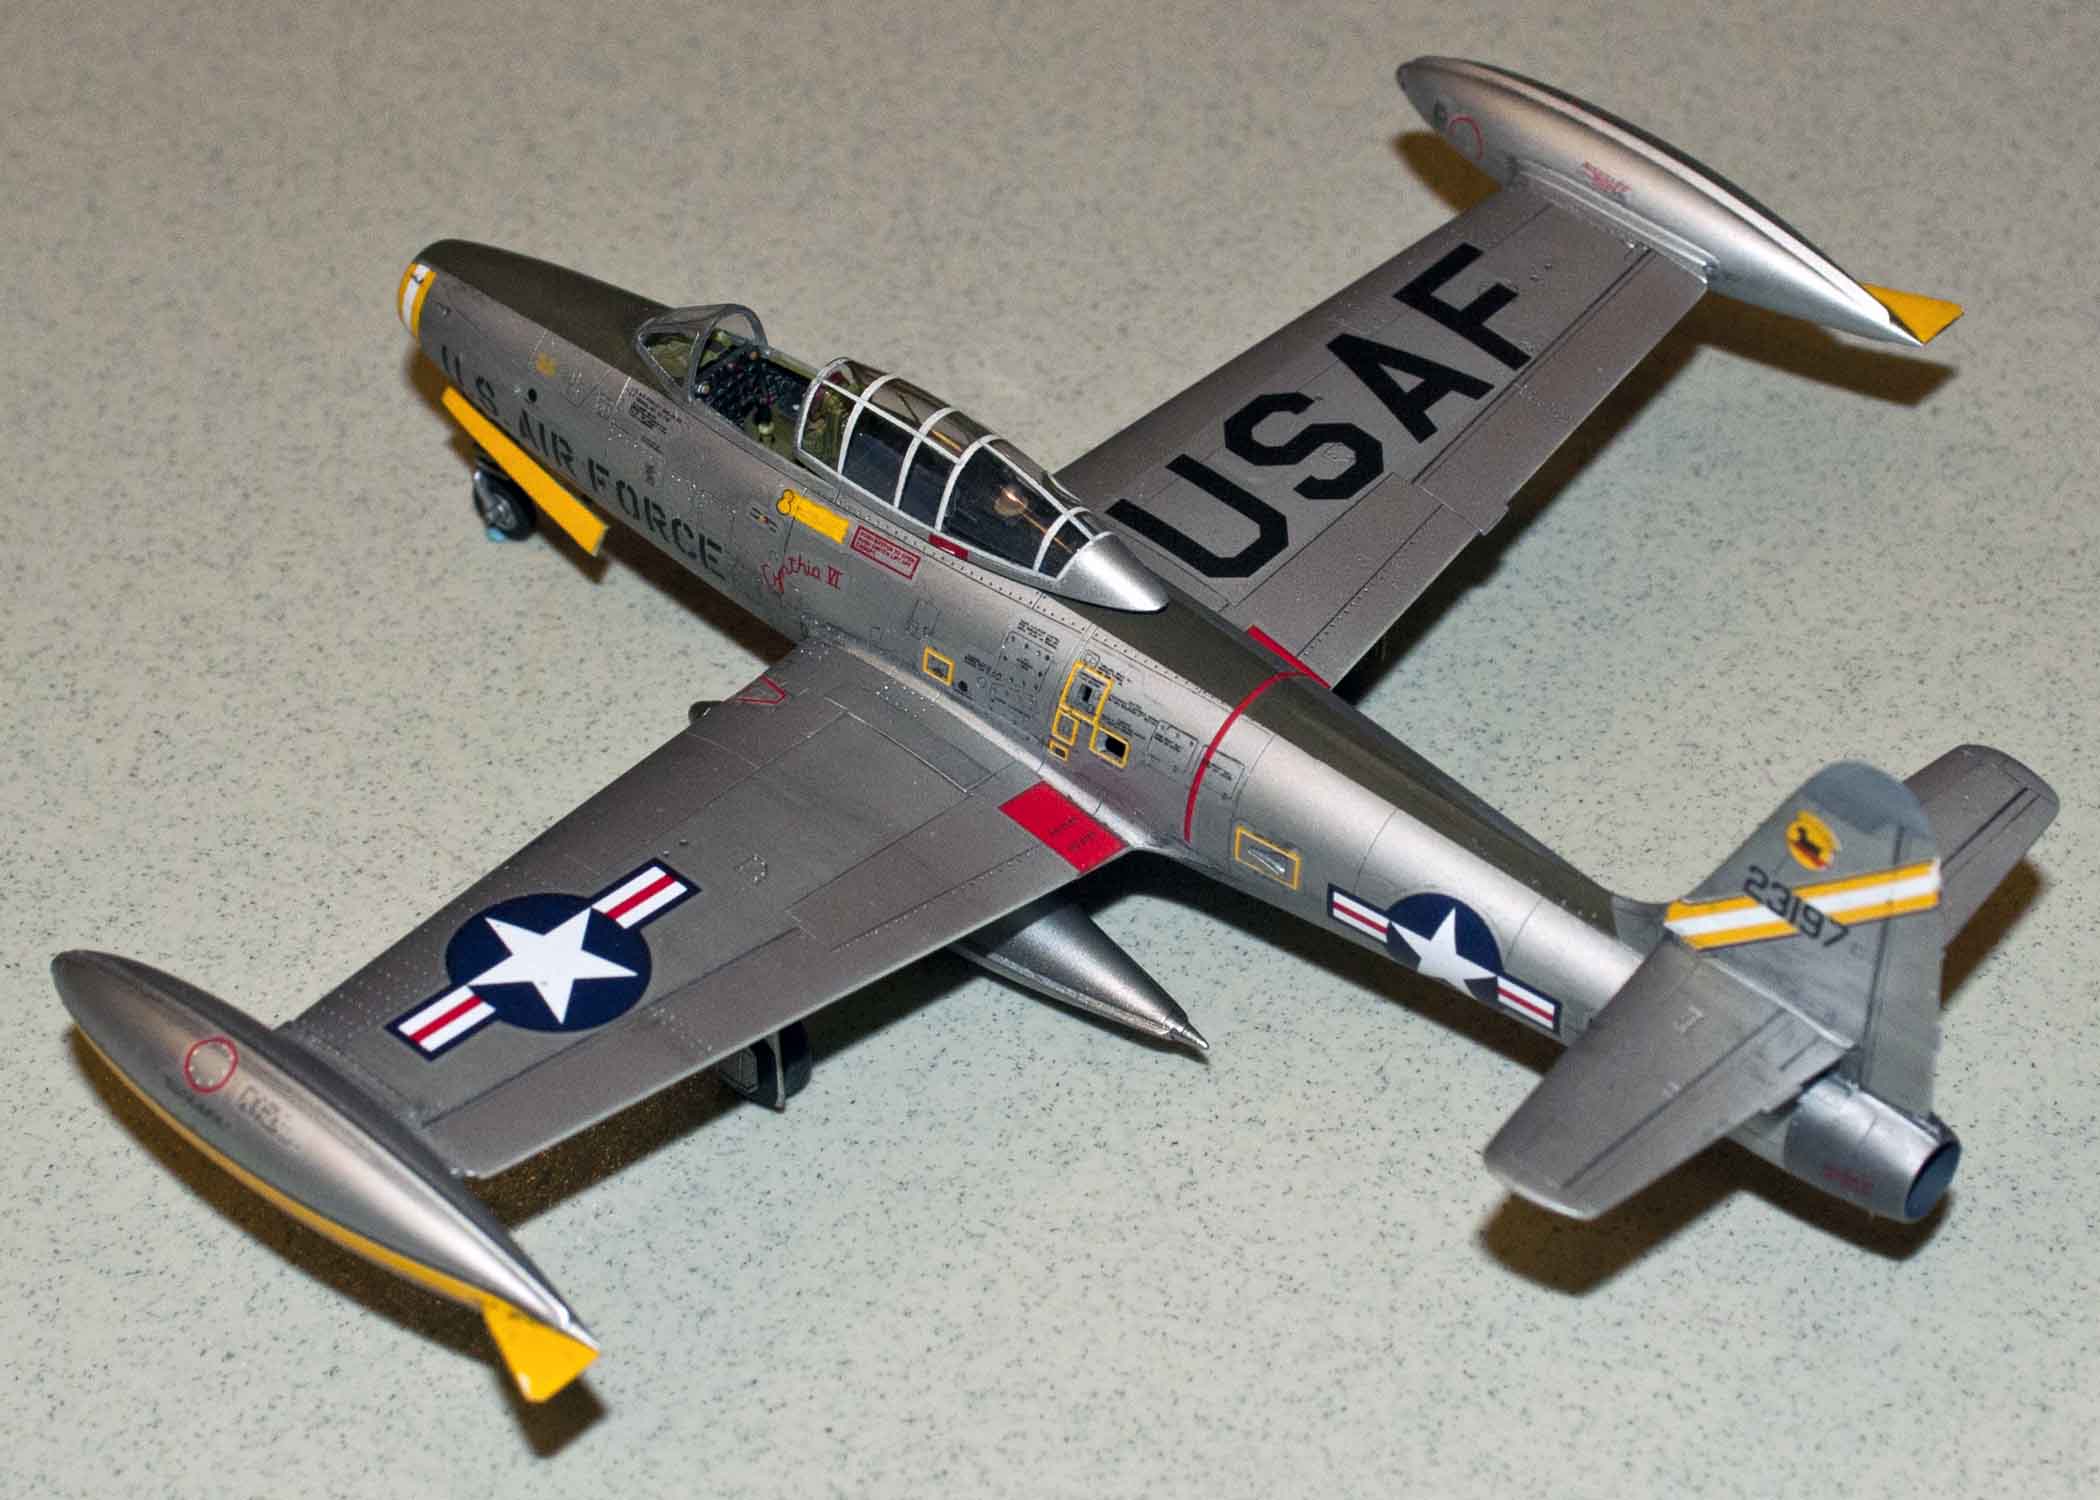
A-4E Skyhawk, 1/48th Hasegawa by Ed Mate
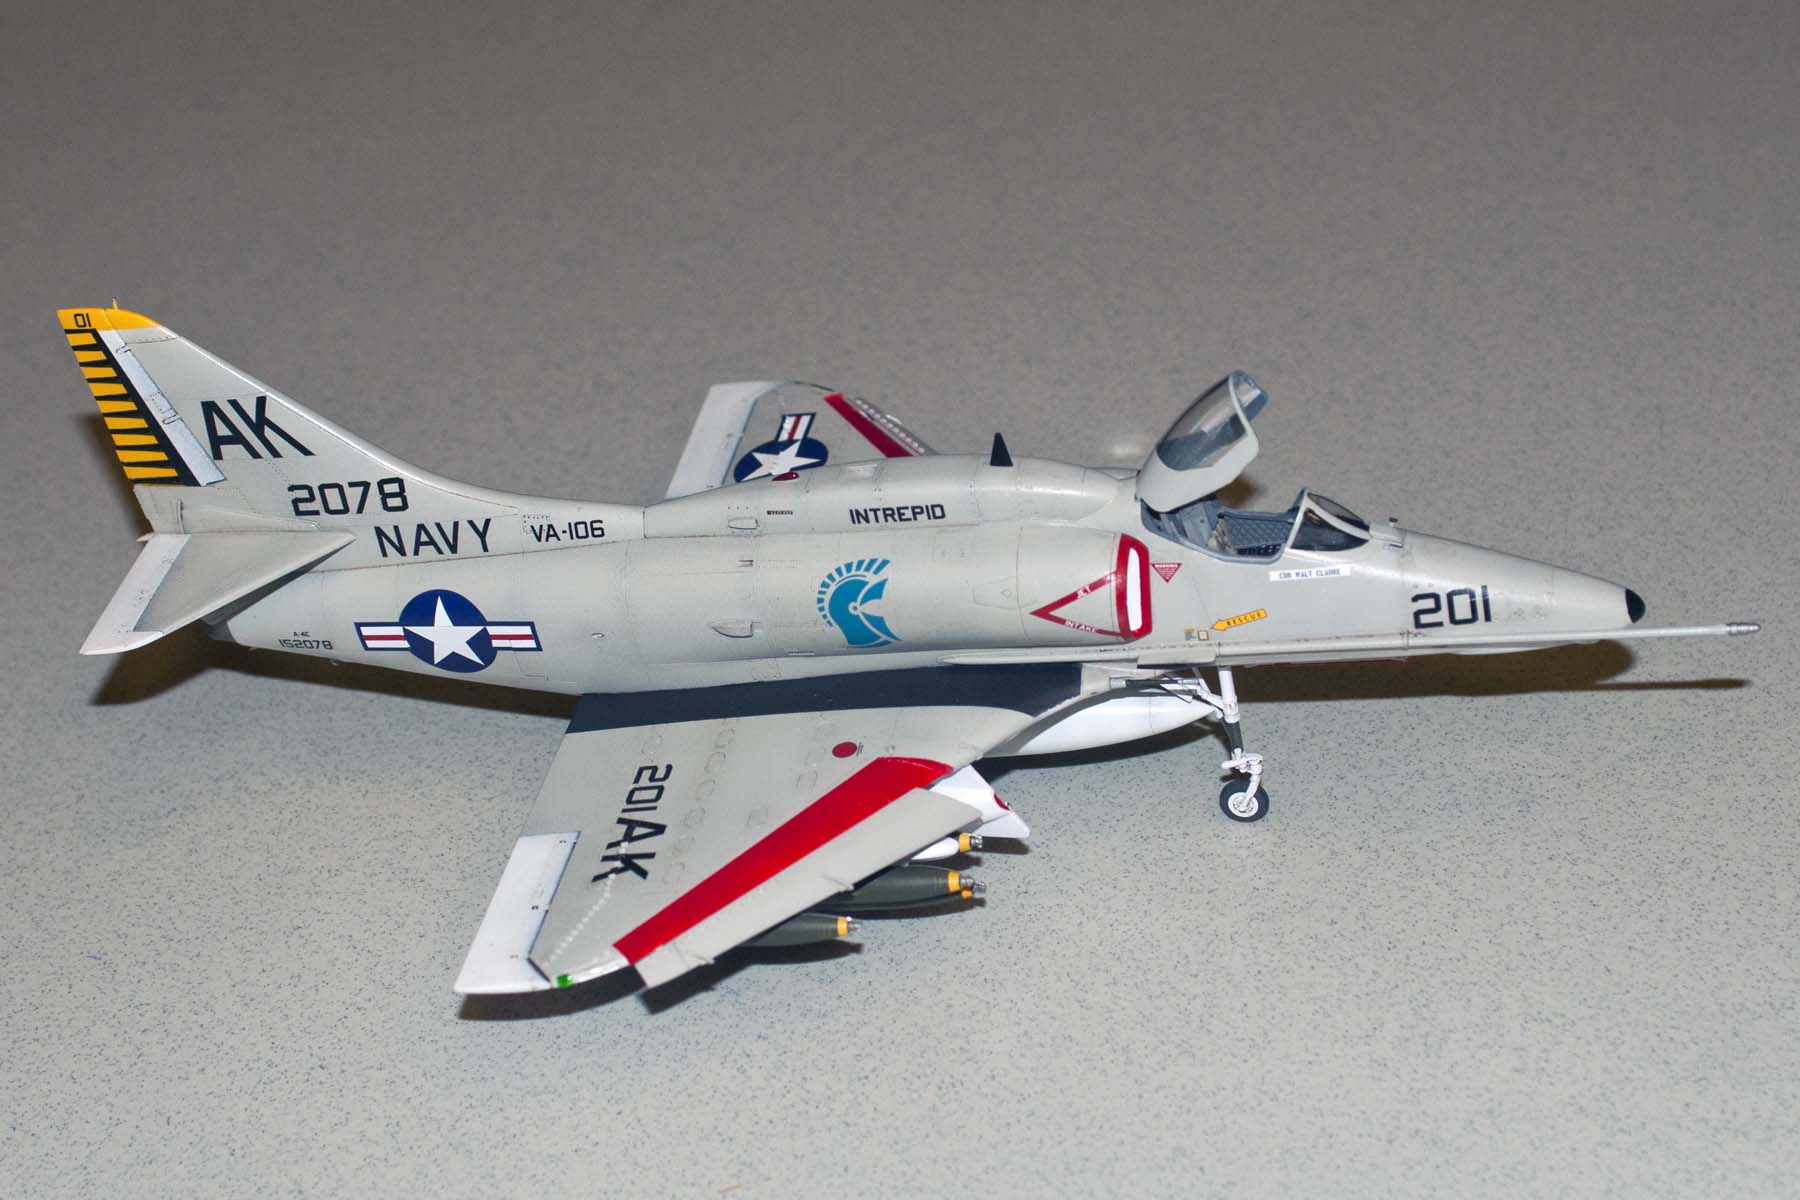
VA-106 USS Intrepid Tonkin Gulf Oct 1968
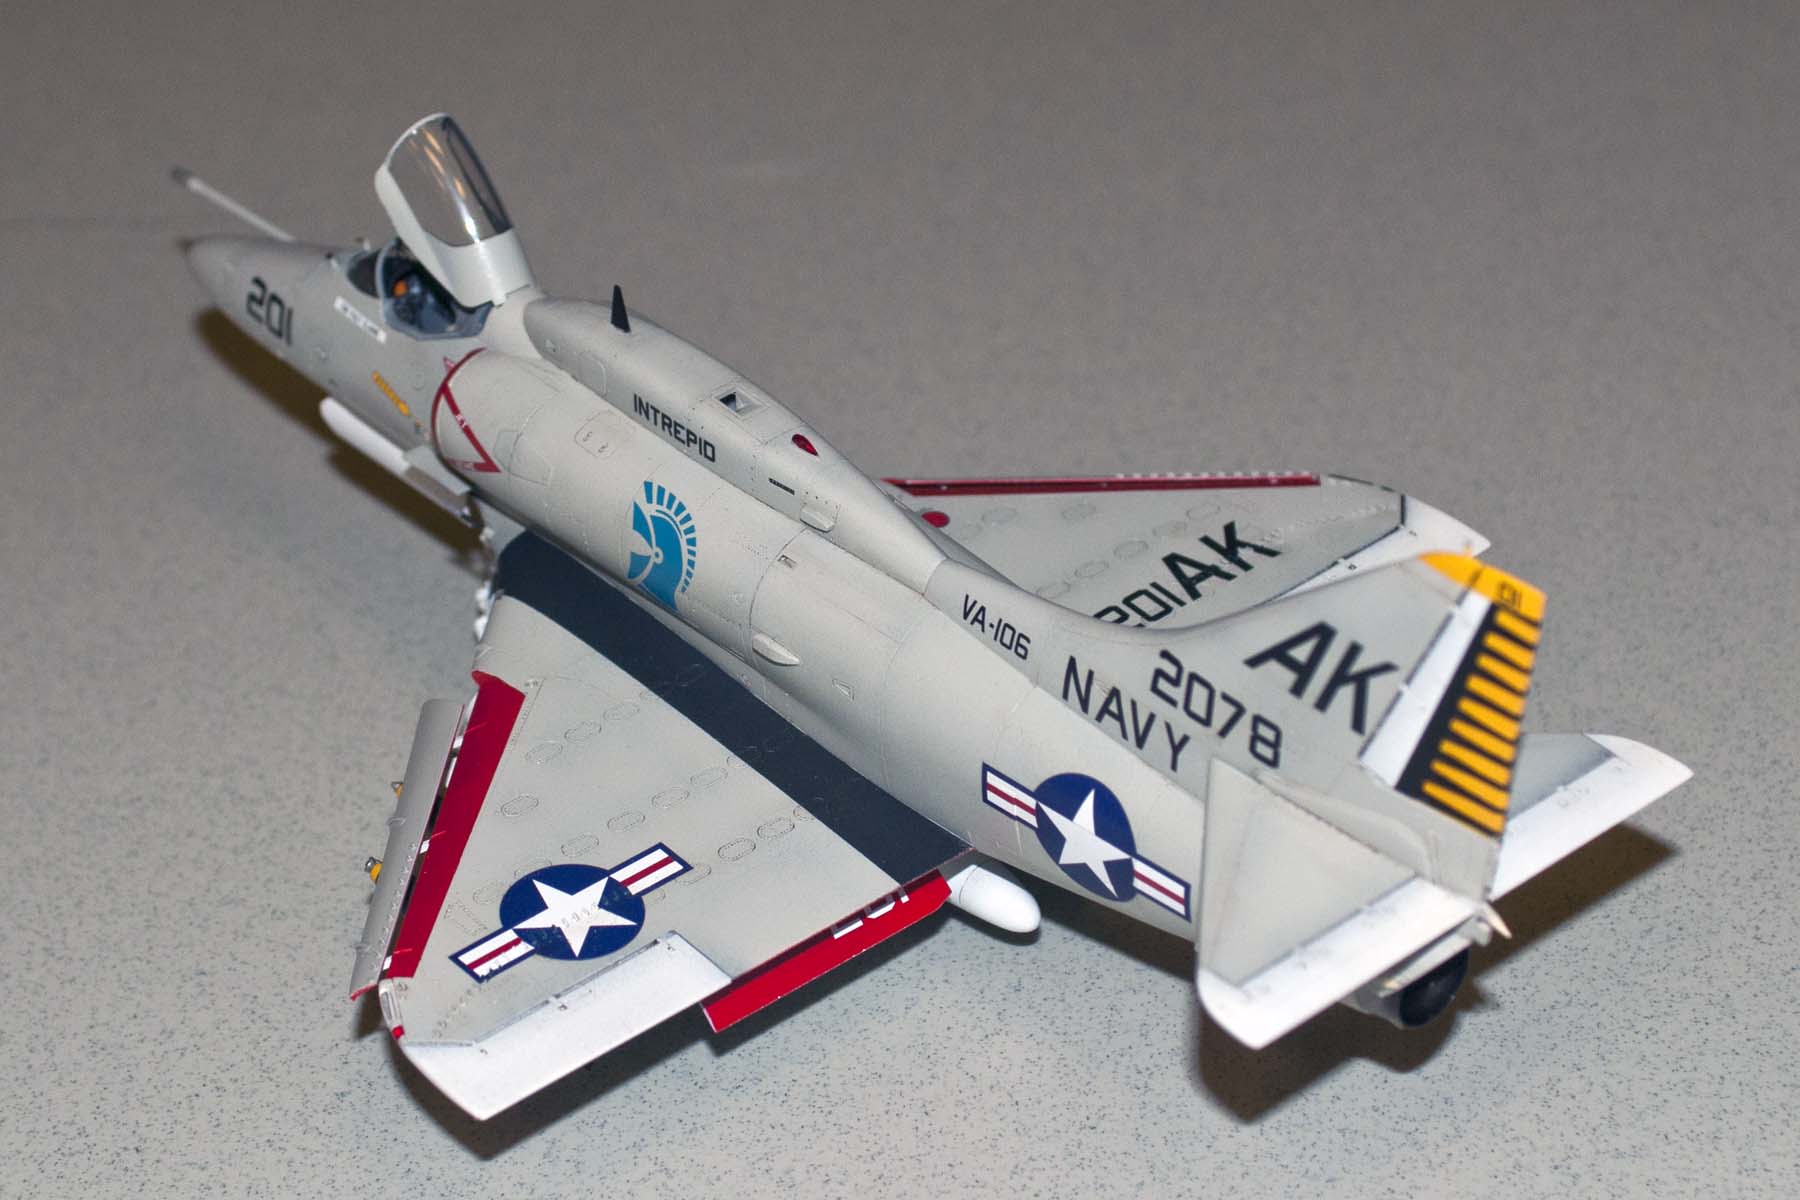
ModelMaster paints, Afterburner Decals, Aires ejection seat, G-Factor landing gear
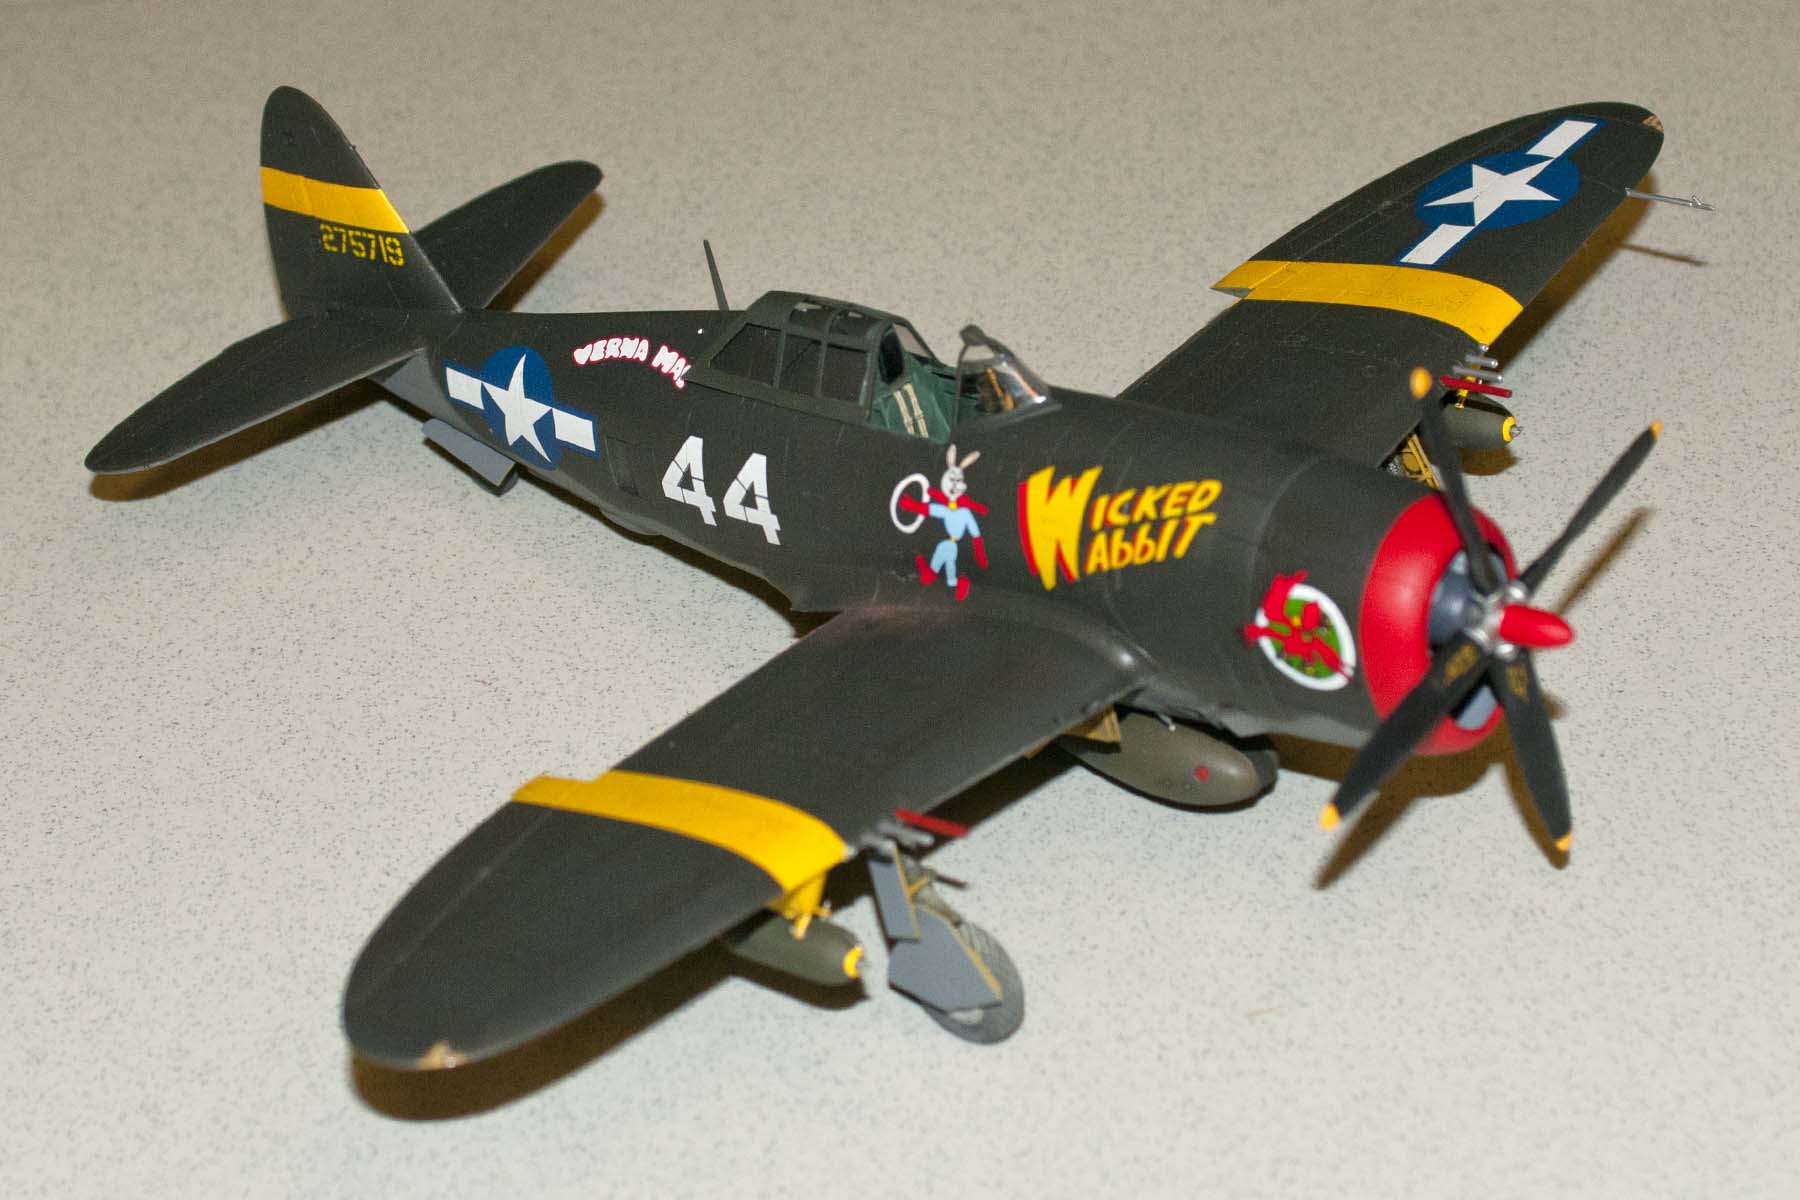
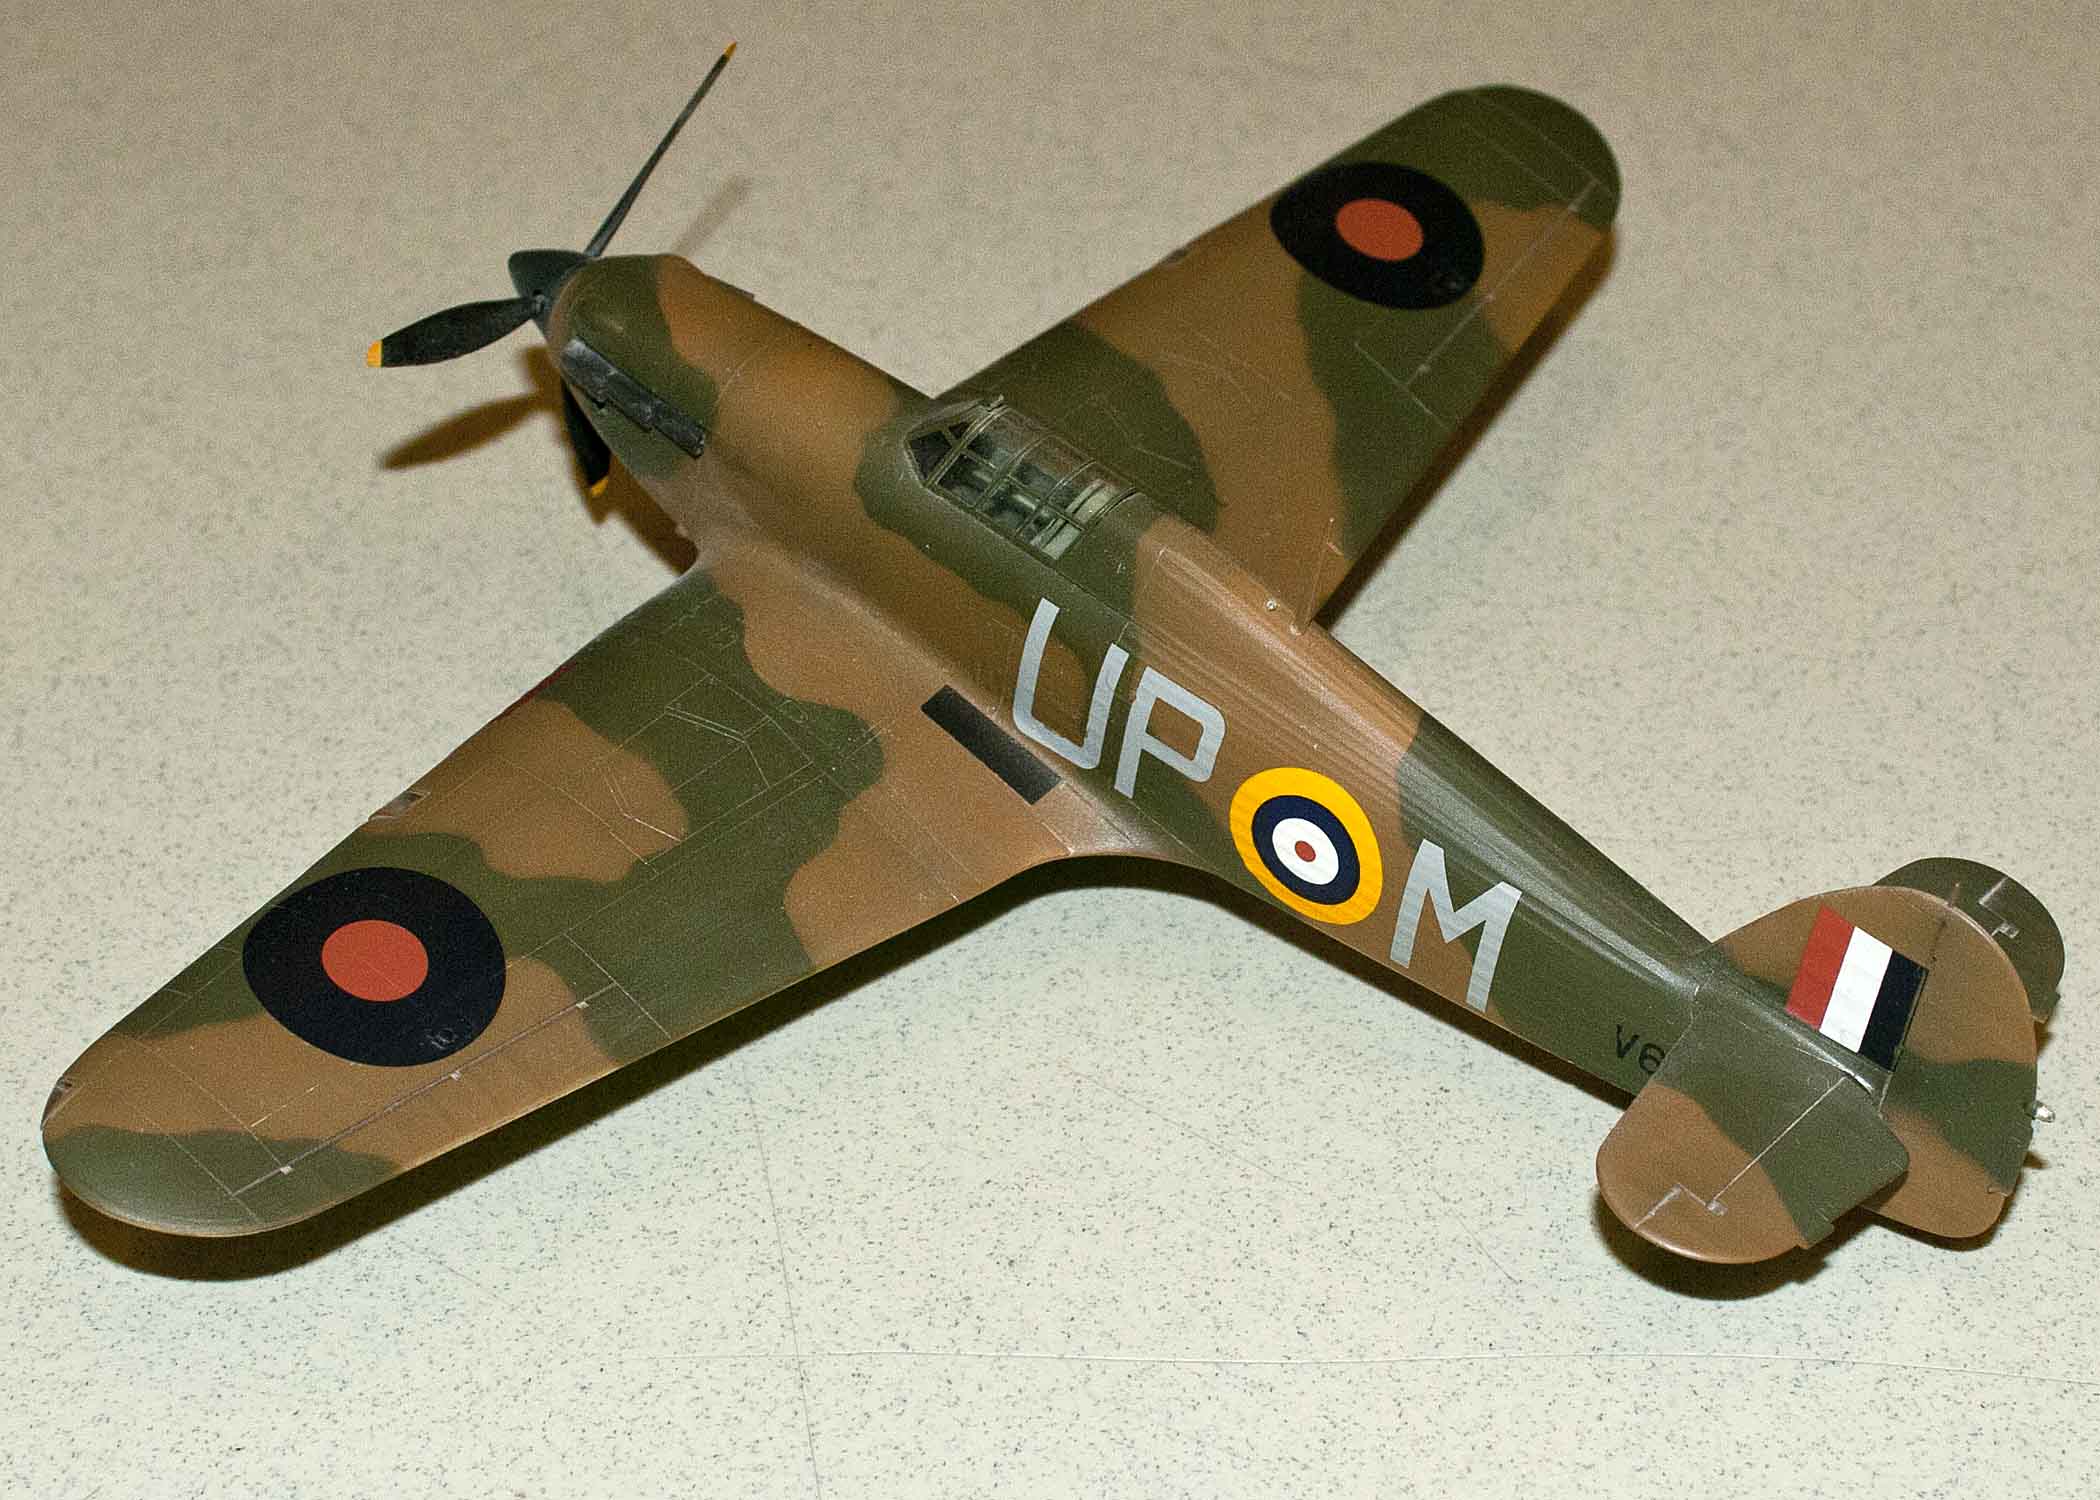
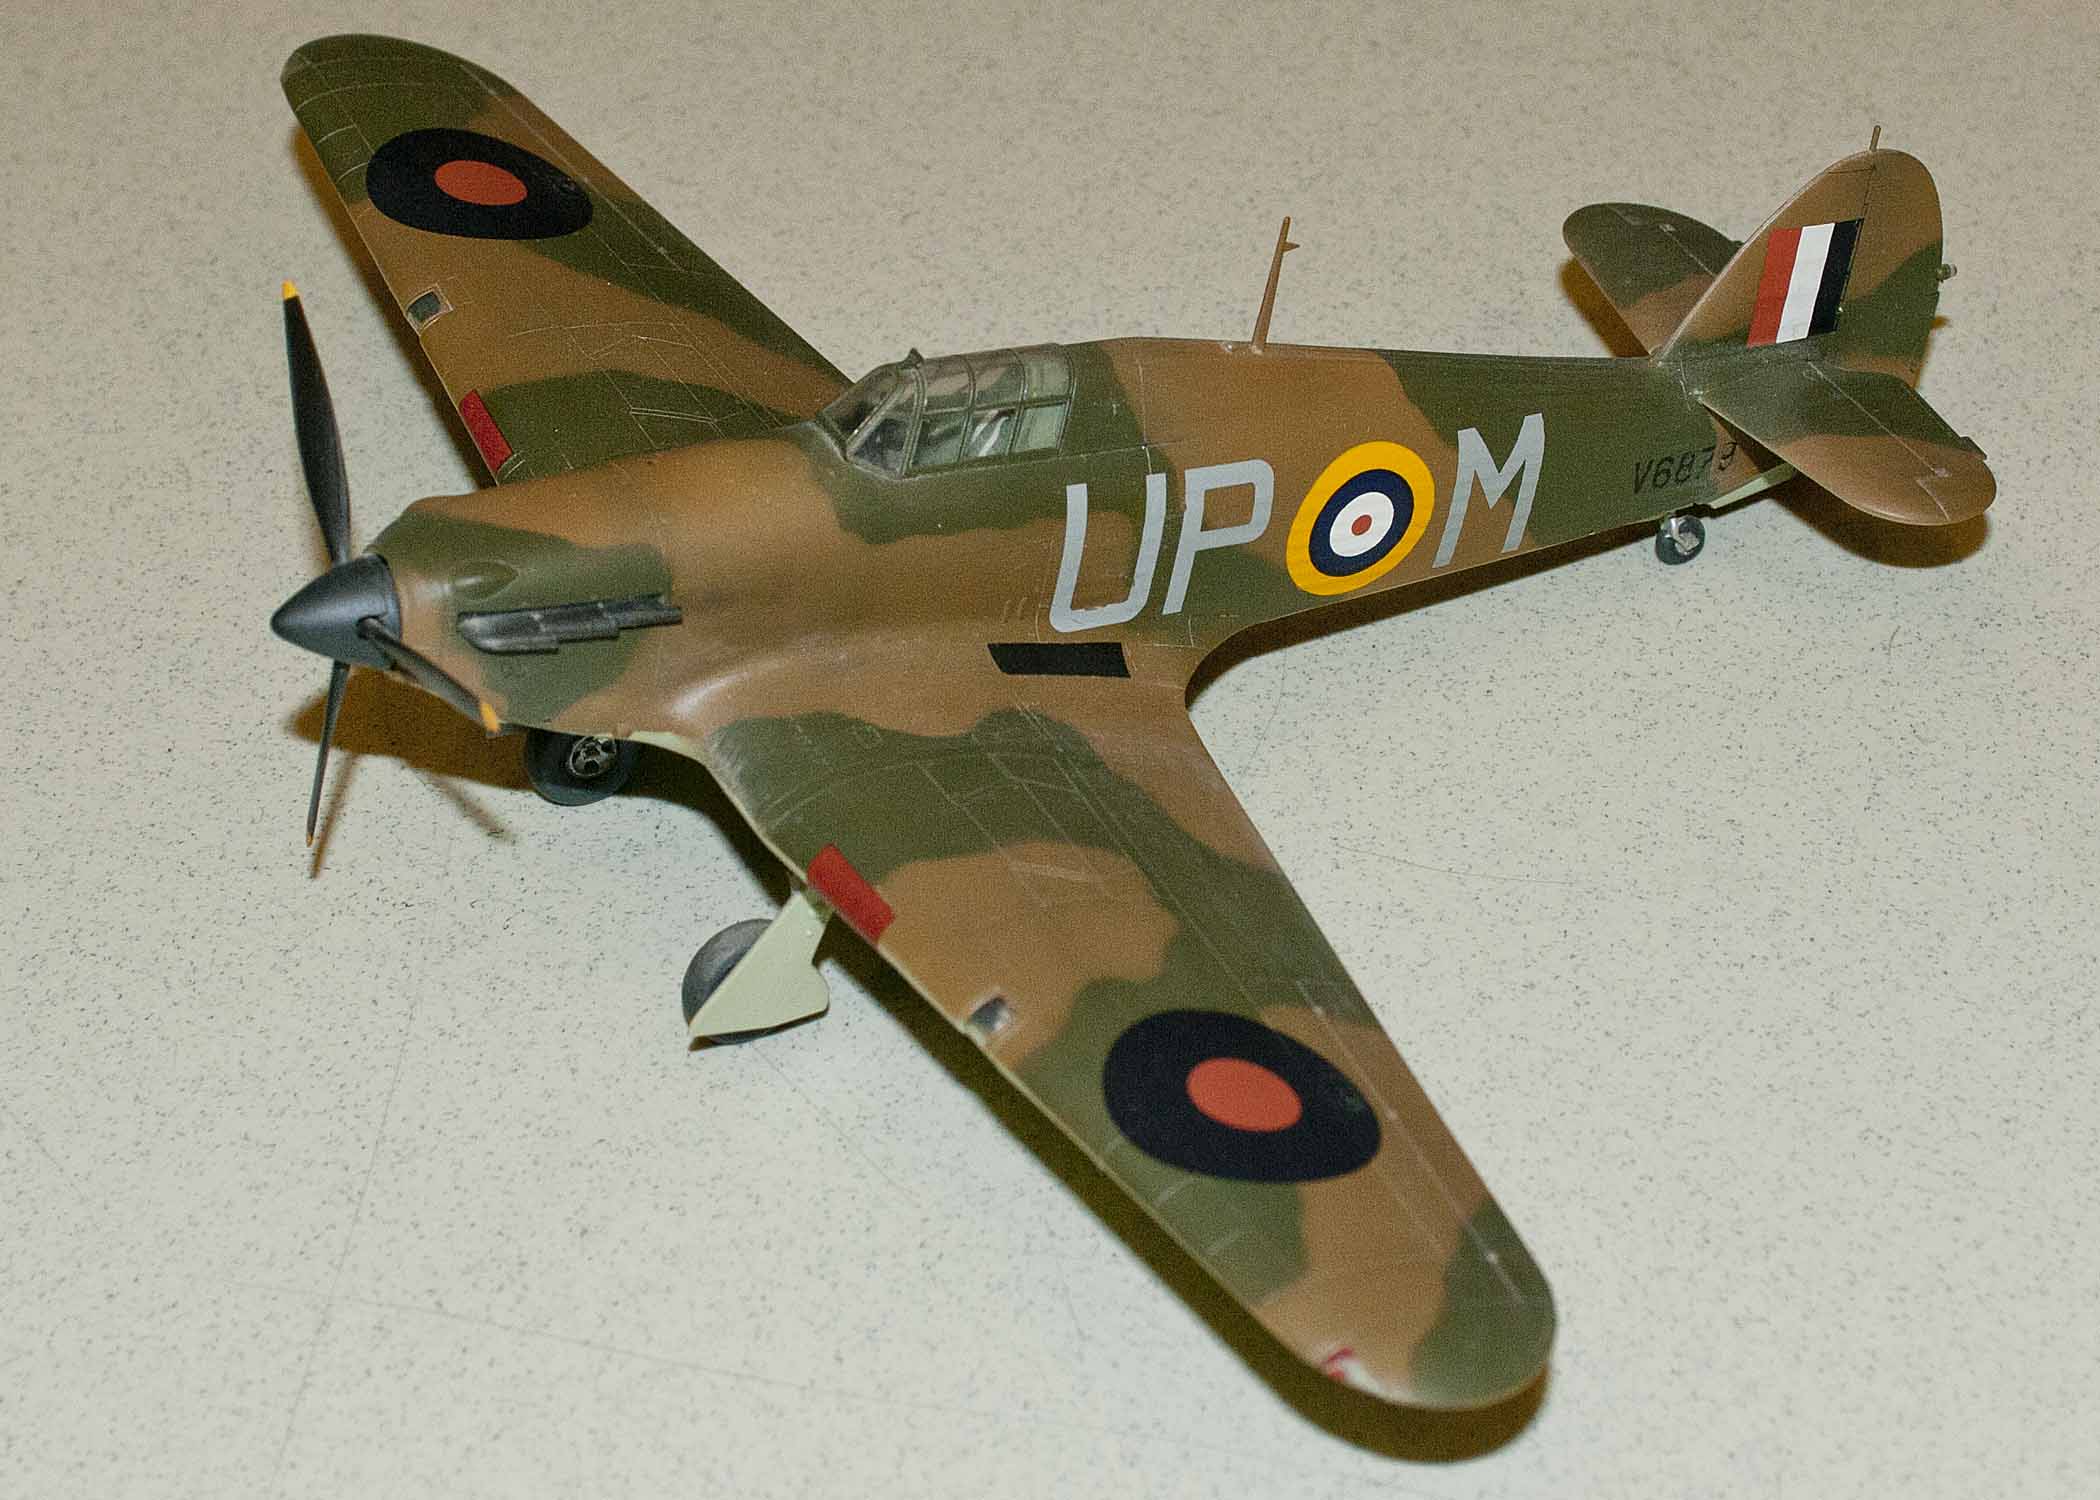
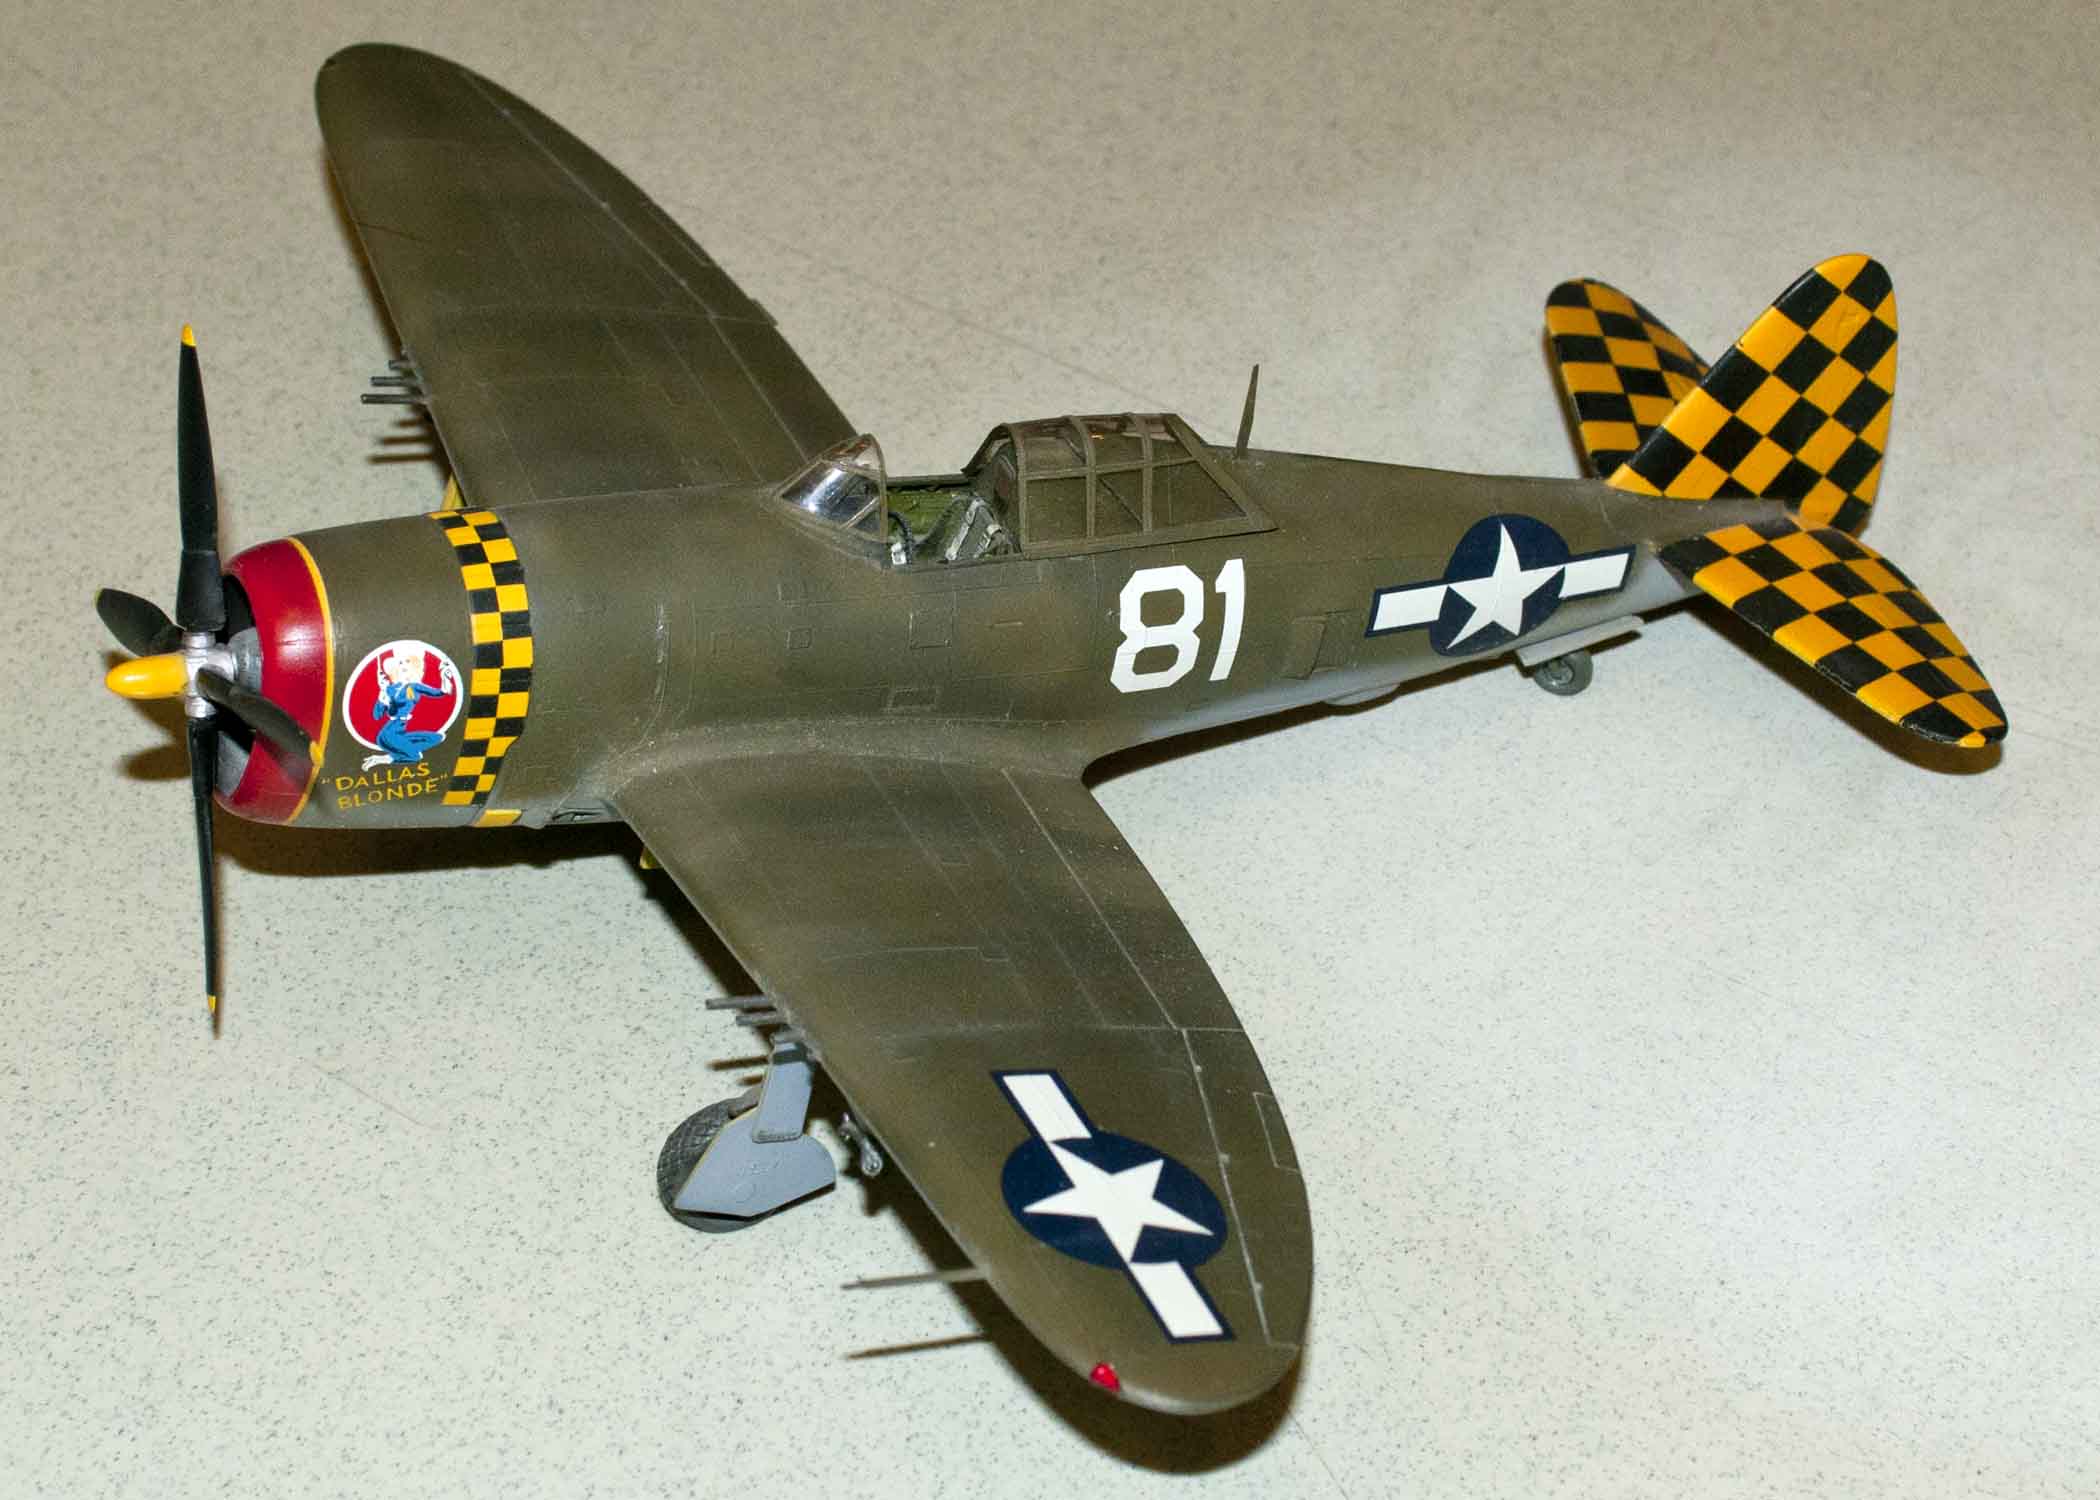
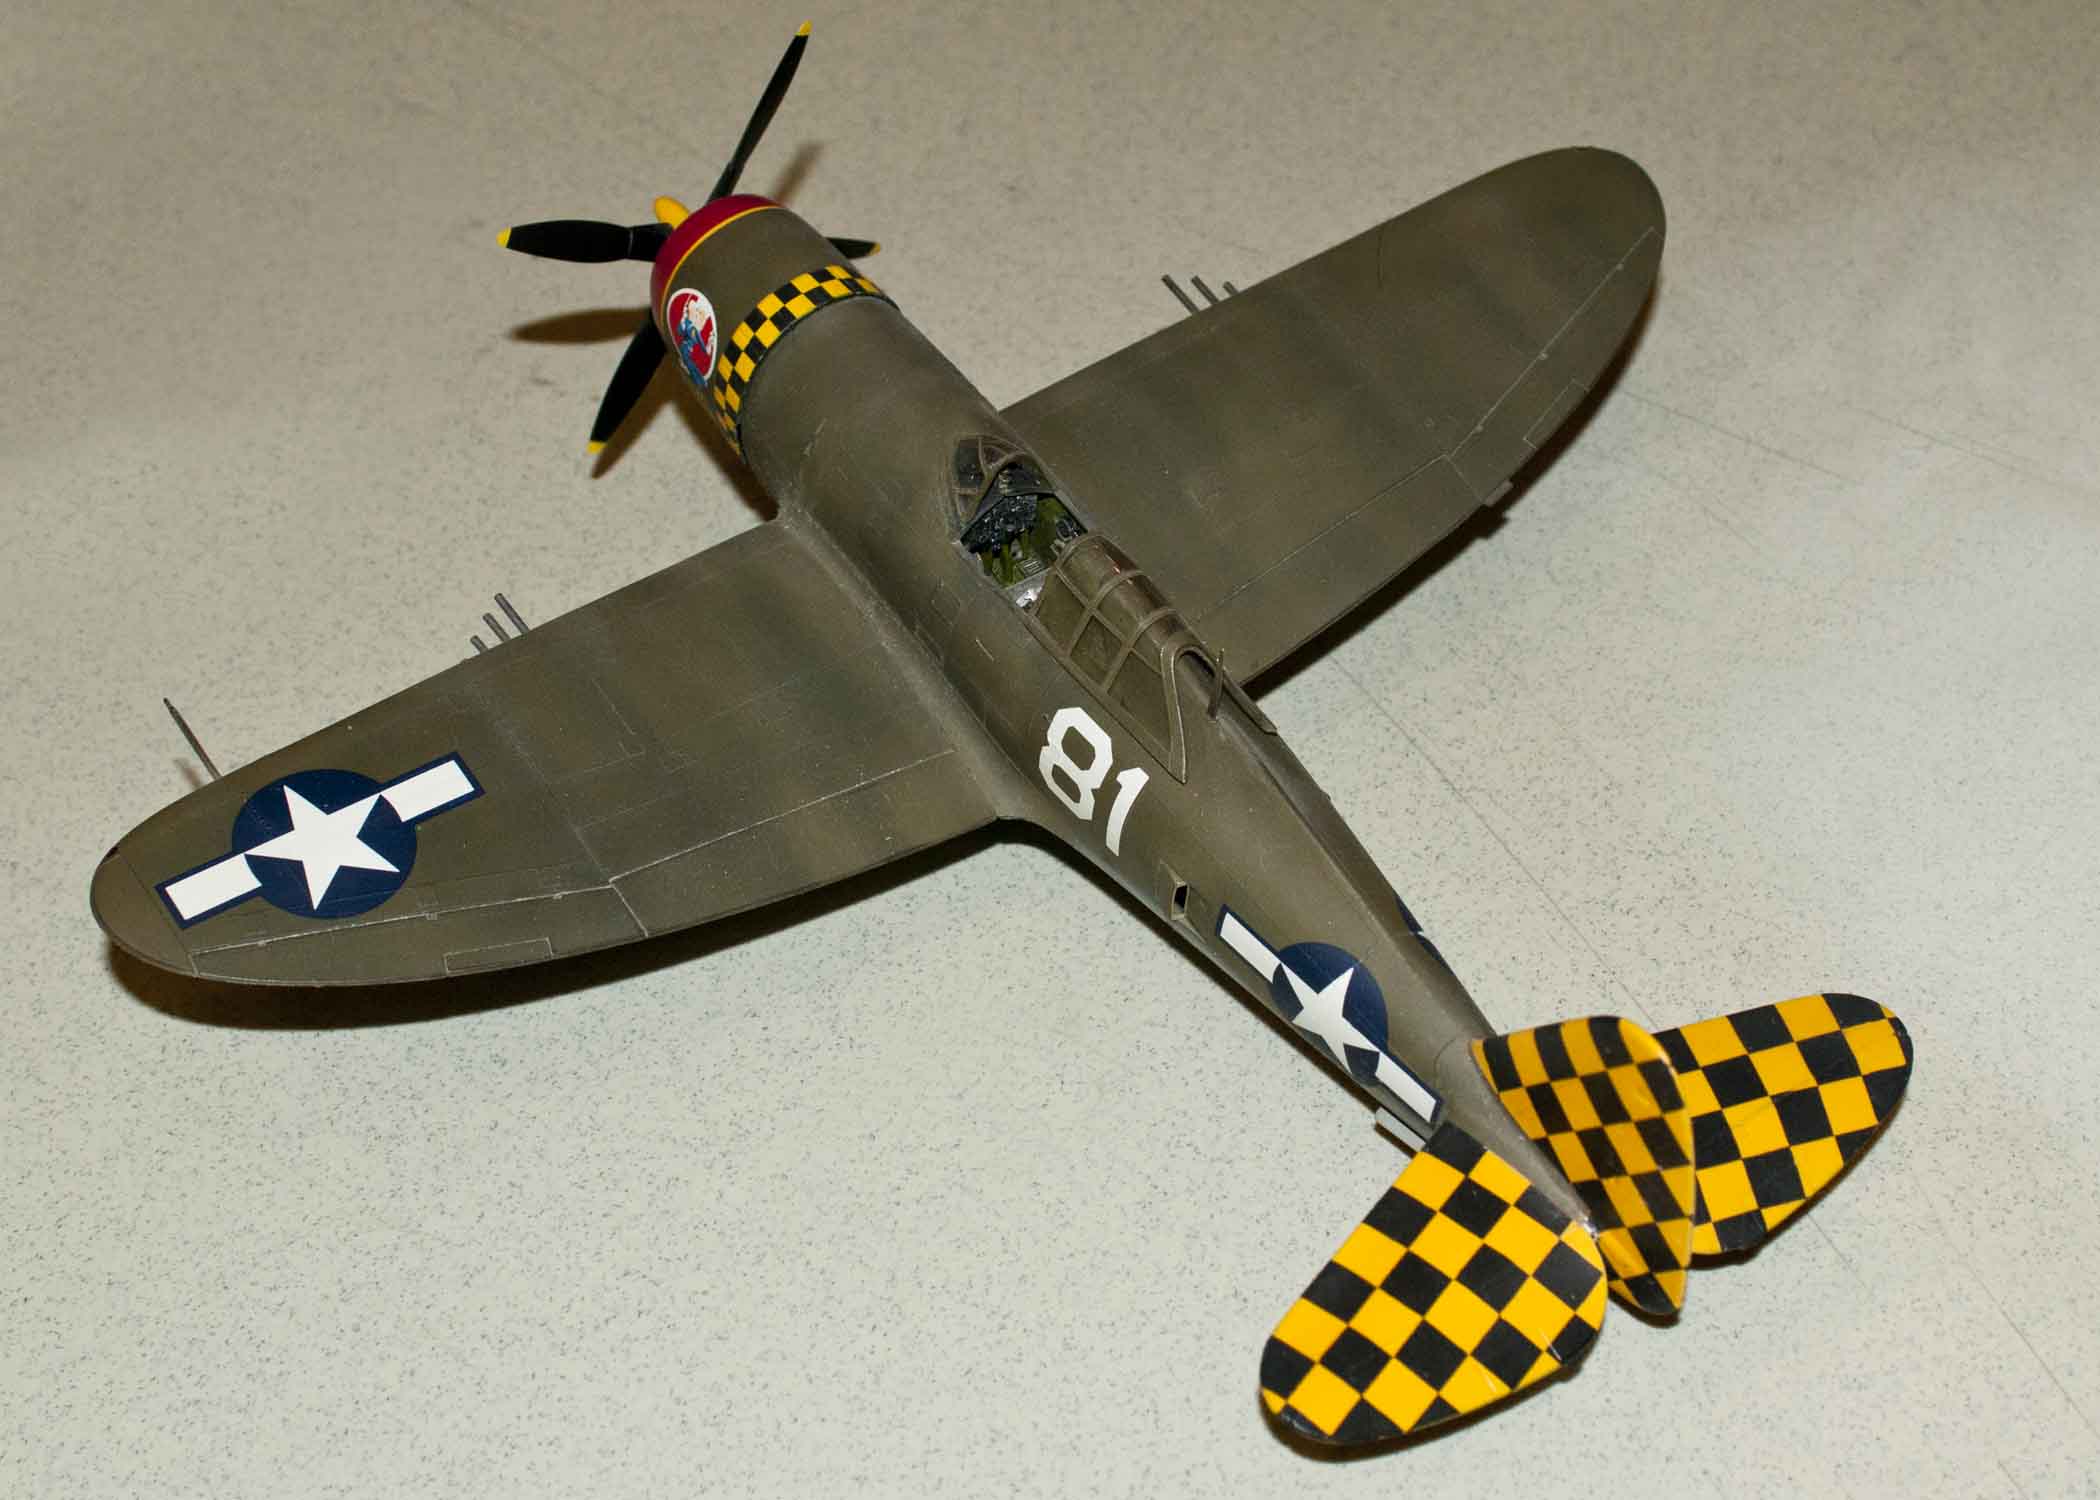
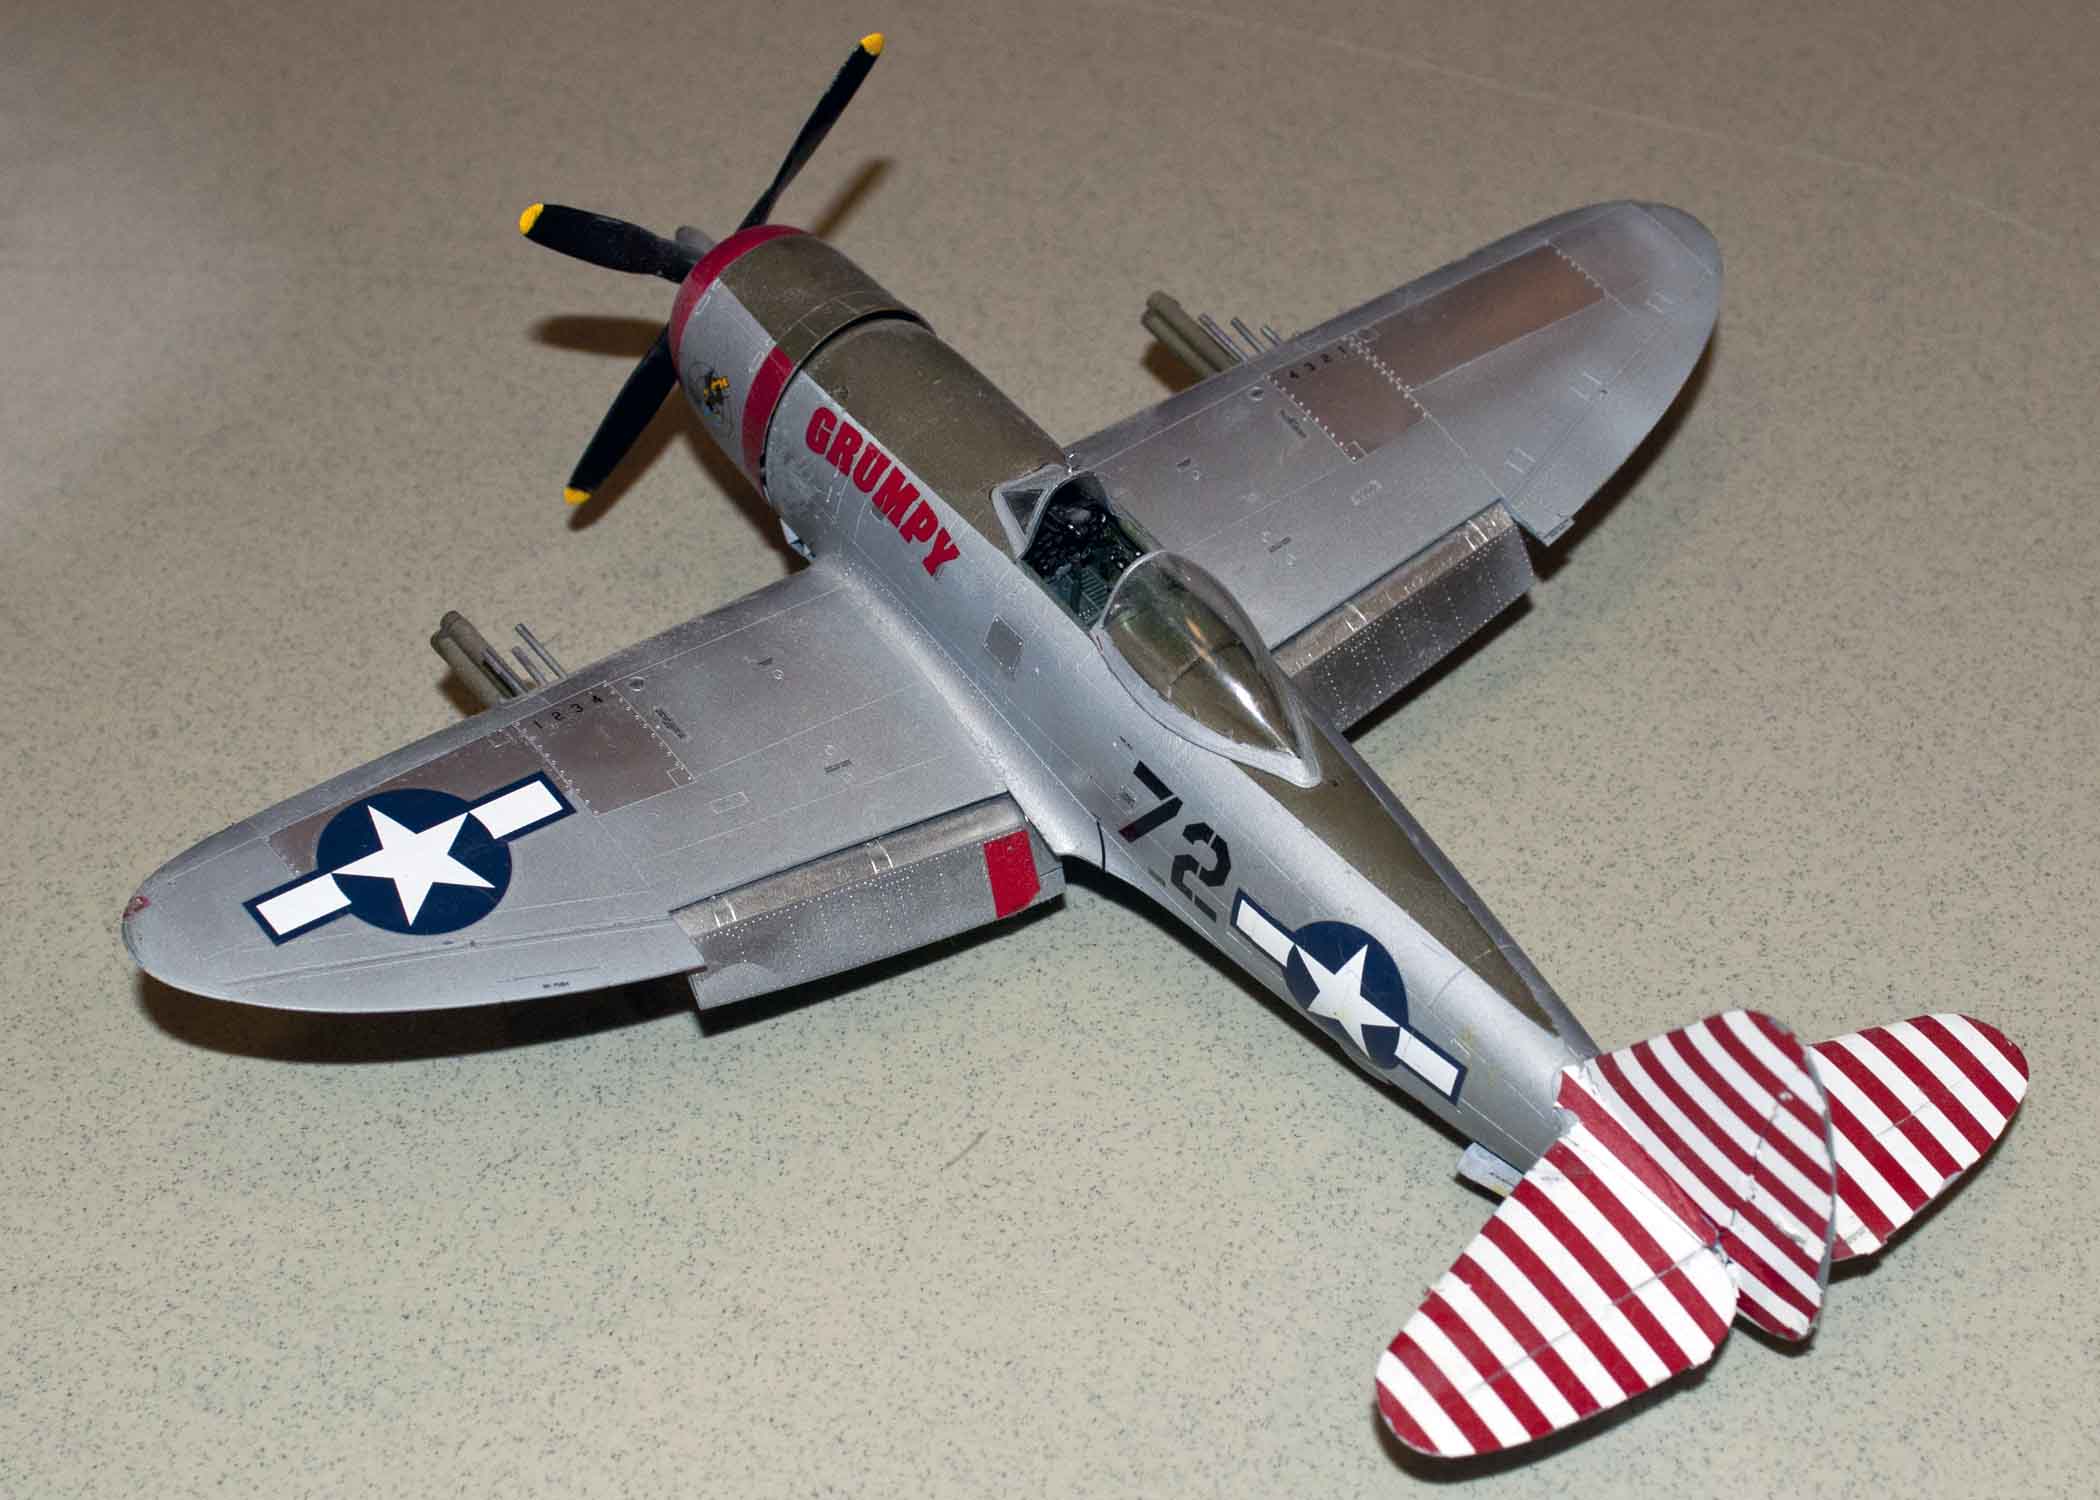
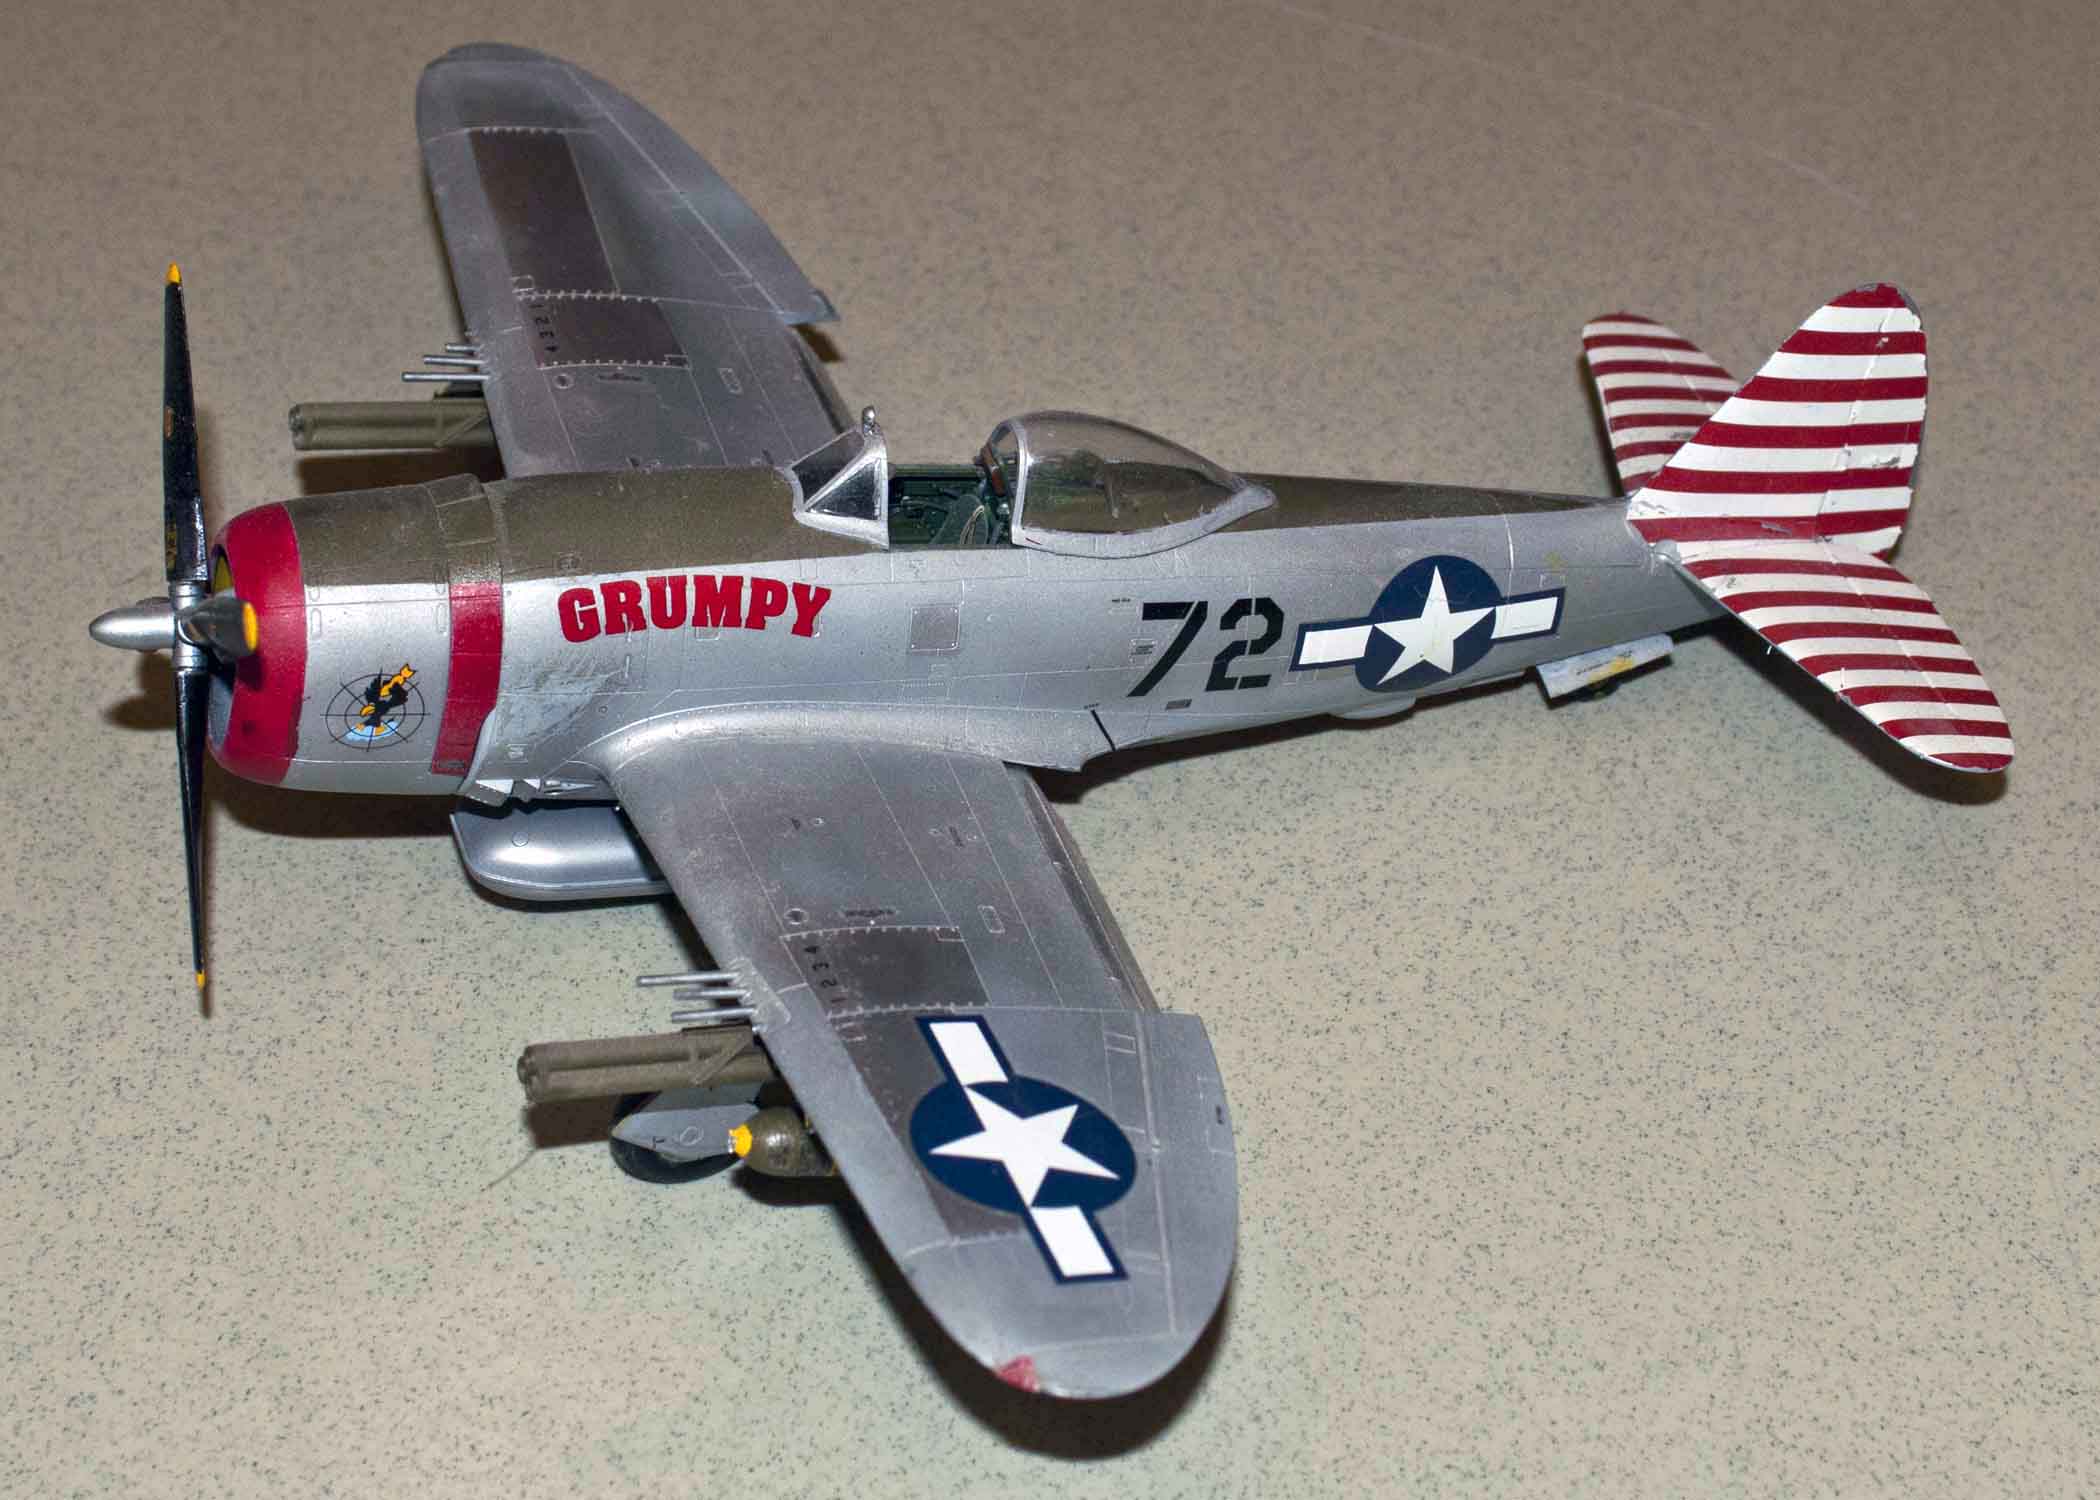
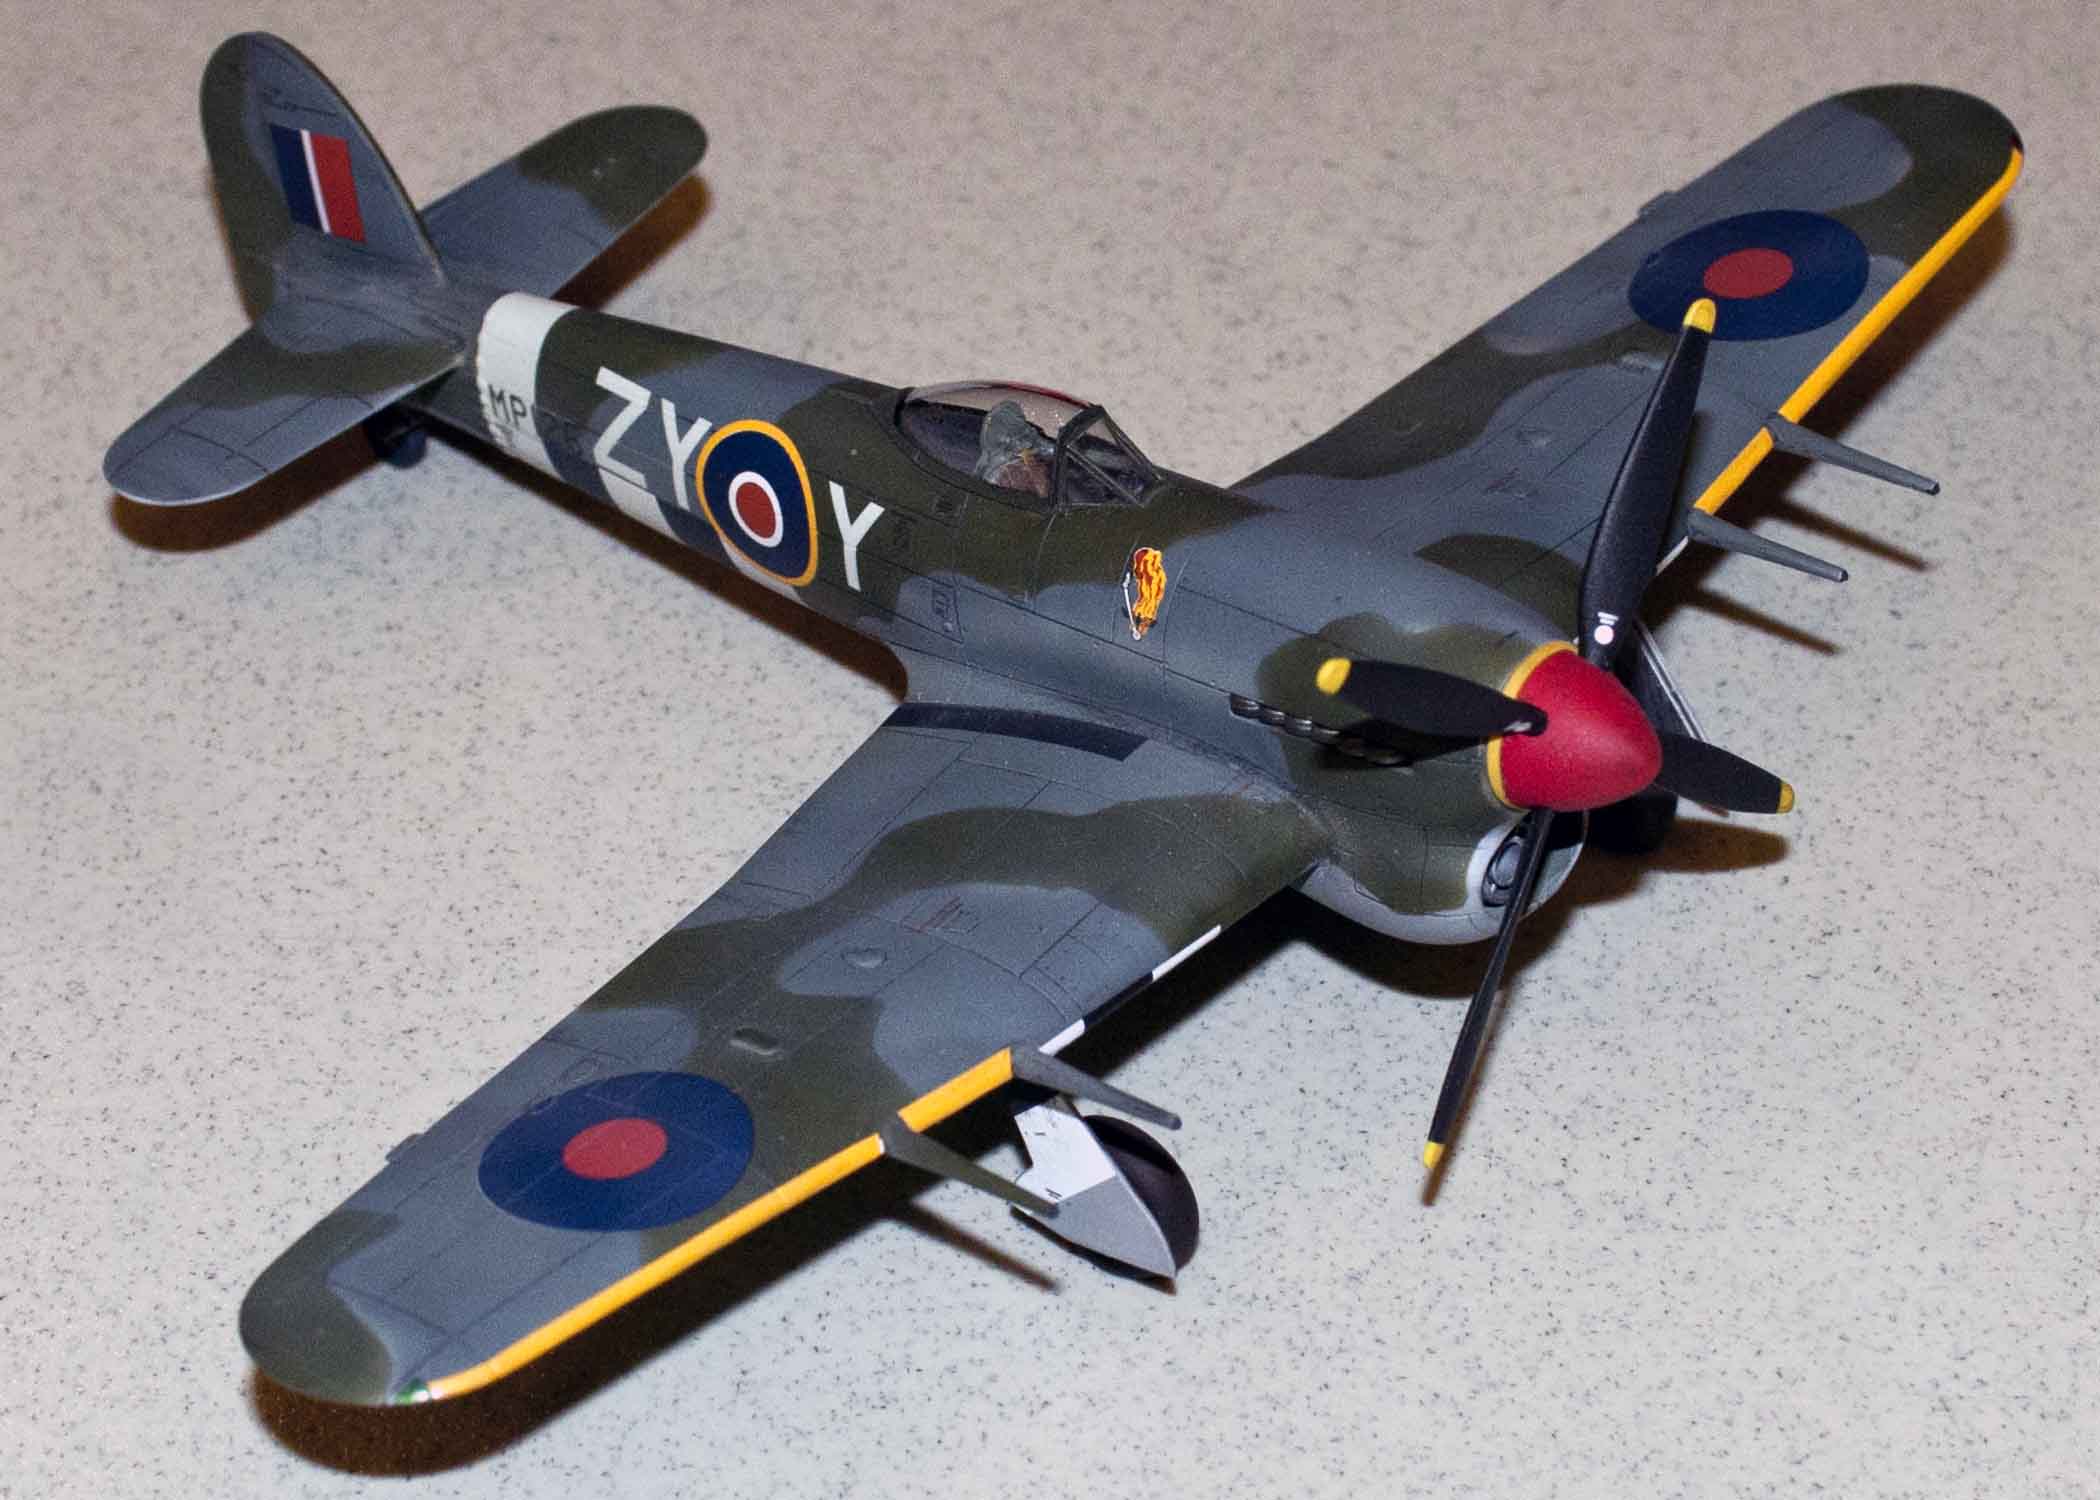
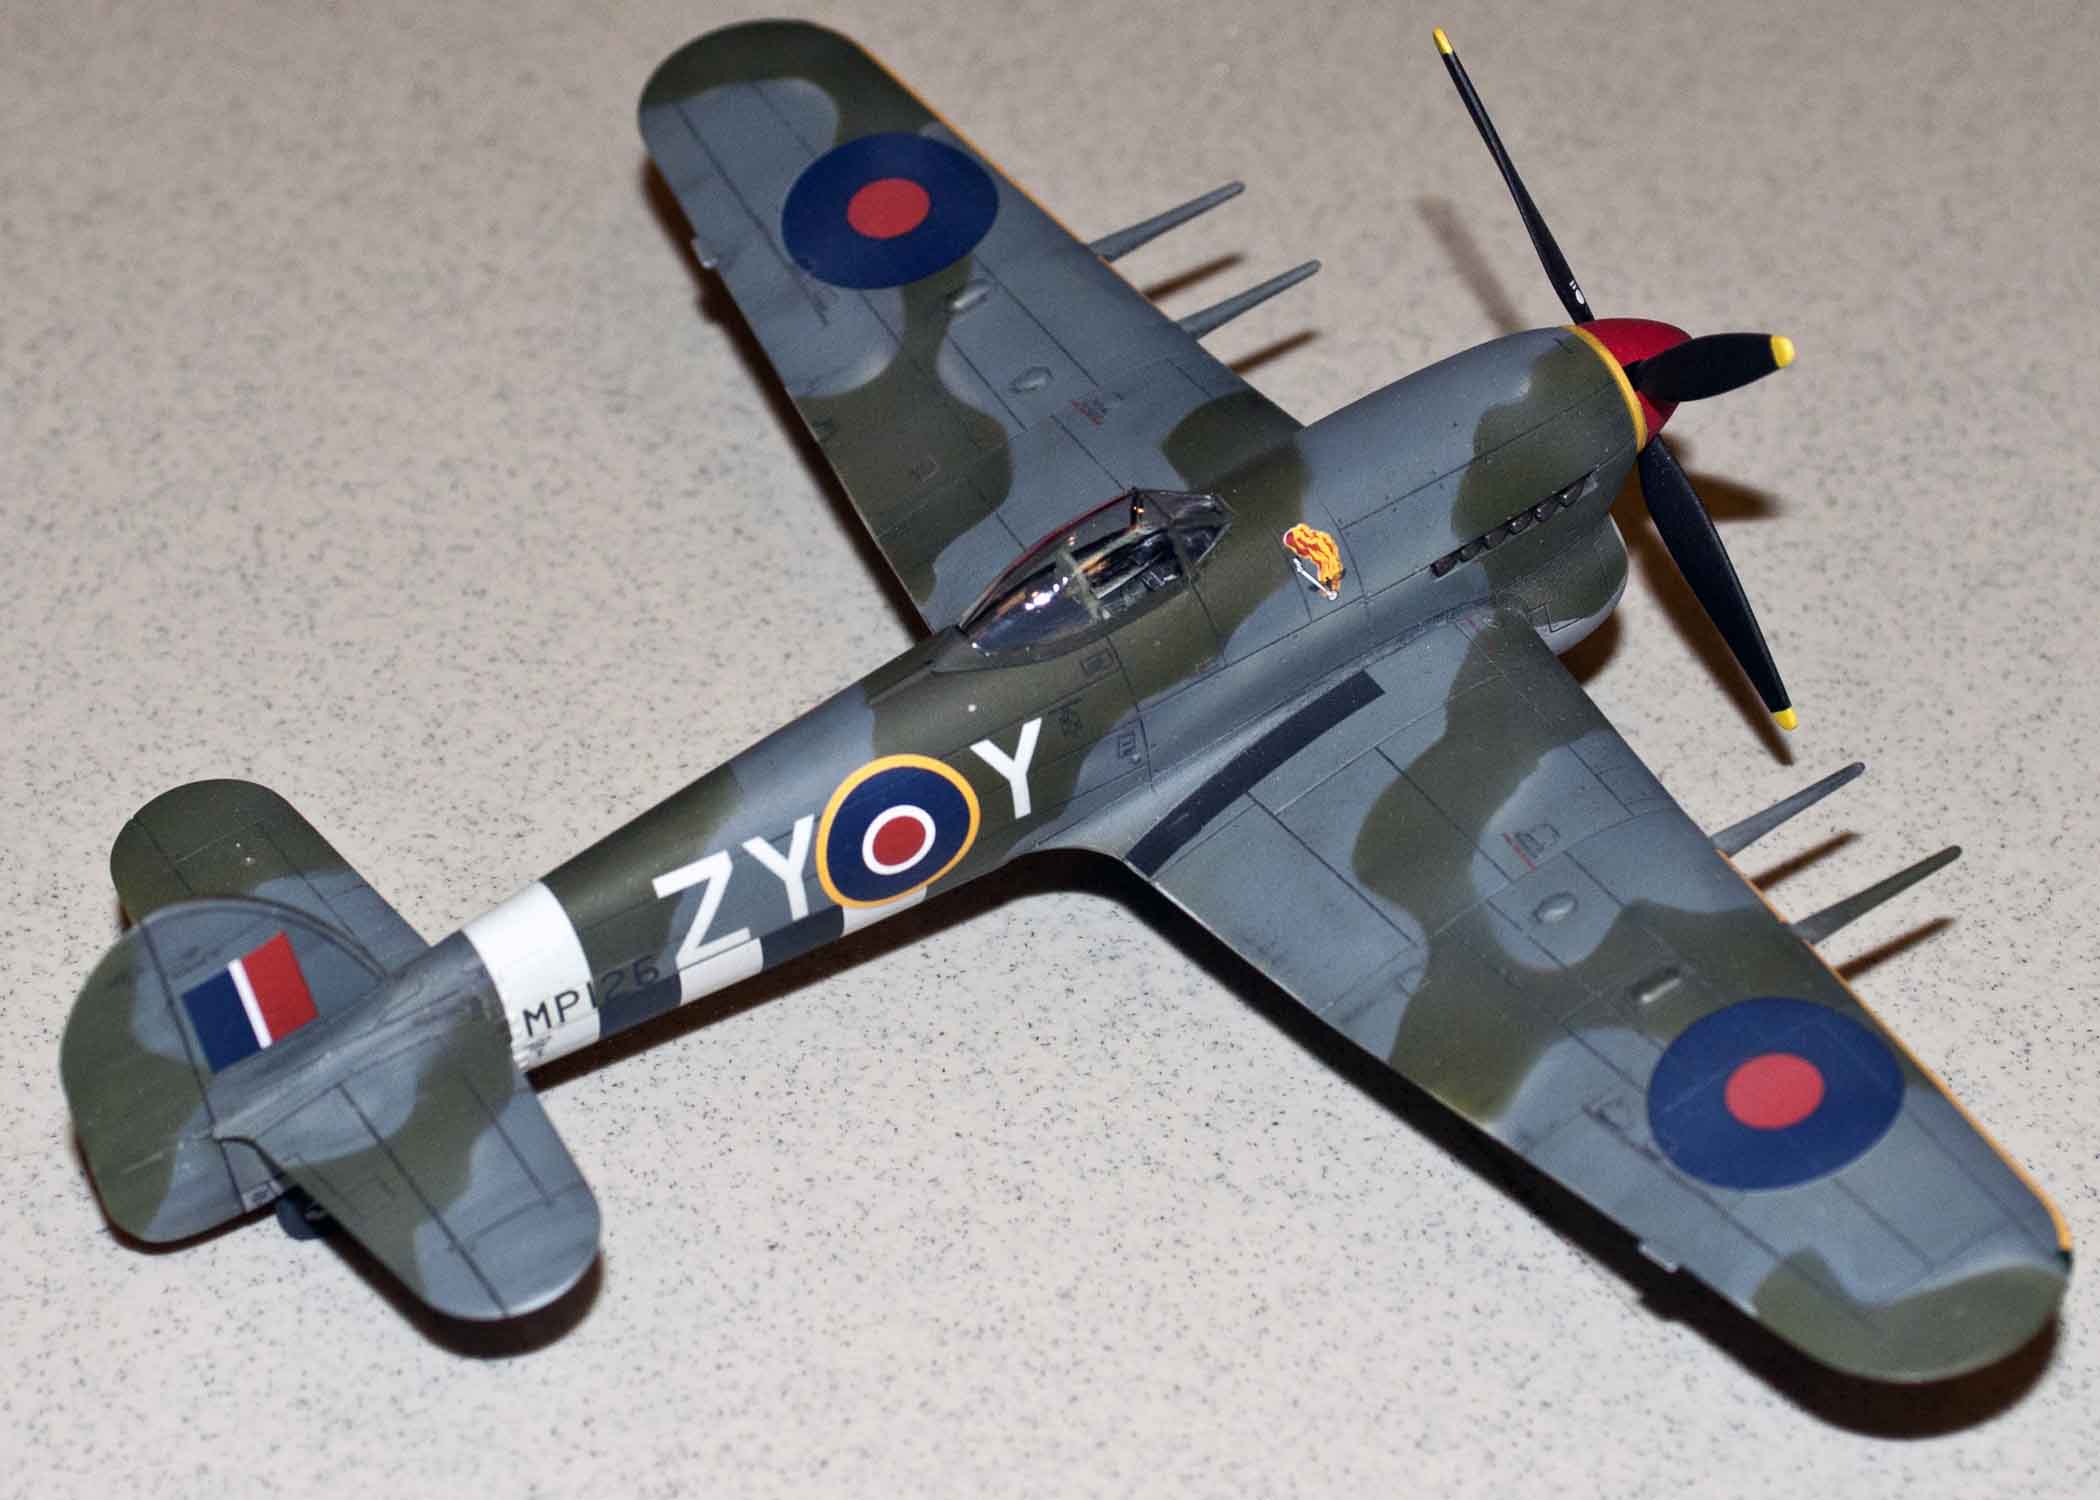
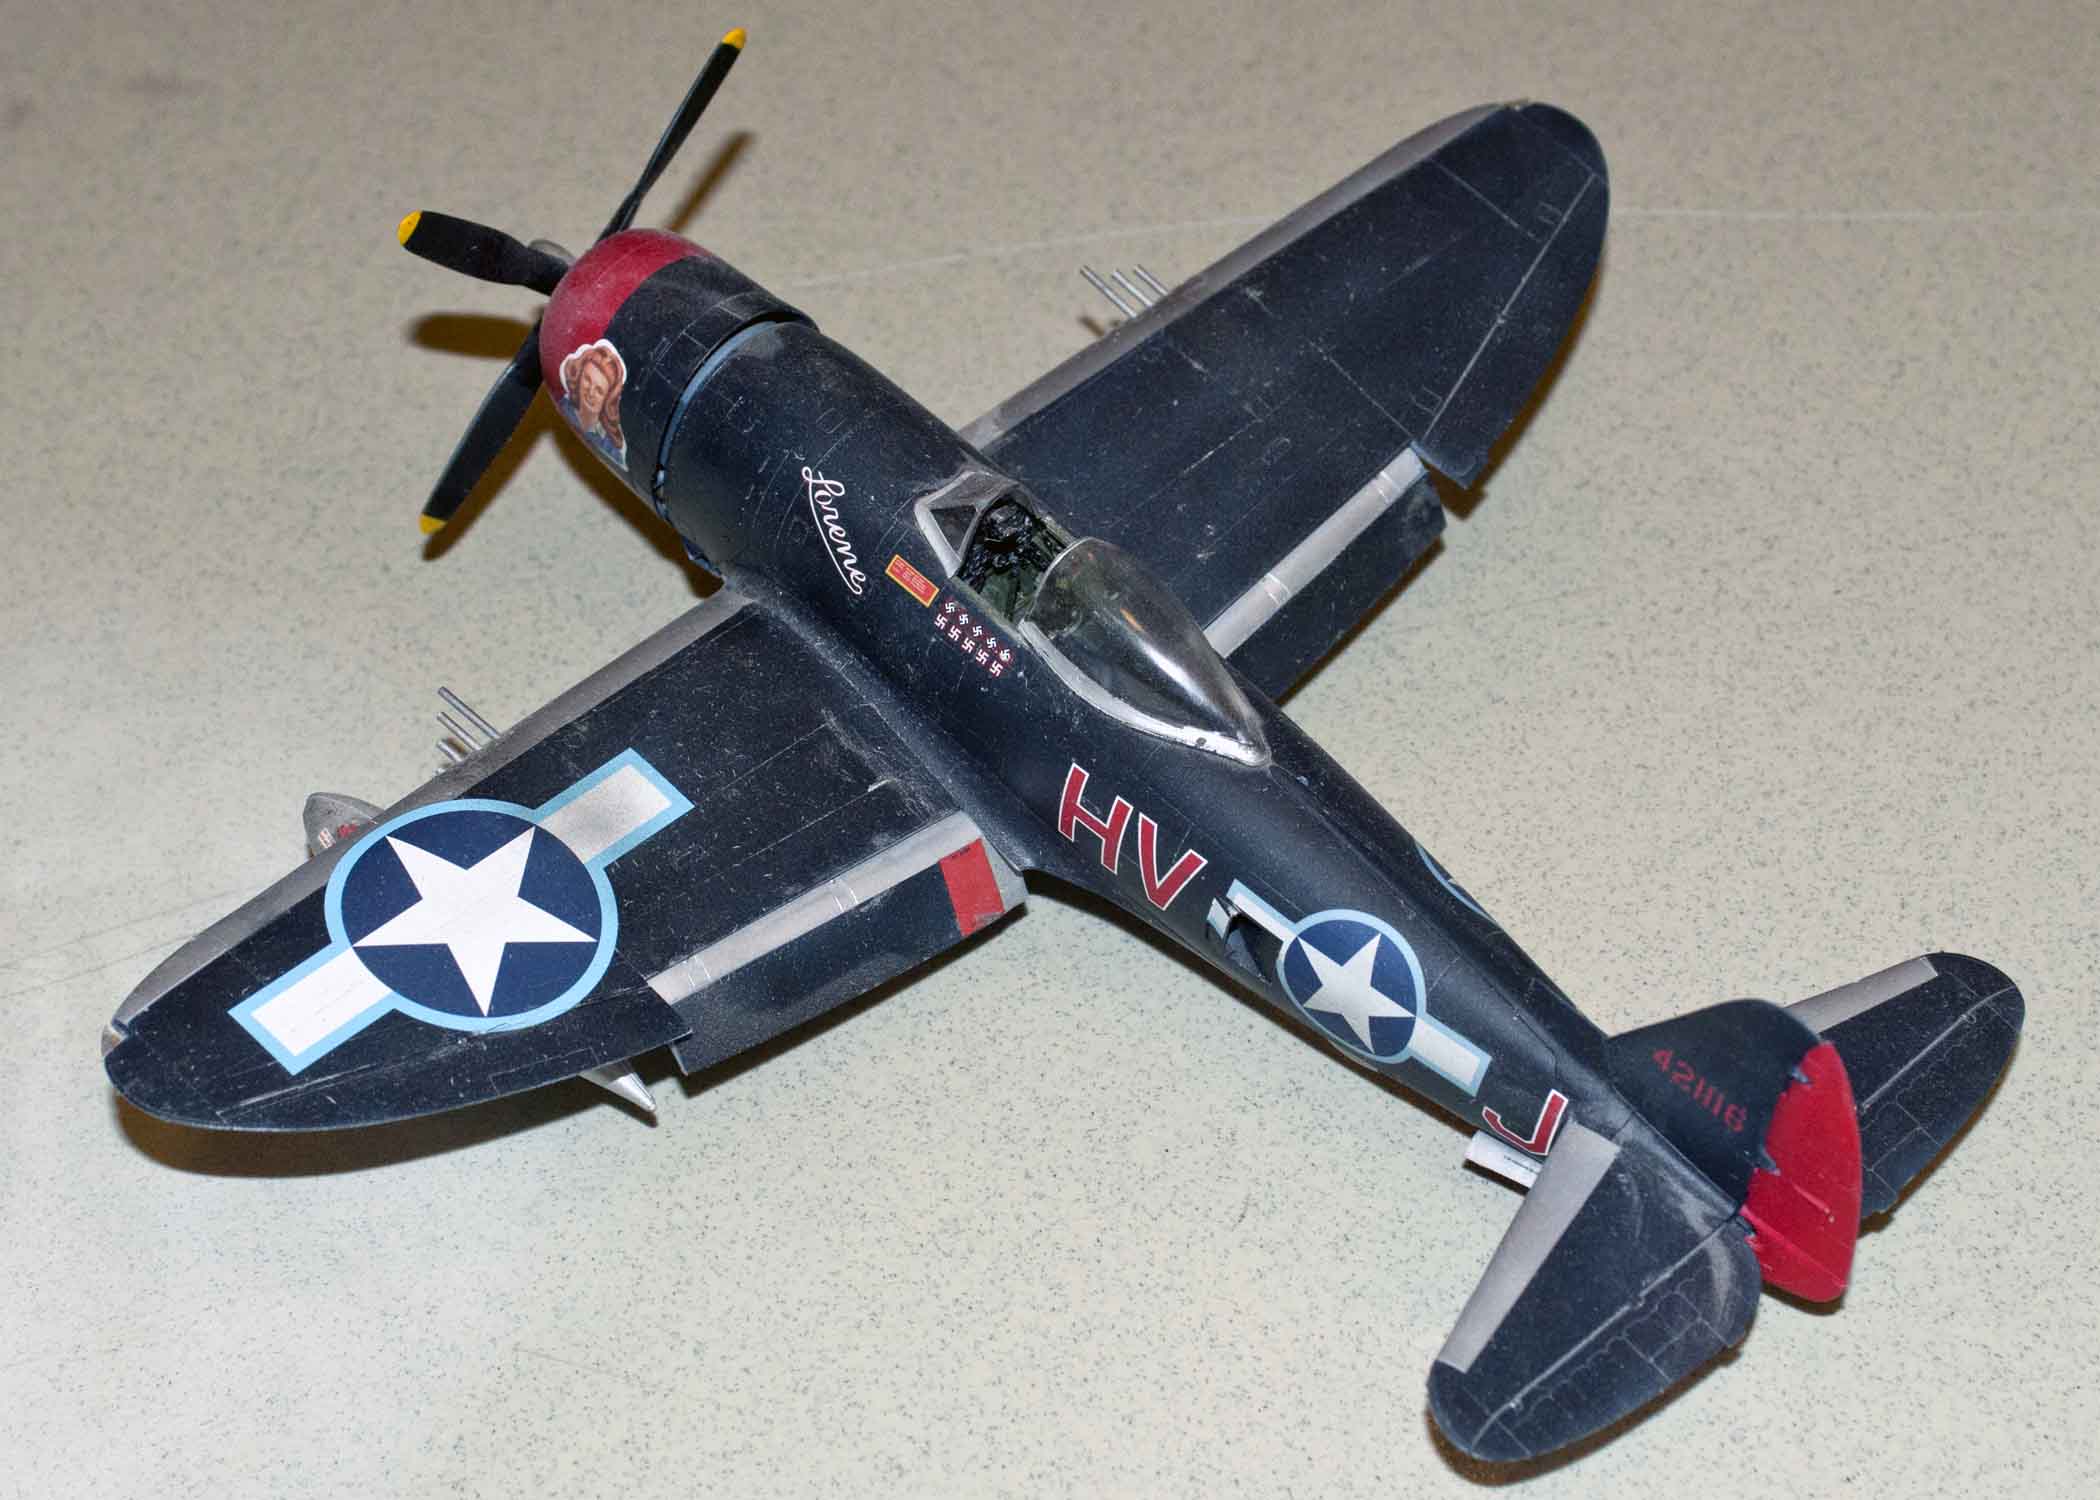
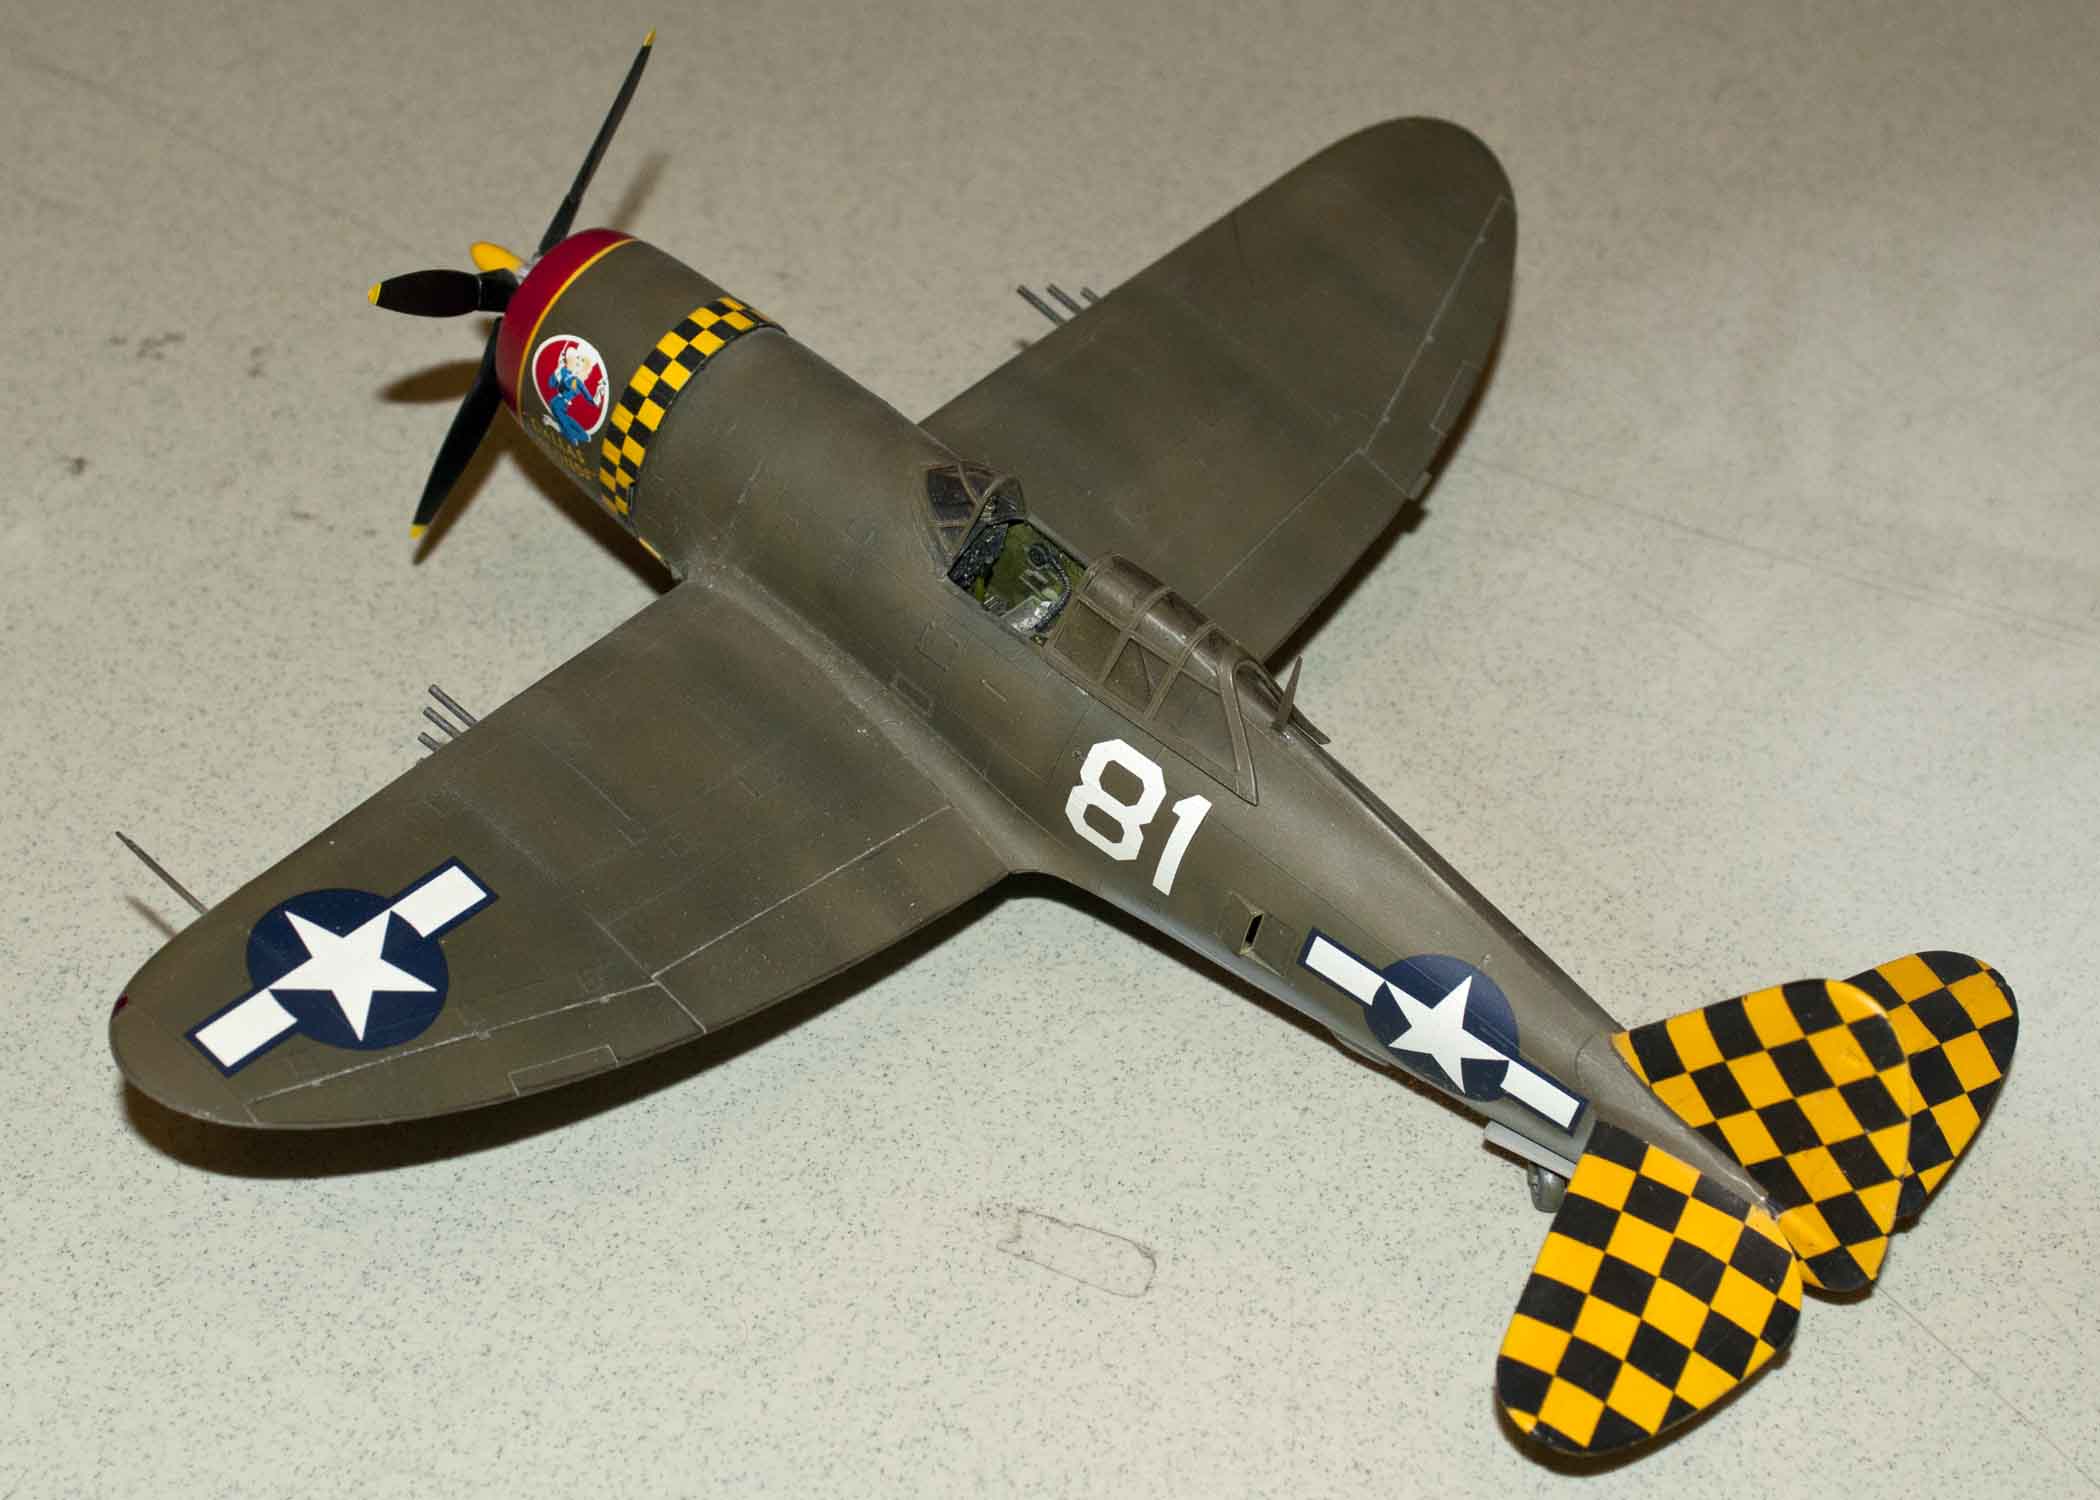
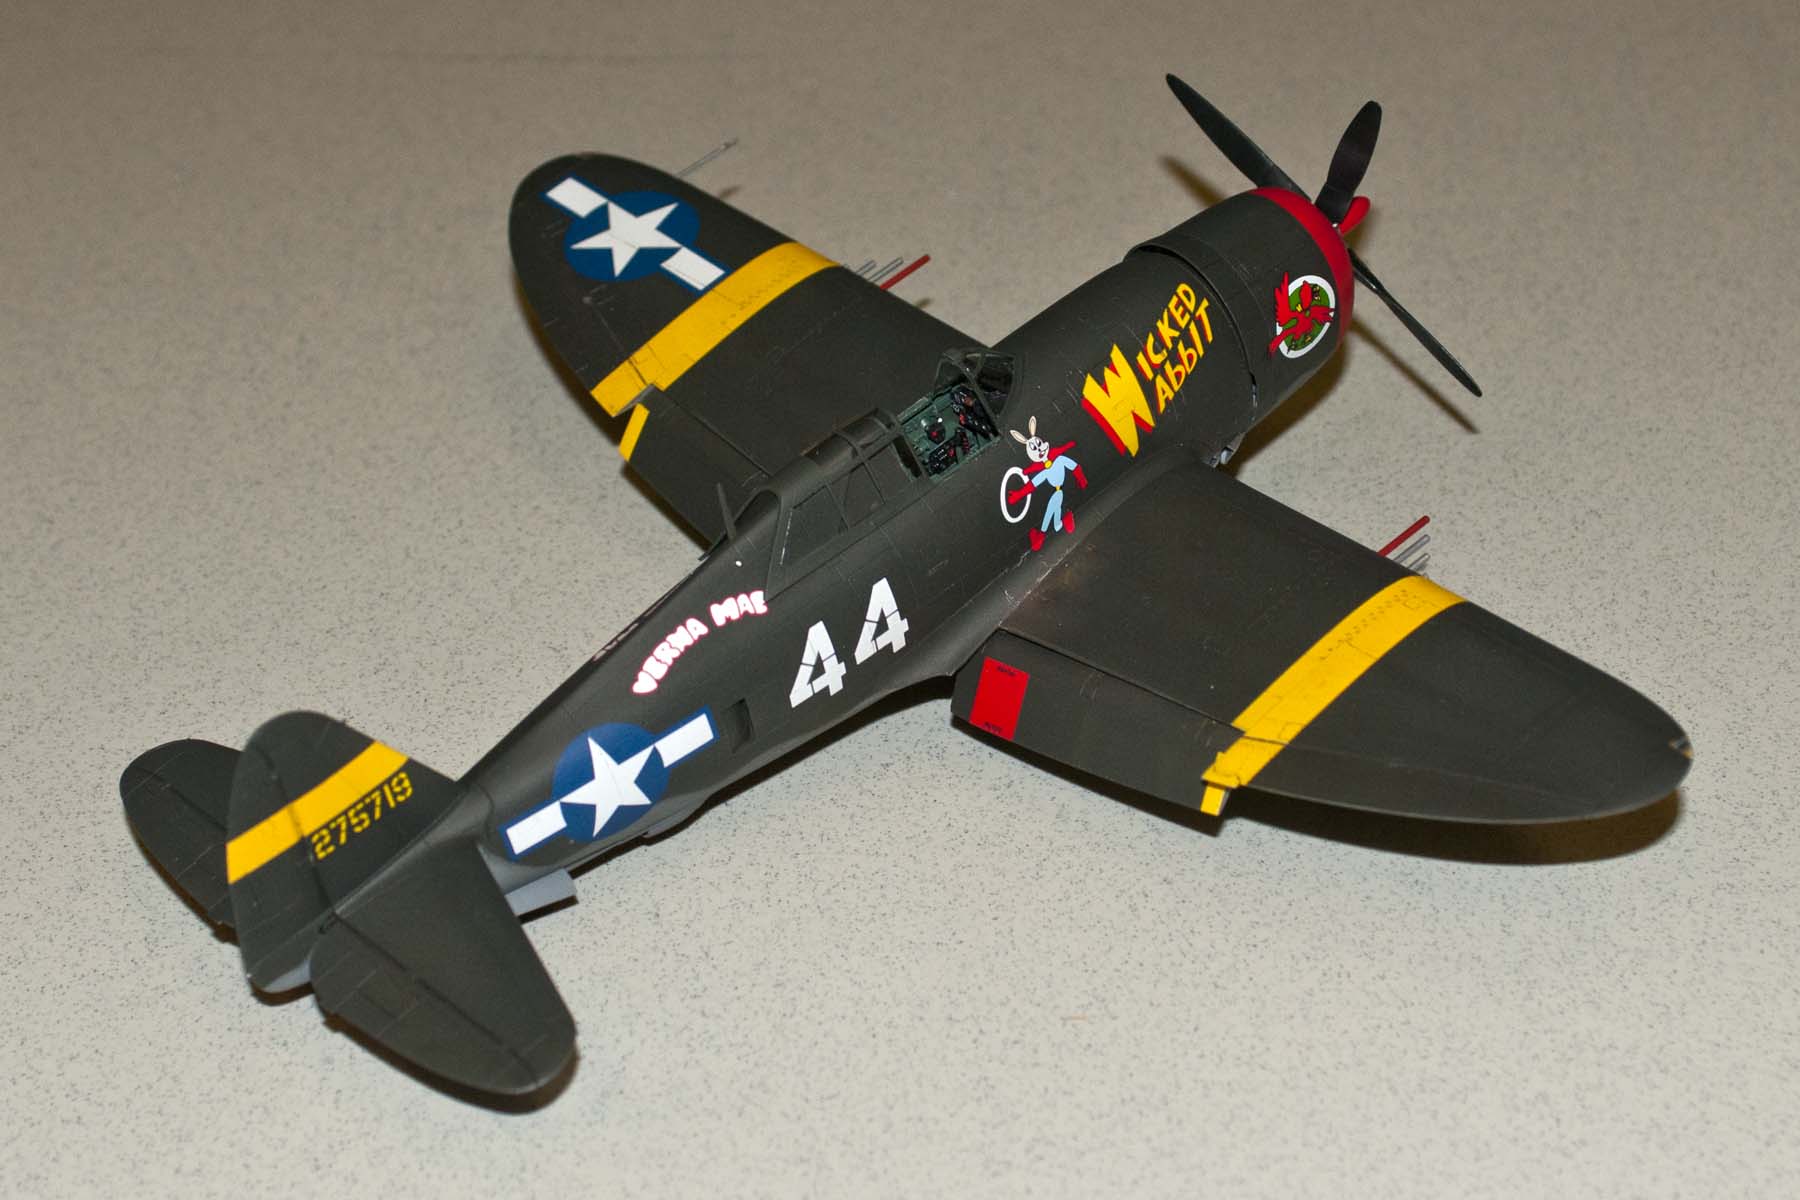
P-47D-15-RE Thunderbolt, 1/48th Scale, Tamiya, Rising Decals. MMaster and Floquil Paint
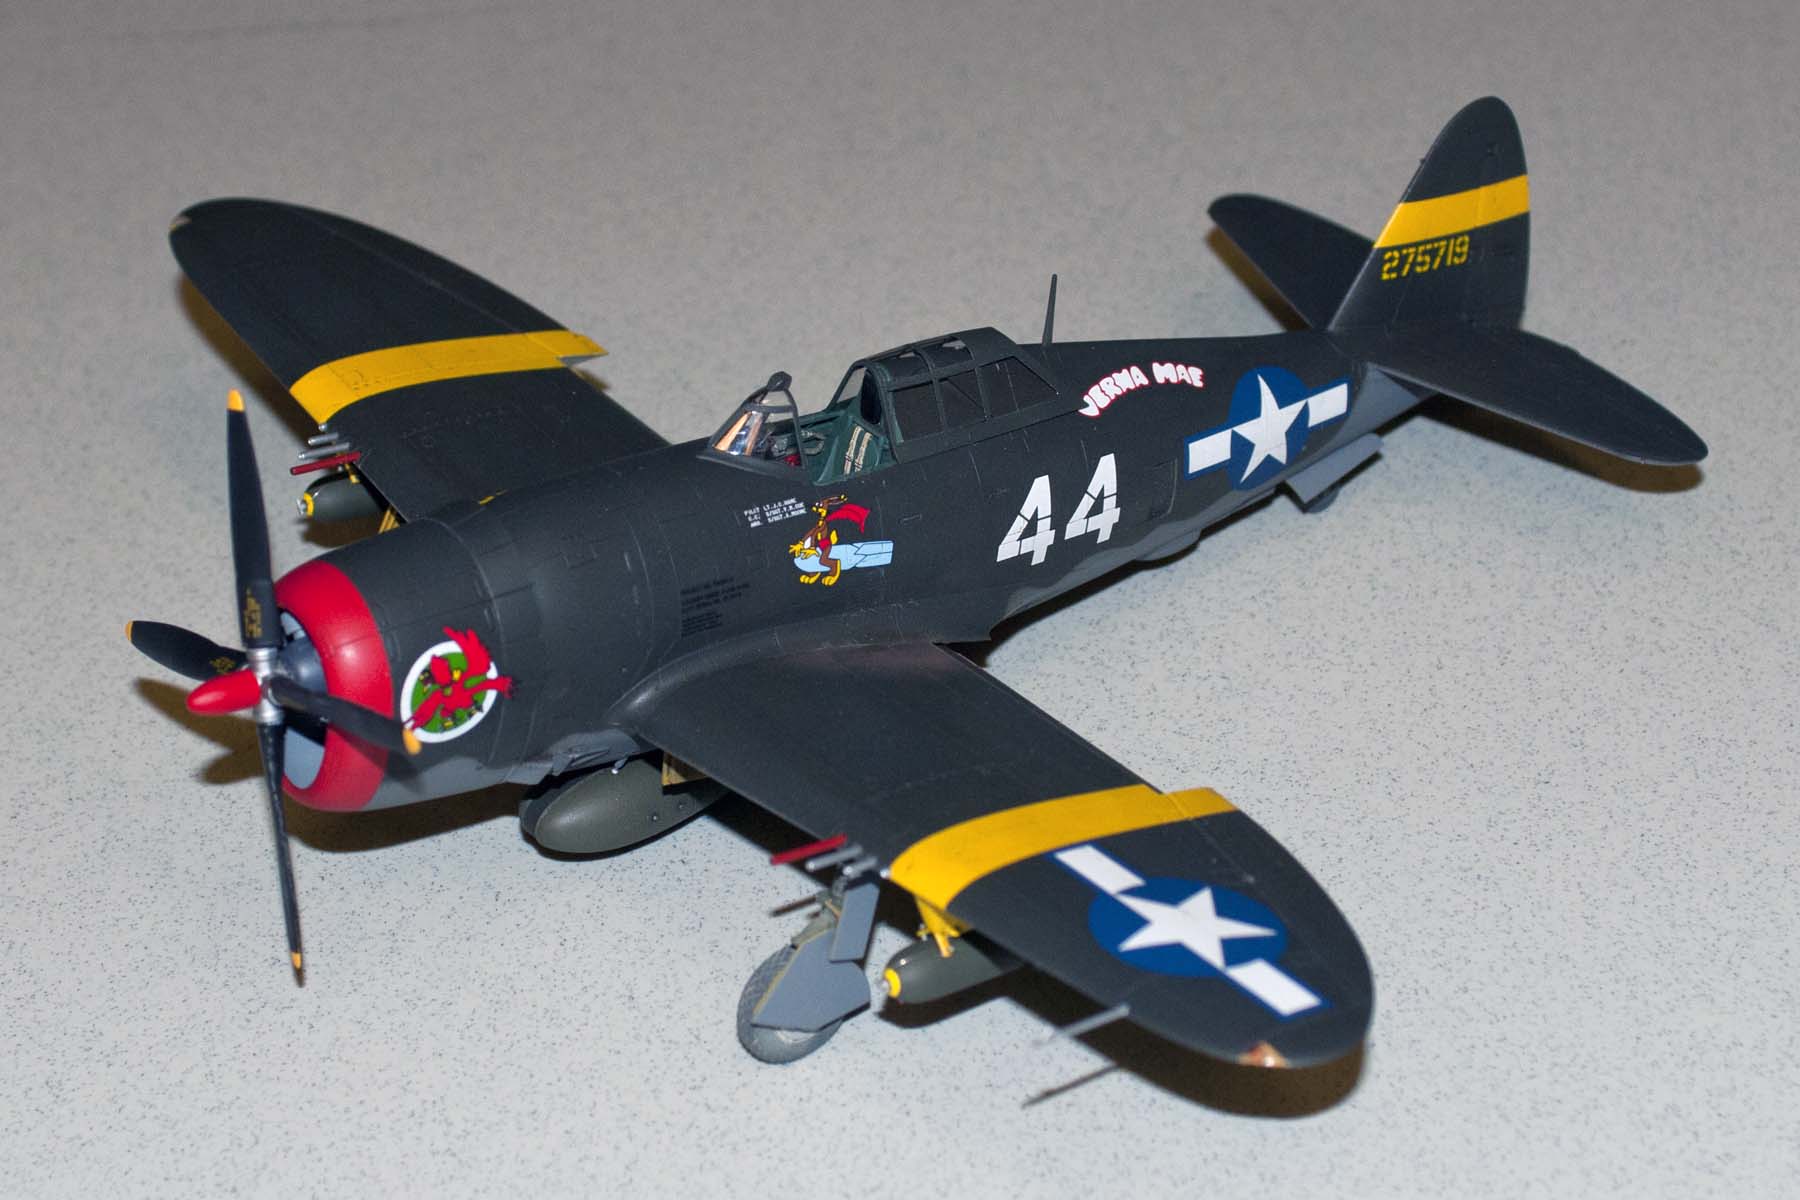
Markings are for Wicked Wabbit Lt J.C. Hare, 65thFS/57thFG 1944 Alto Corica Model by Ed Mate
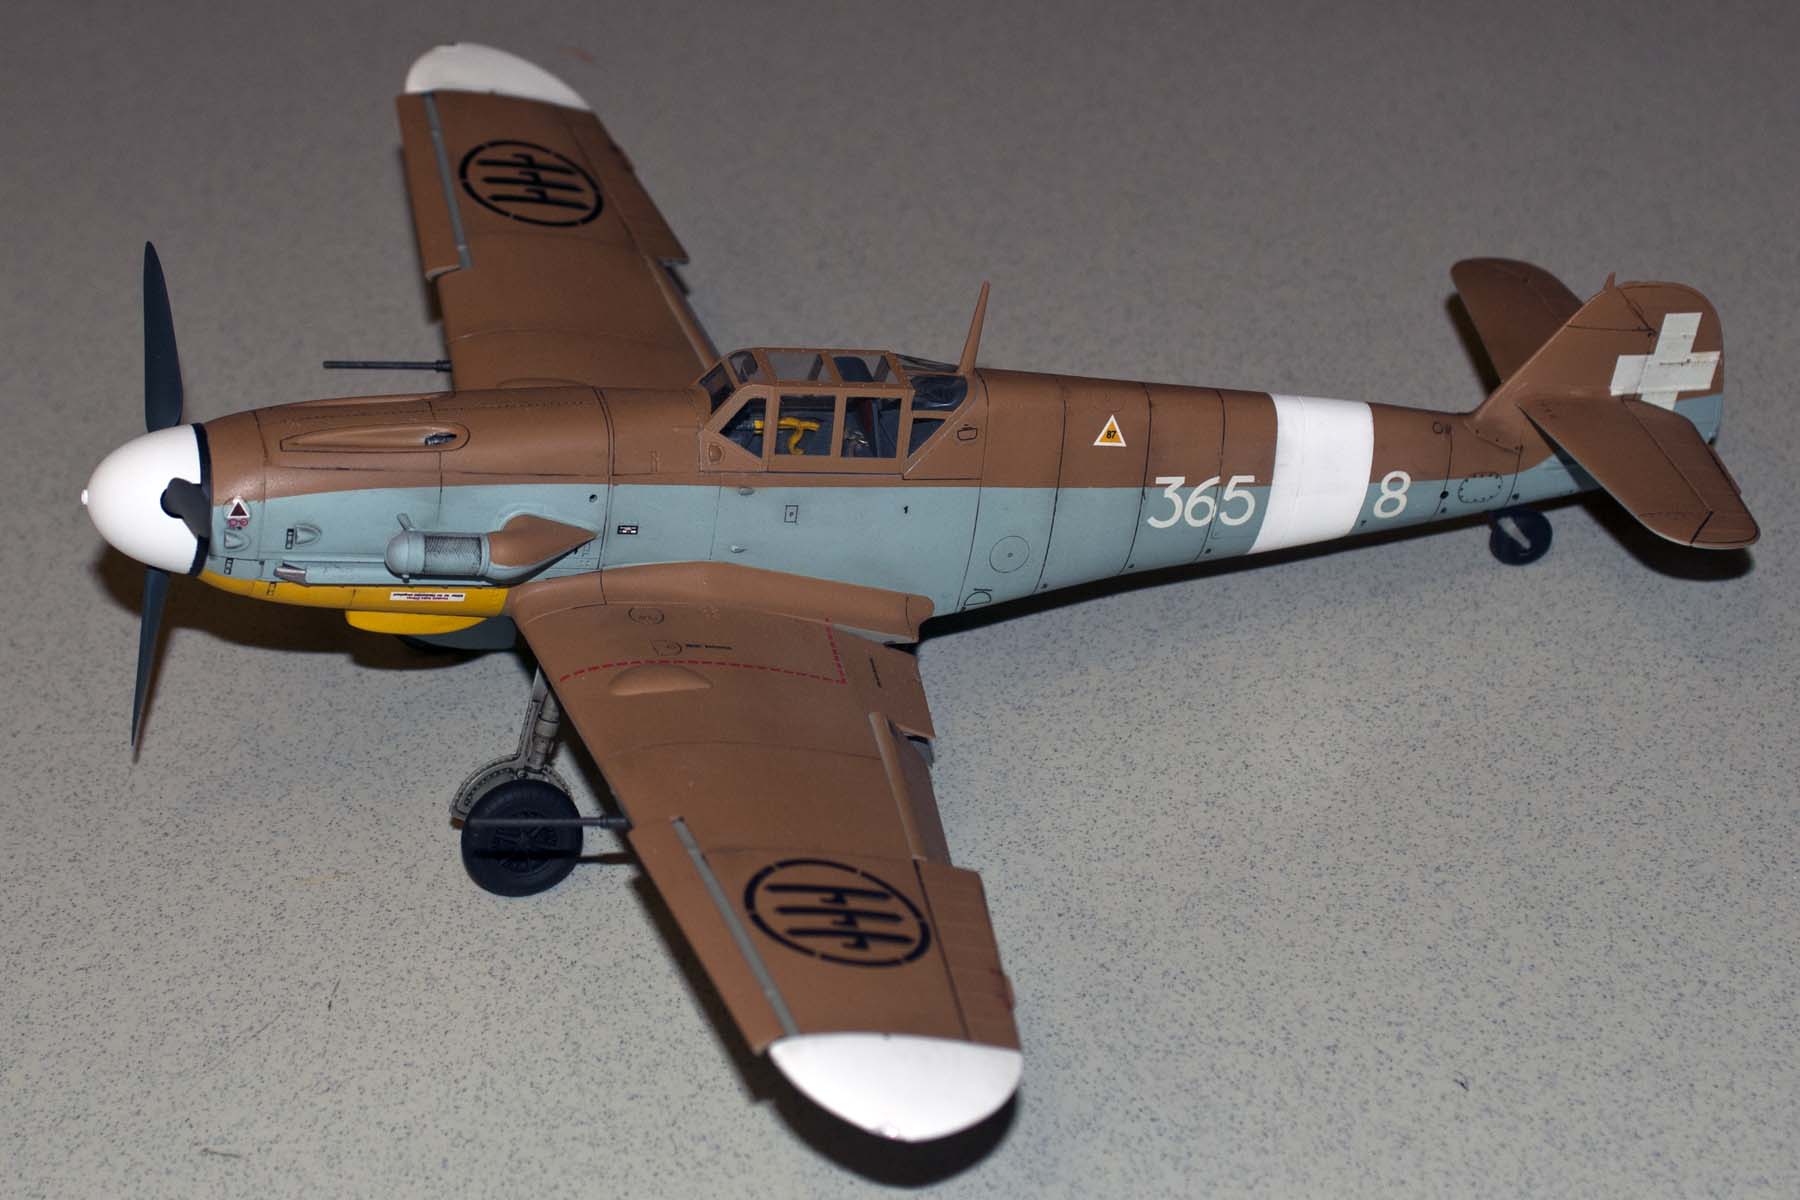
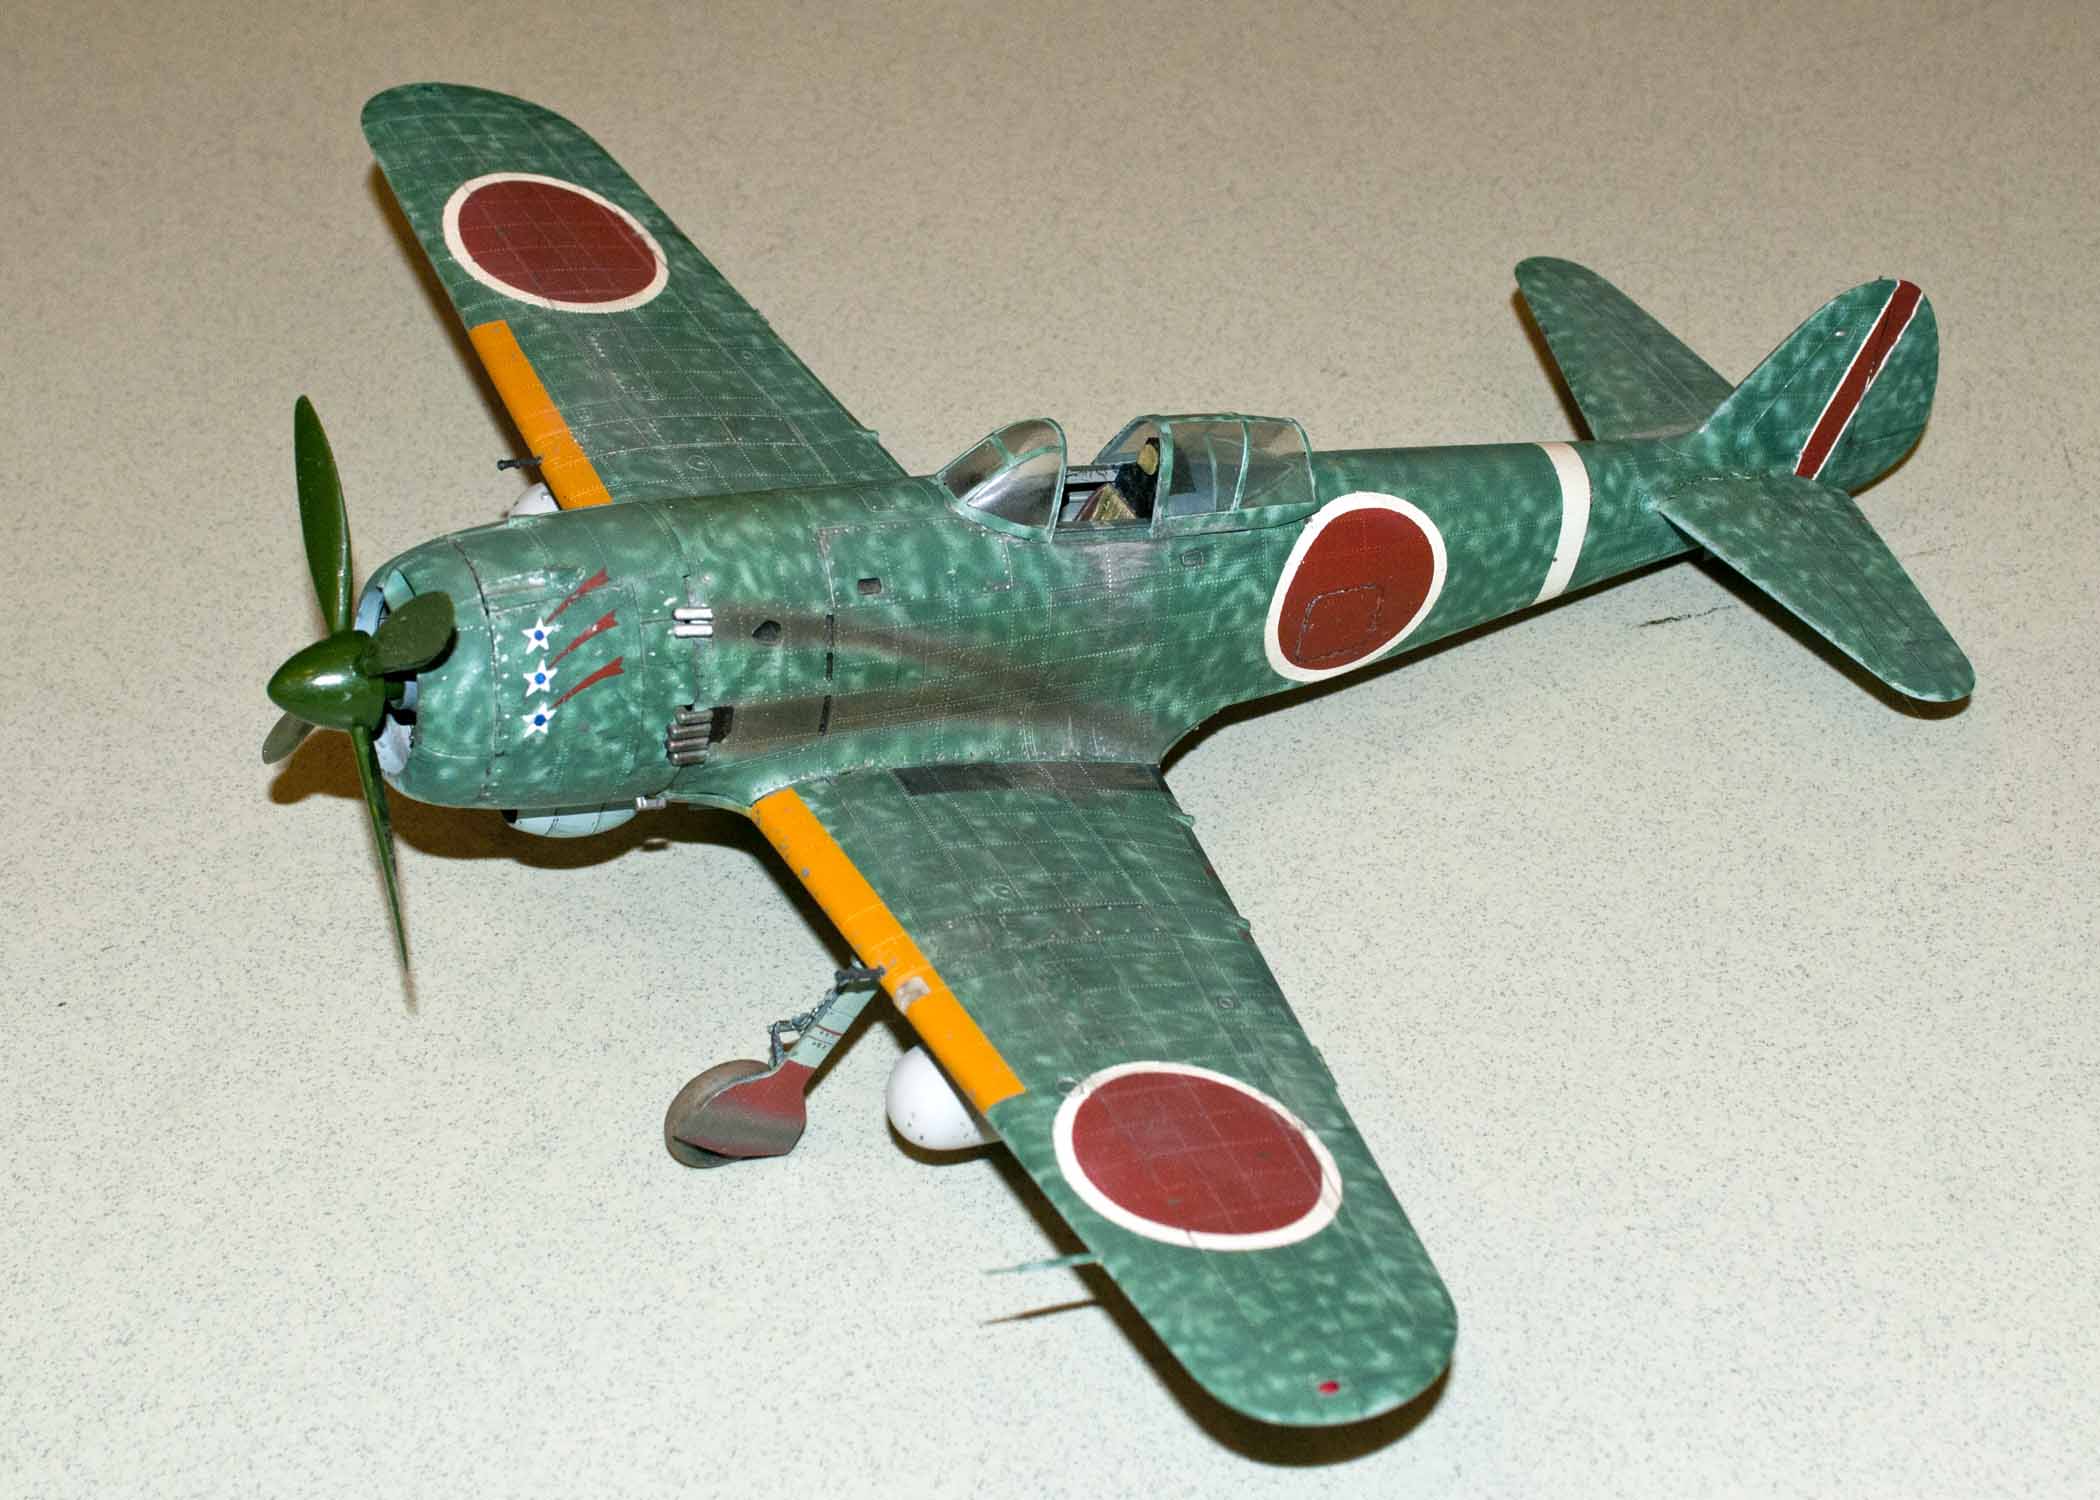
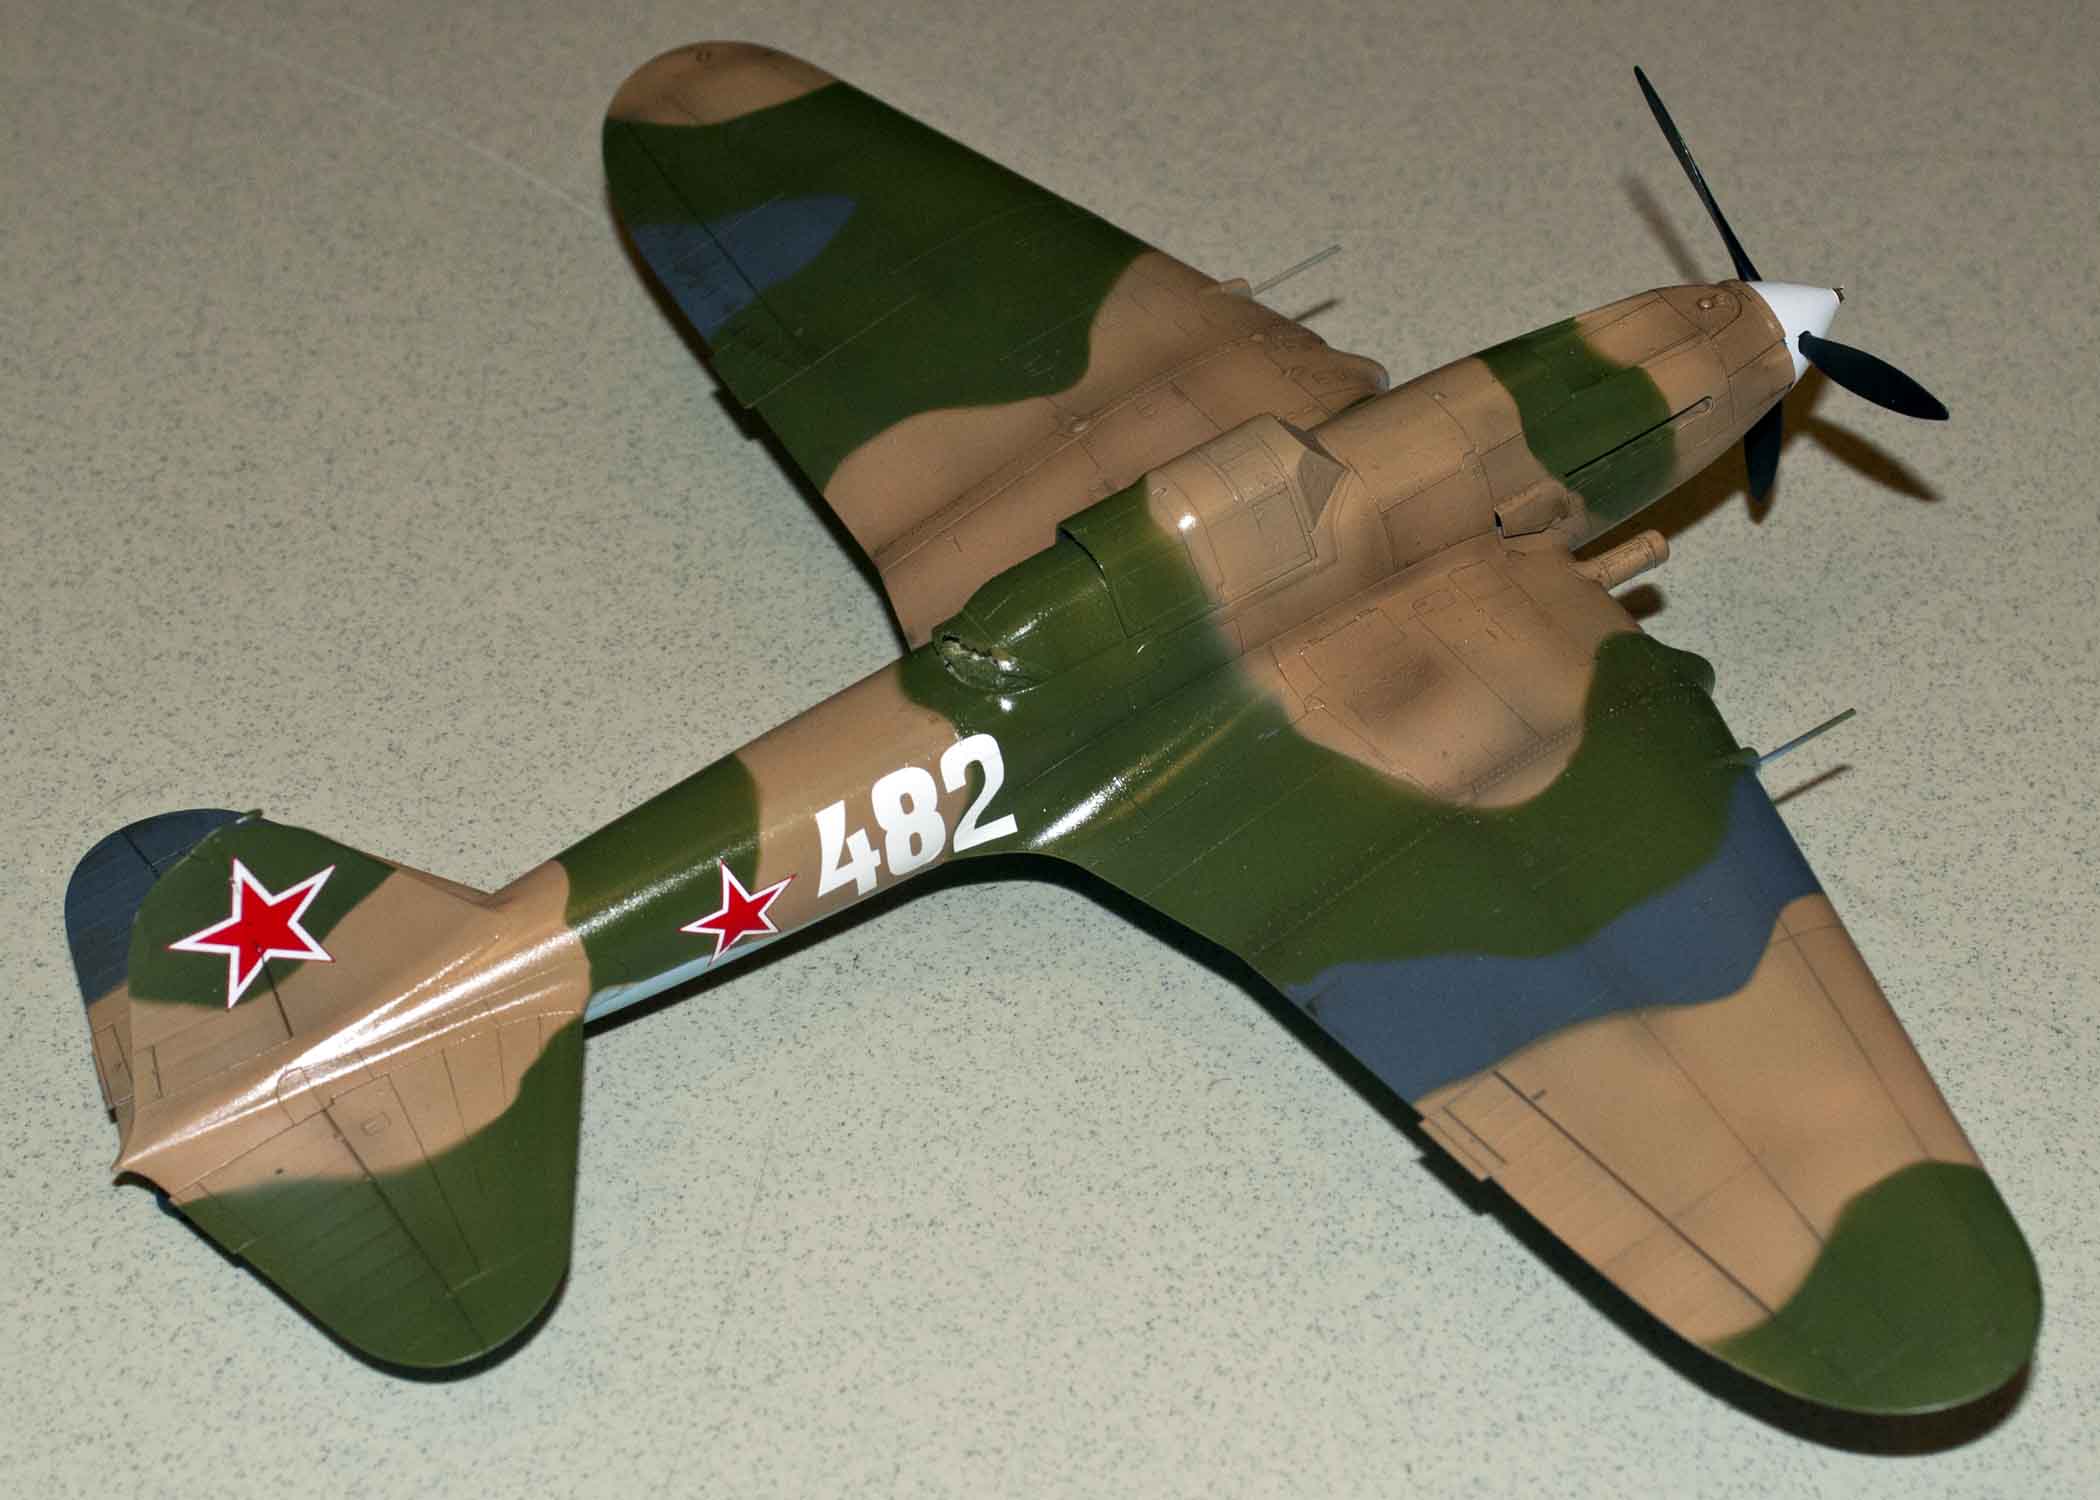
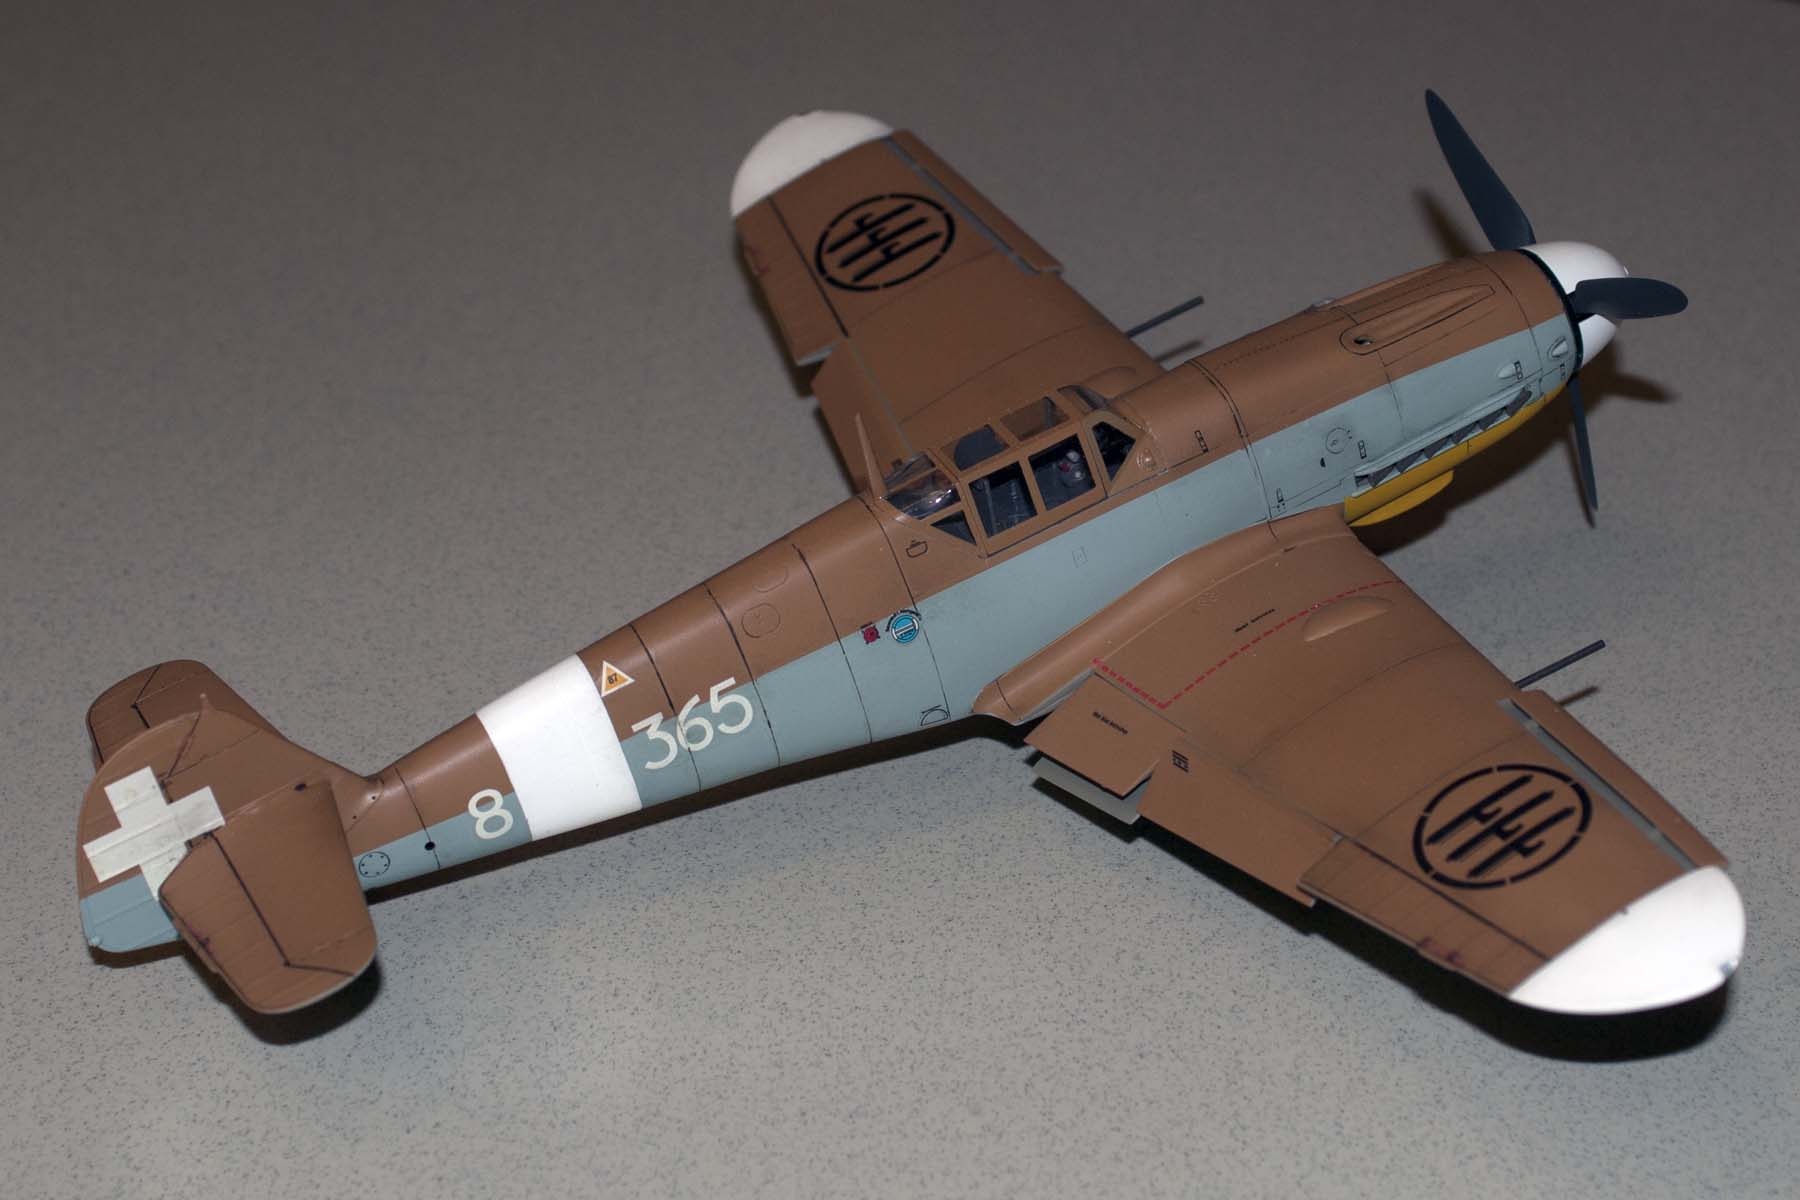
Me-109G4 in Italian Markings. 1/32nd scale by Scott Olsen

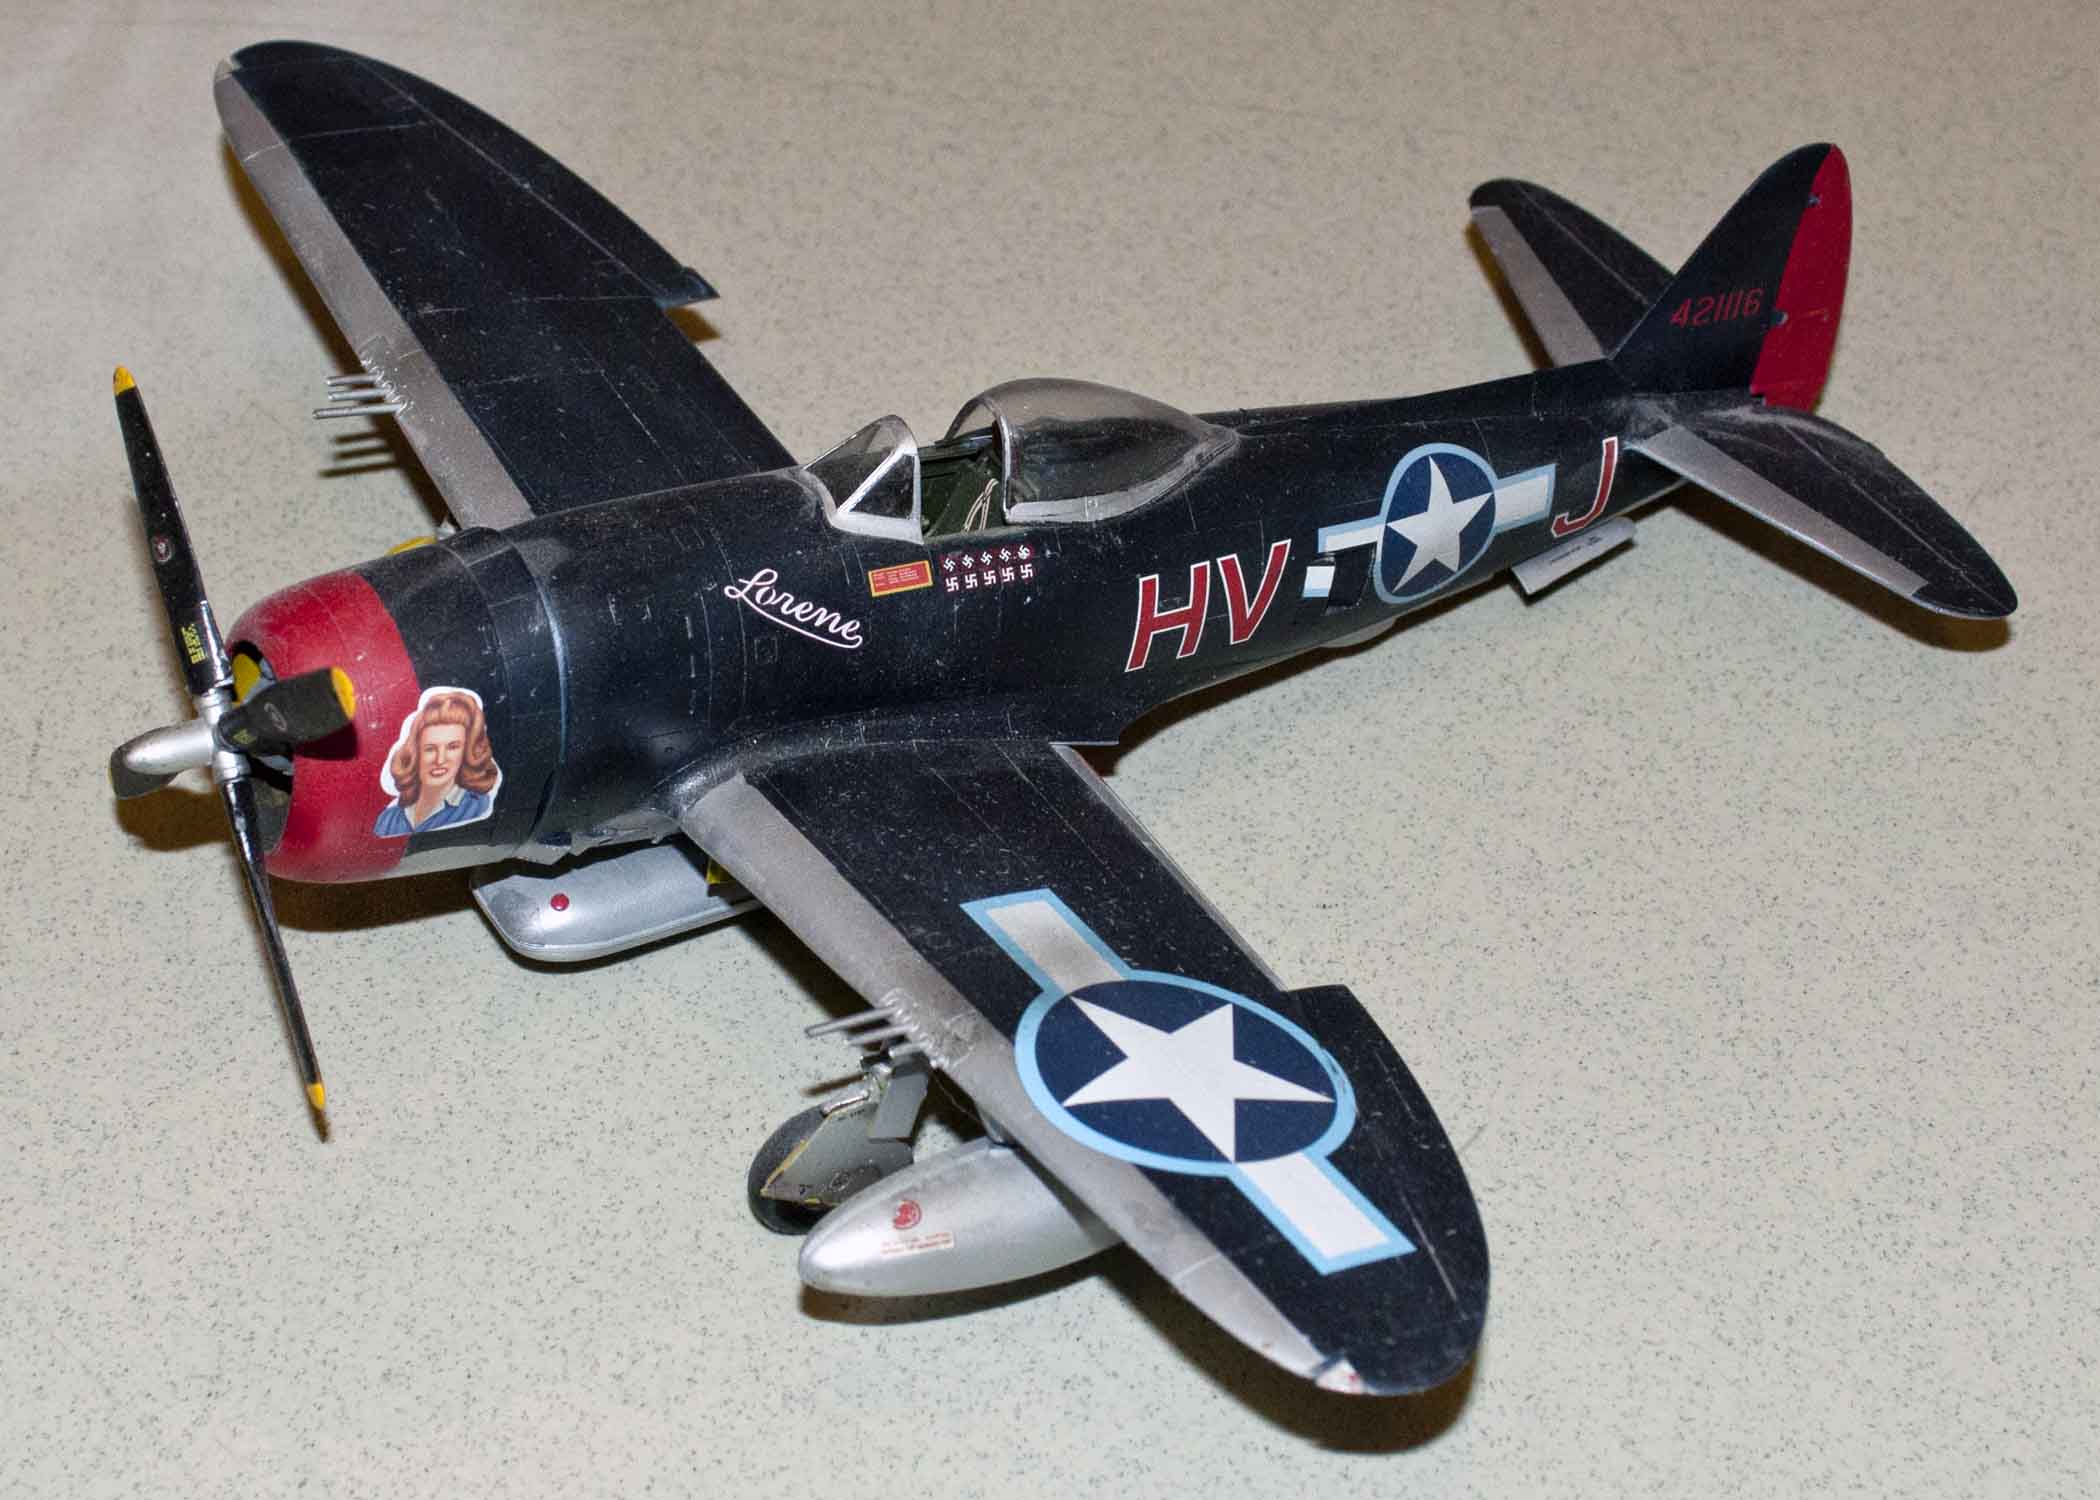
F2H-1 Banshee by Carl Geiger. This is the ancient 1/48th Hawk kit.
If you are familiar with the kit, you will appreciate the work that went into it.
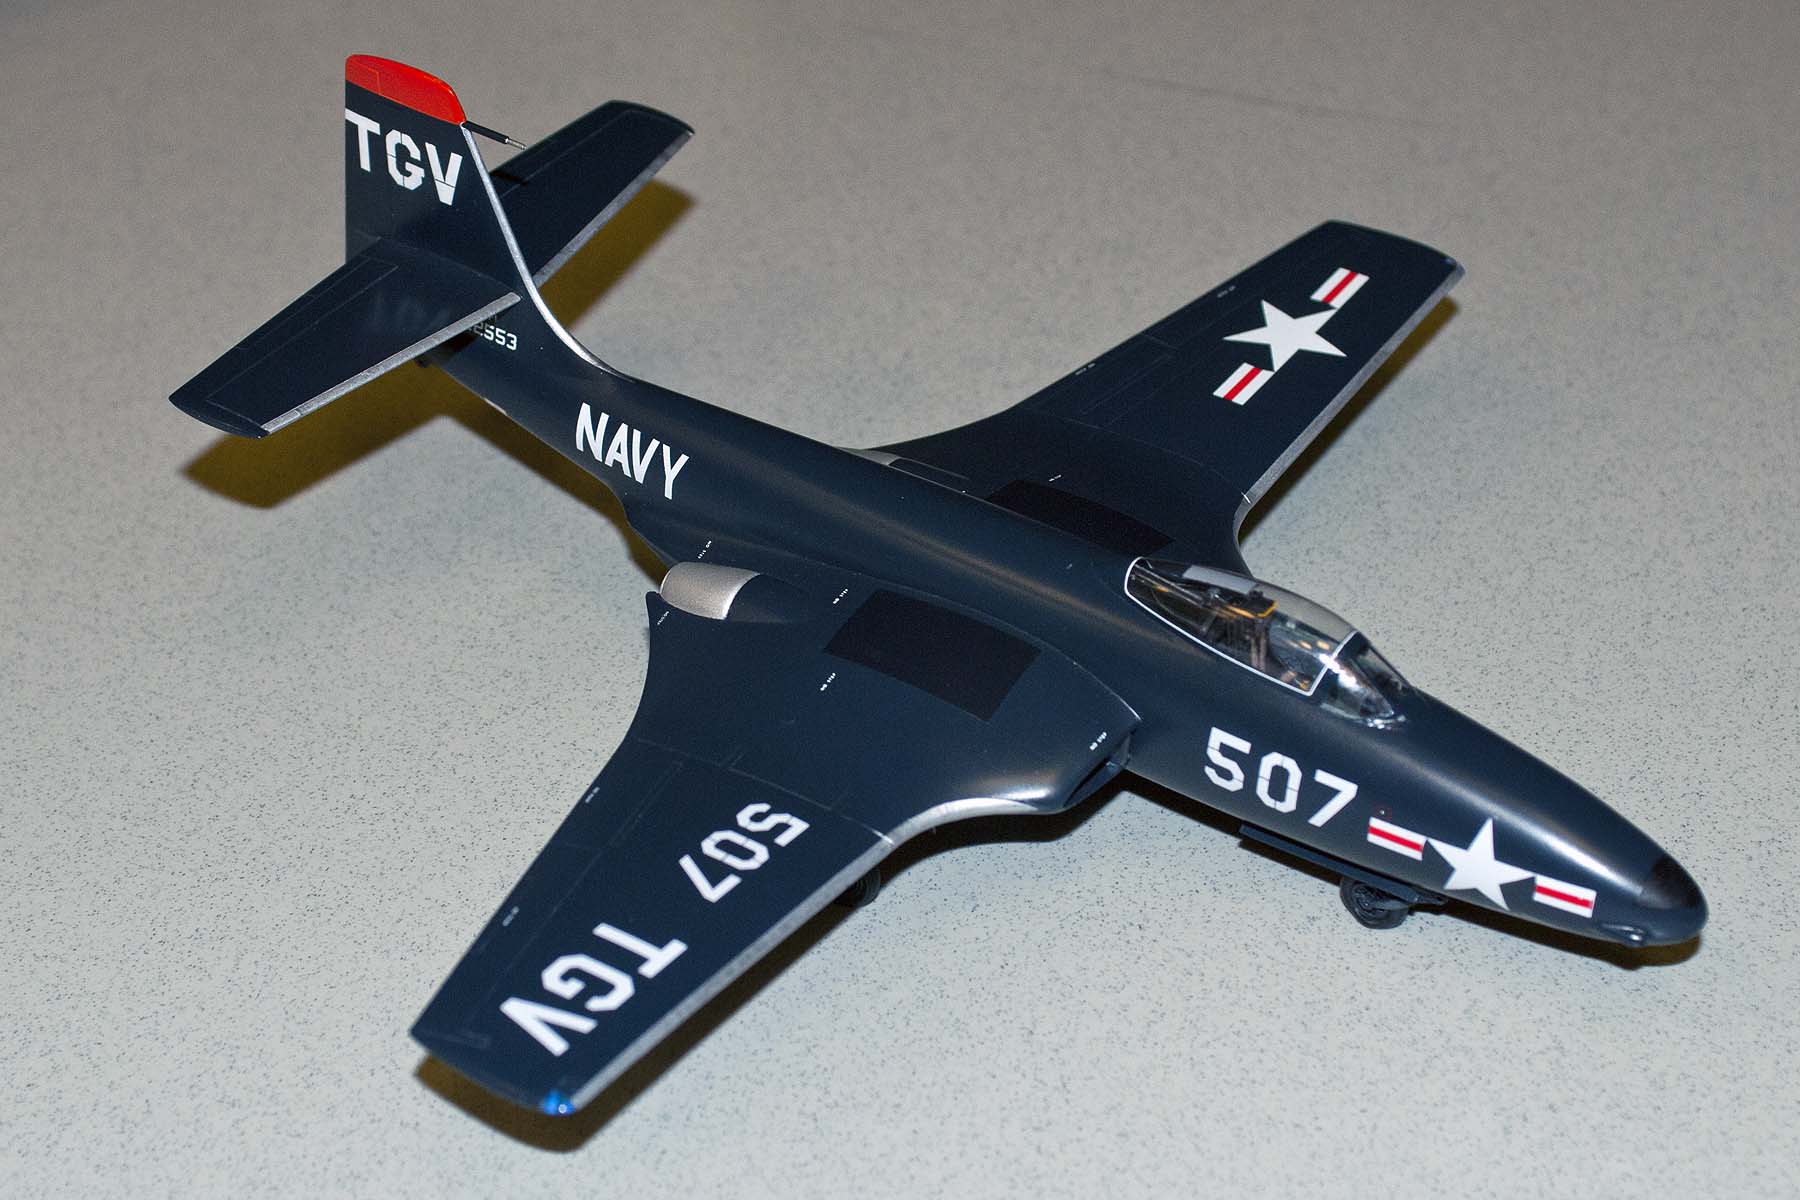
Markings: NAS Glenview training squadron.
APRIL PROGRAM
If members liked the March program on building wood props by Charlie Scardon, then the group was in for a pleasant surprise when he demo’d his application technique for lozenge pattern decals. Charlie explained how and where to cut lozenge before applying to the models. There is more behind it than you would think! He also used his rather different technique for applying decals by dipping them in Future Floor Acrylic instead of the traditional method of preparing the surface with gloss, letting it dry and then applying in the standard manner using water. Two very useful programs in a row from Charlie.

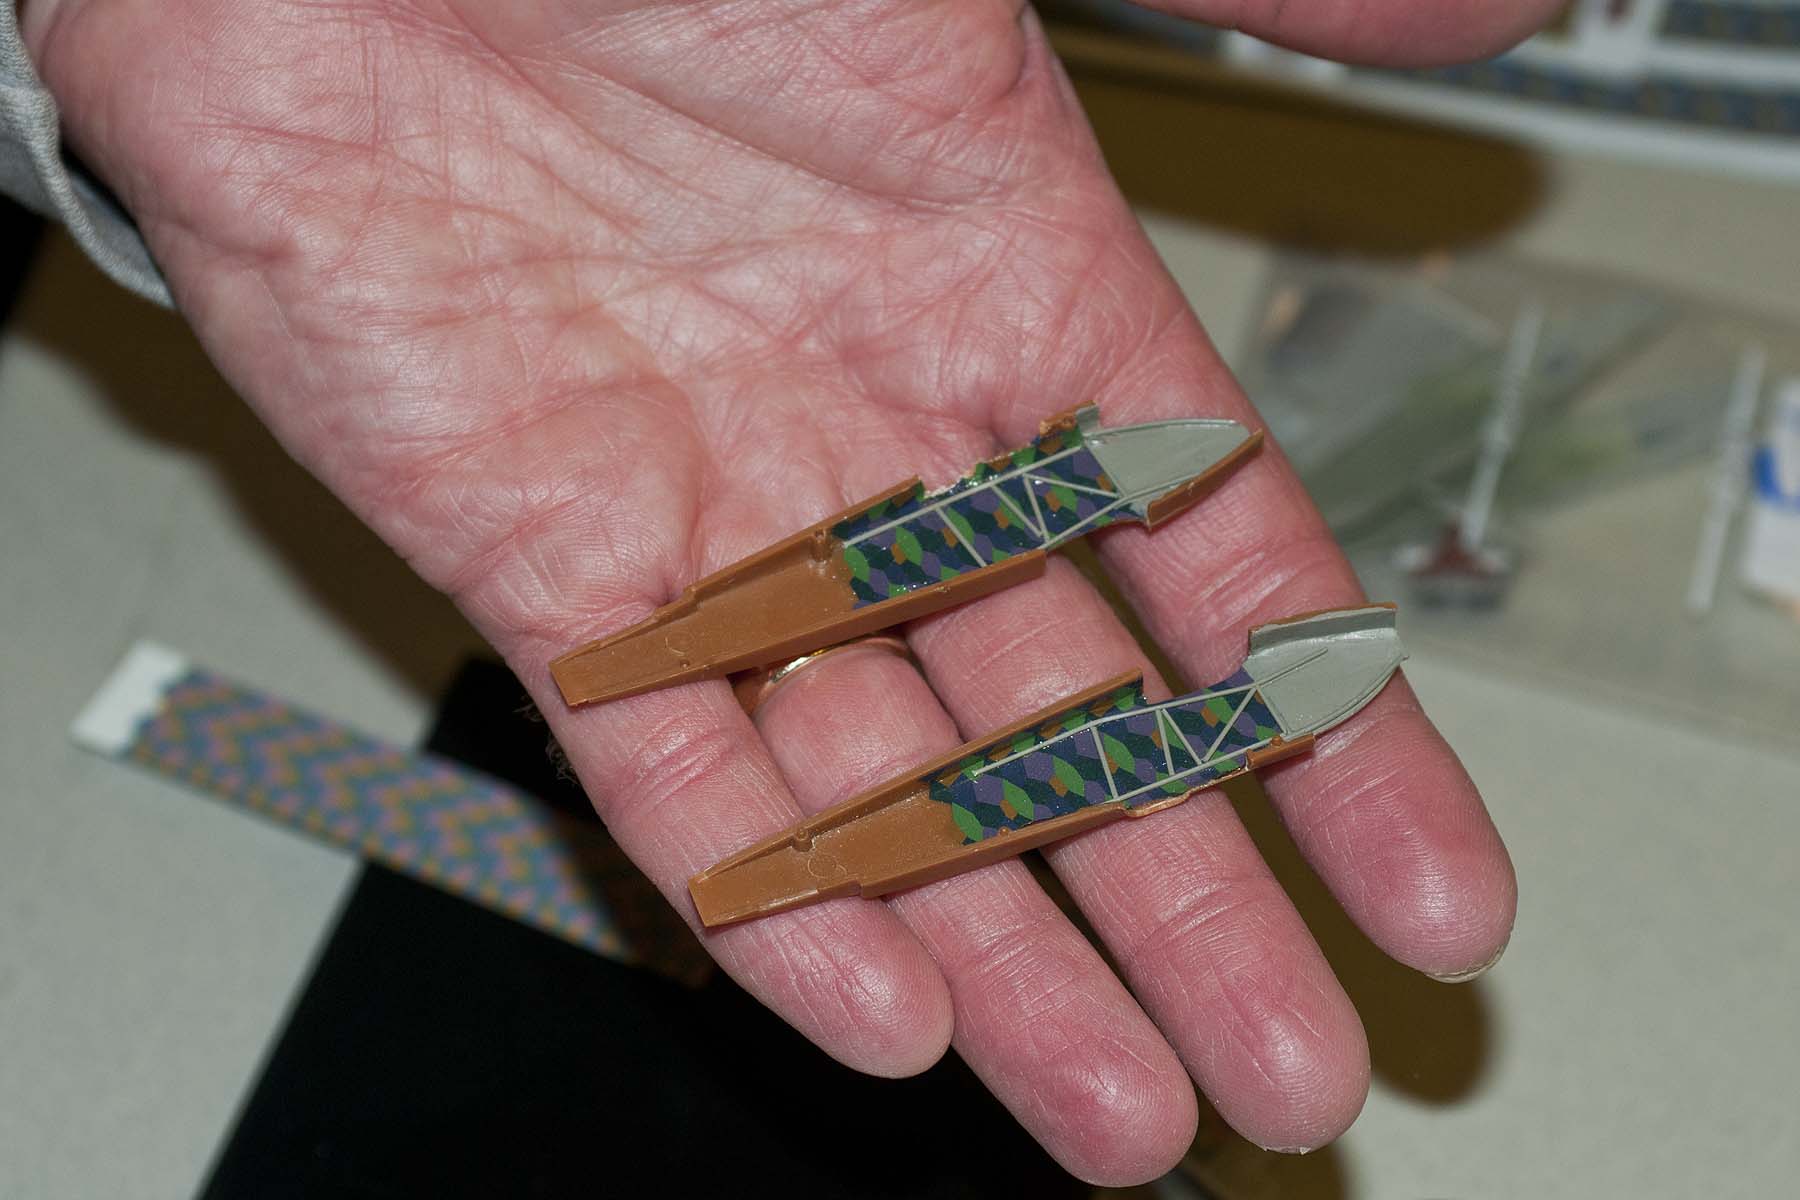
Here’s a few of the finished products – we’ll see more of these next month, hopefully, when the theme for the meeting is WWI.