Pegasus Nautilus in 1/144th
by Glenn Estry
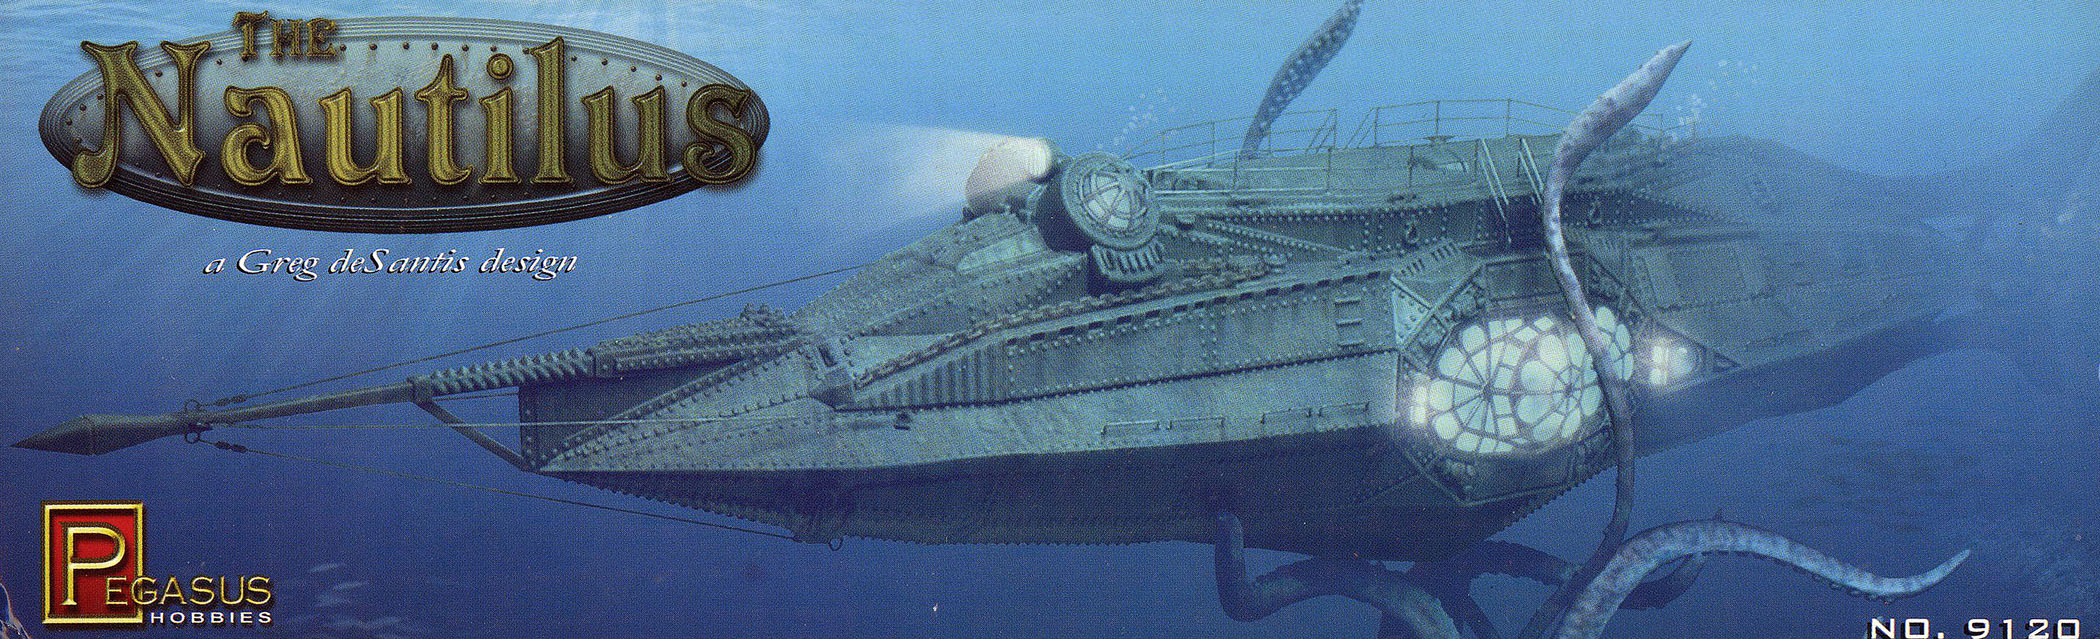
Nautilus cover art
Designed by artist Greg deSantis, It is noted that since Disney owns the copyrights to the submarine depicted in their movie, this model is called an ‘artist’s interpretation’ to avoid getting a nasty letter from the friendly legal department at Disney.
The first thing I noticed about the model from the picture on the box, was that it had some resemblances to the Civil War ship H.L. Hunley, most notably, the harpoon mounted torpedo and the heavily riveted hull, which I liked. What I DIDN’T like was the price. $69.00. When I first saw this model, that’s what stopped me, but when I saw this in a hobby shop having a 40% Off sale on plastic models, I went right to the checkout with it. $42 was a lot better price.
Upon opening the rather weighty box, I found 9 sprues nicely wrapped, (some areas covered in protective foam sheet) along with one envelope containing a good sized plate of photoetch and complete set of masks for the ornate windows. The model included a nice interior ‘living room’ that made for some intricate painting and if I wanted, could have made much more detailed. I decided that most likely, the details wouldn’t be seen unless the interior was illuminated, so, off to the internet I go and find Evan Designs website which sells very small LEDs, switches, battery holders, etc.
(http://www.modeltrainsoftware.com/ledlights1.html), for $5 (shipping extra), I got an LED, switch, and button battery holder.
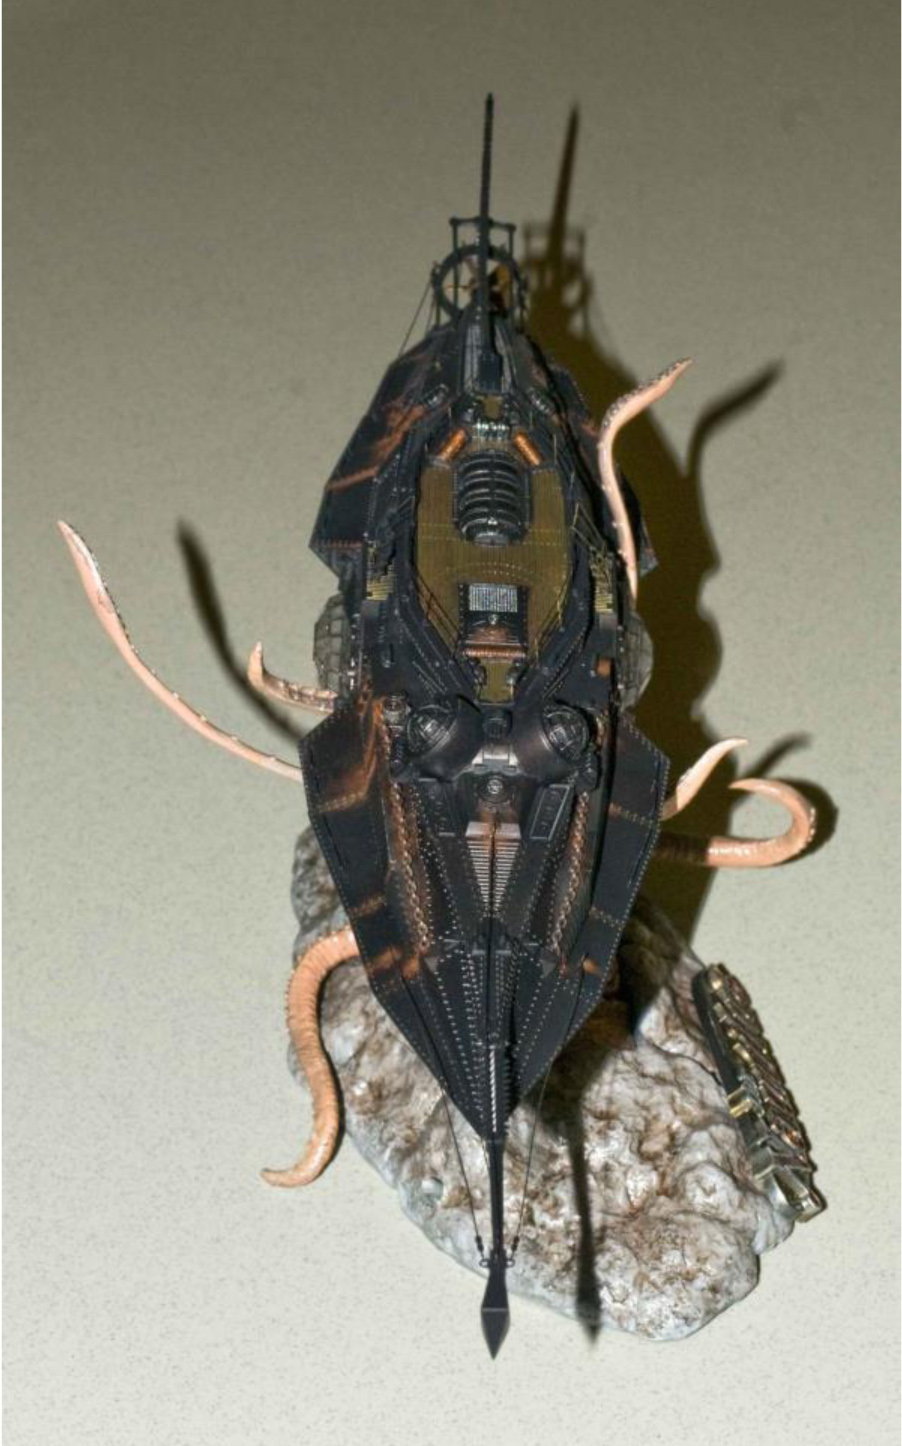
The hull and other pieces are nicely engineered and molded well, barely any flash at all and the pieces fit together well. With one complaint; the sprue attachment points are located in the joints of each piece. This means that in order for the pieces to fit tightly/smoothly/evenly, you must get a small file or sanding stick to remove the excess plastic because the joints are rabbeted for the angular construction to work, and will not meet flush with an obstruction there. This was my only beef because it was in multiple places on almost every piece.
The window masks were a nice addition, but they didn’t fit perfectly in every frame. Also, I think the adhesive could have been stronger and the mask made from thinner material to ‘seal’ better on each pane. The photo etch parts were great and there were plenty. A bit of advice:
Since I also build wood ships that contain brass parts, I am a big fan of ‘Blacken-It’, a nitric acid bath to blacken metals. Do NOT use Blacken-It on the photoetch parts. $10 mistake! The railings are so thin, the Blacken-it actually made them weaker and areas fell apart as I tried to pick them up. I called Pegasus and luckily they sold the replacement photoetch for $10 and told me not to use Blacken-it. The railings and side stairs are the most fragile of the photoetch, and, for me, was nerve-wracking, even at 1/144 scale (I have no idea how anyone can work on 1/300 or smaller scales). I decided it will be a long time before I use photoetch for anything ever again.
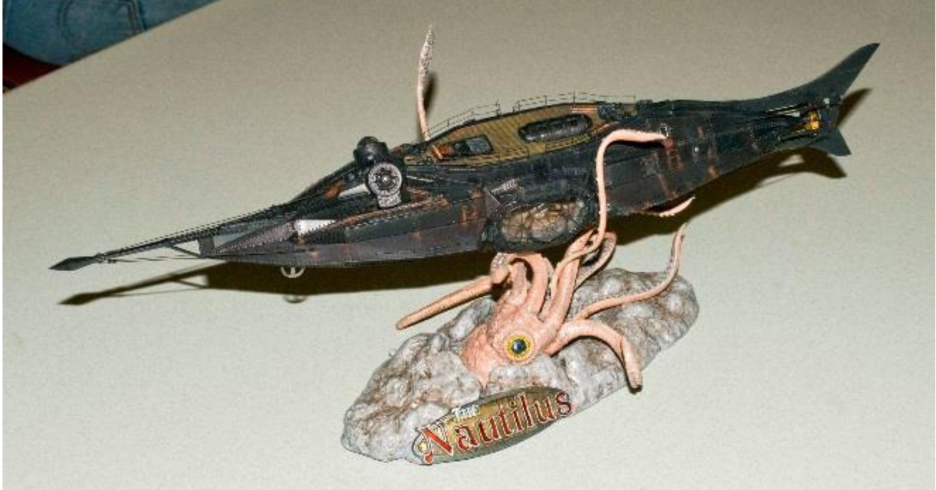
The giant squid model support/base was made of solid, heavy vinyl. I used CA glue and that worked well, but I was concerned about acrylic paint sticking to the vinyl. I used a lacquer primer and that seemed to work. Nothing much to say about this other than I thought that an actual squid might be
pinkish-gray so I used Vallejo’s Beige Red as the main color and Dark Blue Grey as a wash, then applied a clear gloss lacquer to give it a ‘wet look.’ After painting, I drilled a small hole for the battery wiring and switch for the LED and hot-glued them underneath the base.
The actual Submarine color I chose was Testors Metalizer color, Burnt Iron, a nice black with flecks of brass in it.